Although sliders are generally not recommended, if you or your client want onem such as for a homepage hero section, you no longer need to rely on heavy plugins like Slider Revolution. Total 6.6 introduces the Carousel element, which lets you create sliders using the theme’s built-in components, including Image Banner, Image, Icon Box, and Text Block.
For creating slim, fast, and visually appealing sliders with backgrounds, text, and call-to-action buttons, the Image Banner element is perfect. It allows you to build polished hero sliders without adding unnecessary bloat, keeping your site both beautiful and performant.
Add the Carousel Container Element
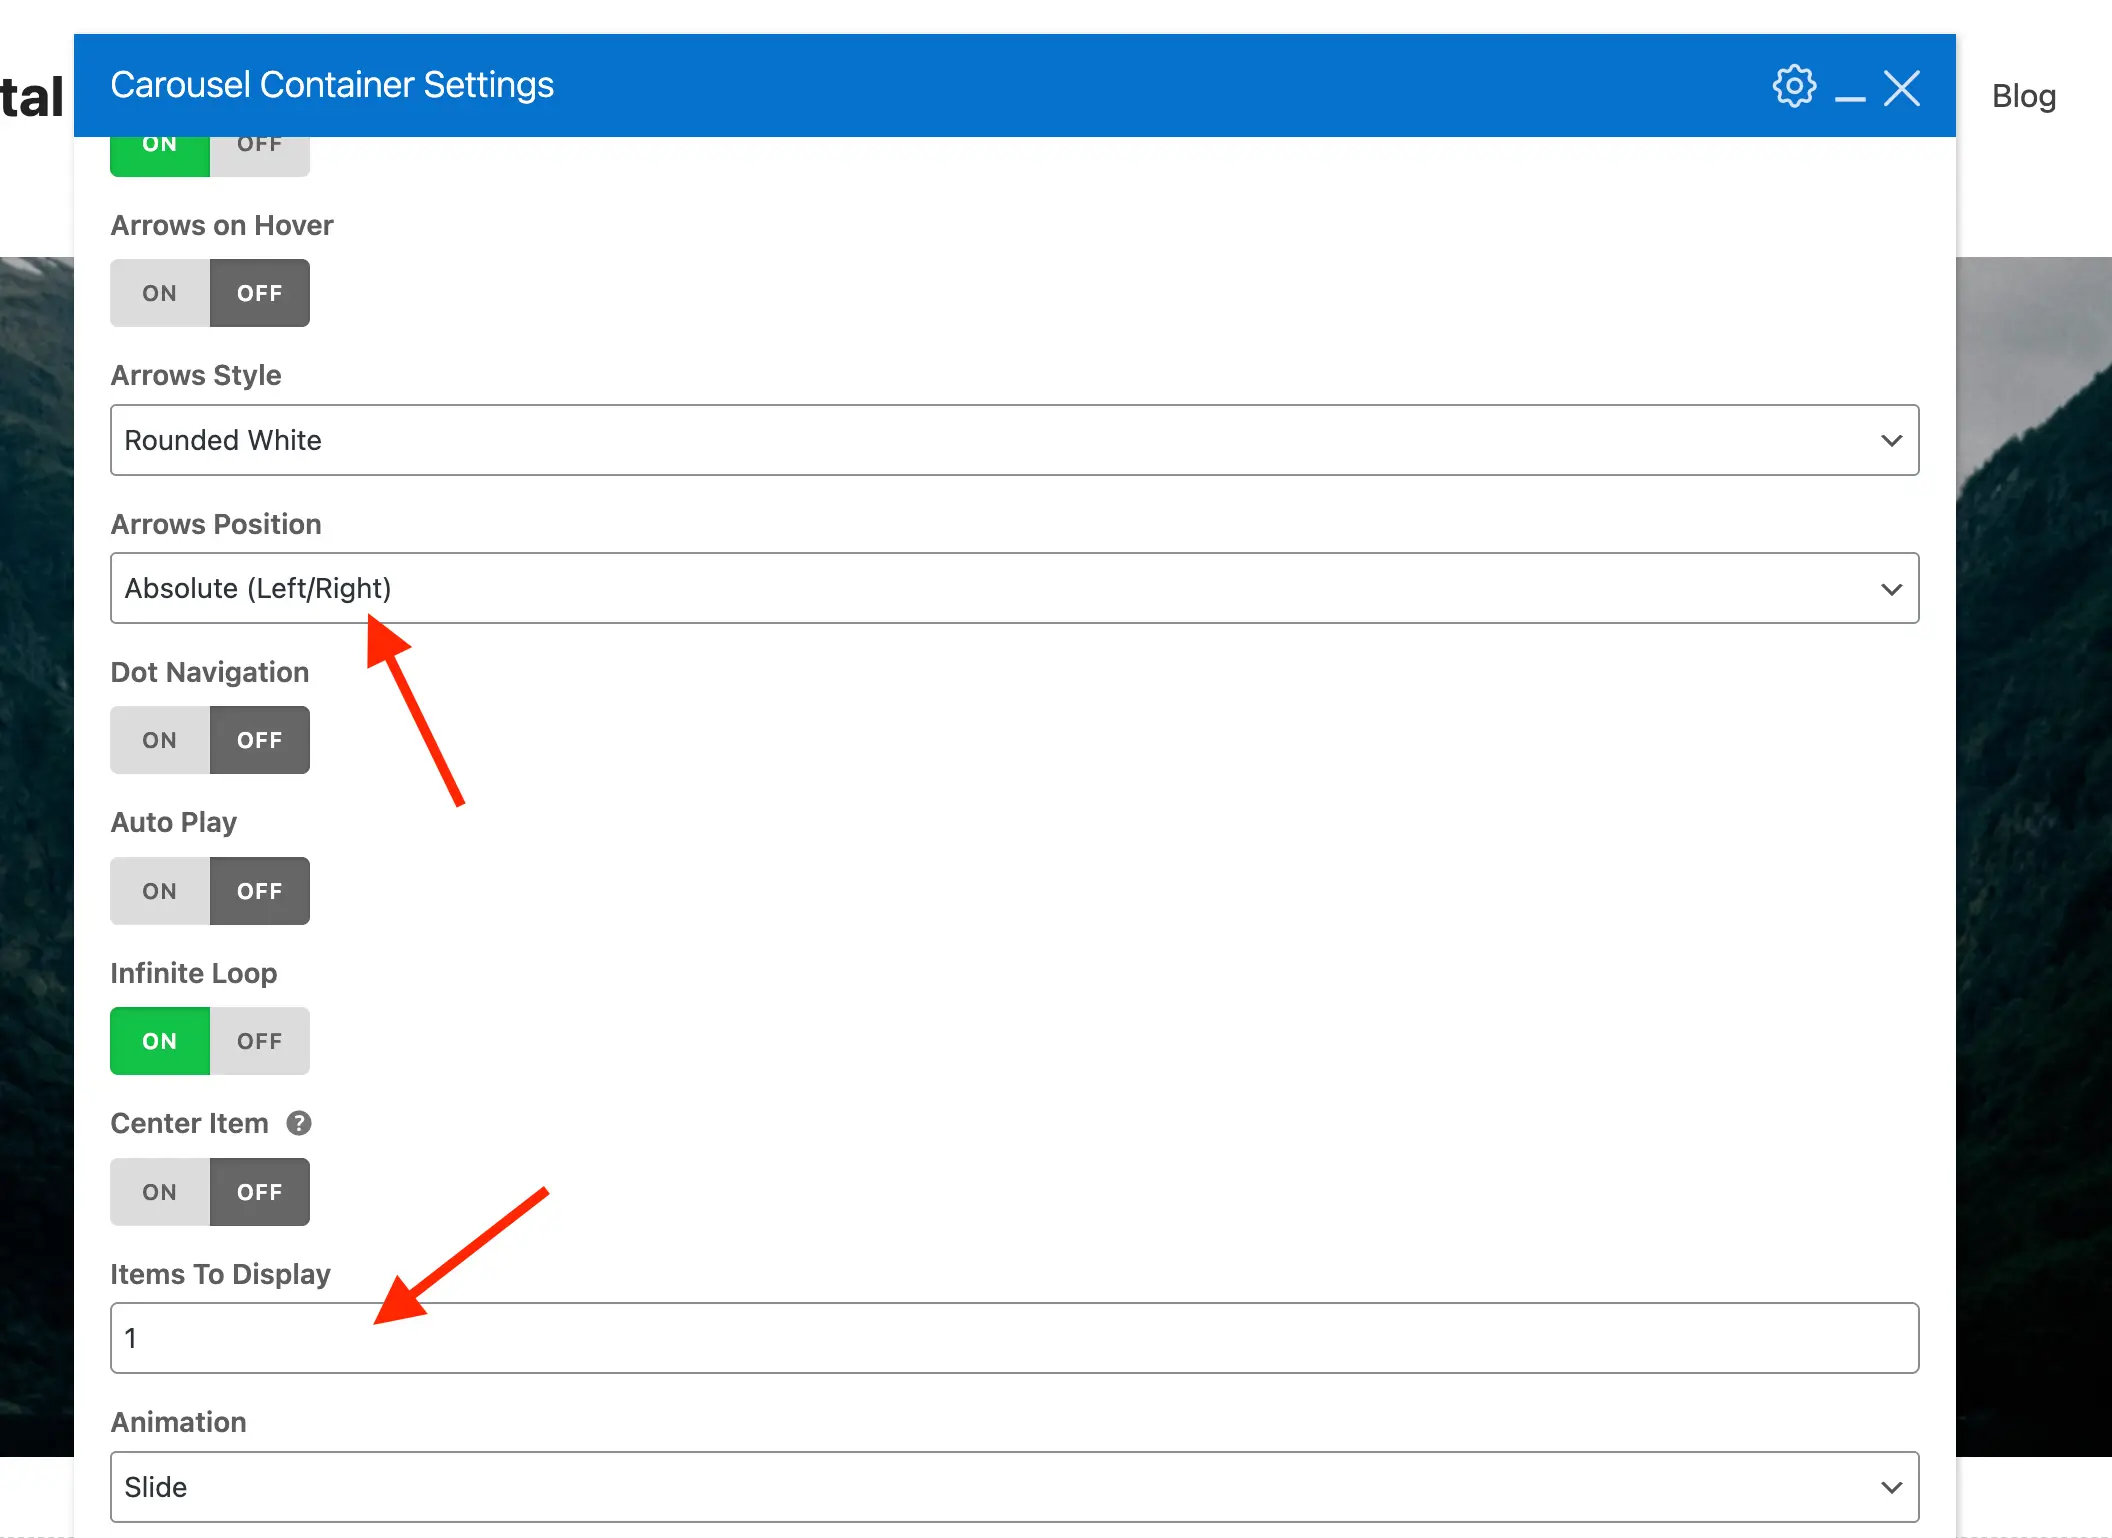
To get started, add the Carousel Container element to your page and adjust the settings to your liking. We recommend setting the number of slides to 1 and changing the Arrow style to “Absolute” (optional, but a common design choice).
Add the Image Banner Element to the Carousel
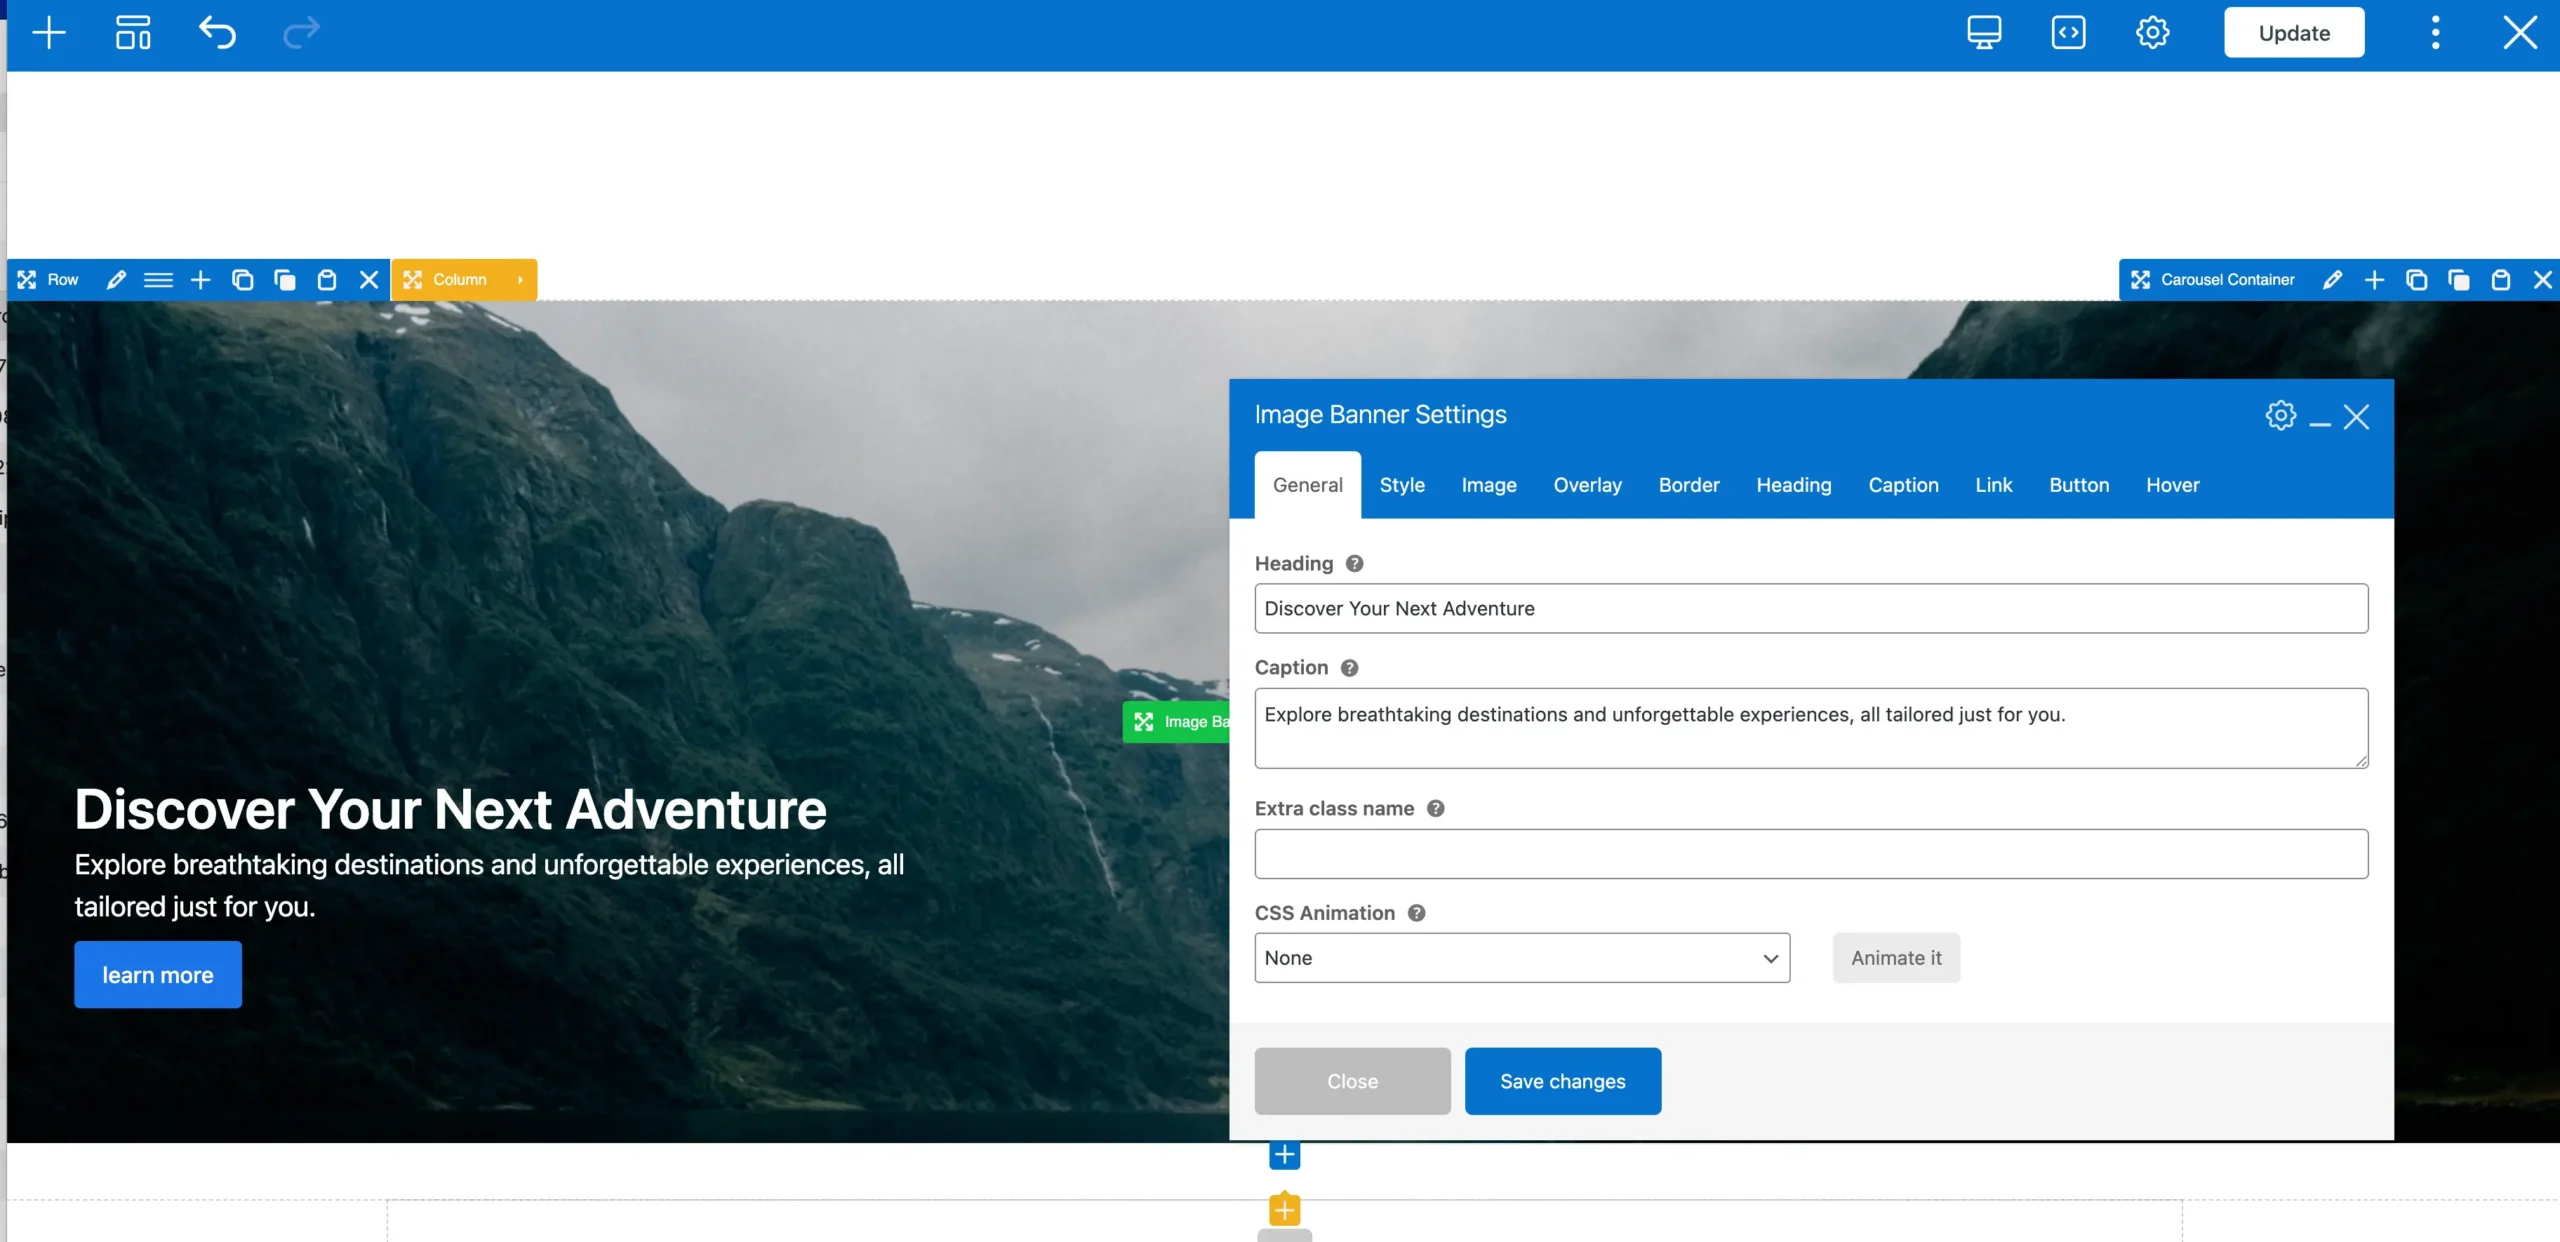
With your Carousel Container in place, the next step is to add slides. For a hero slider, the Image Banner element is the ideal choice. It lets you showcase full-image backgrounds with a semi-transparent overlay, along with text and a callout button.
Start by adding a single Image Banner and customizing it to your needs, then duplicate it to create additional slides.
In the frontend editor, your Carousel element will display as a grid. This layout makes it easy to view and rearrange your items, since rendering it as a live slider while editing wouldn’t allow proper customization. Once you’re done, save and preview your page to see the slider in action.
Making Your Slider Full-Screen
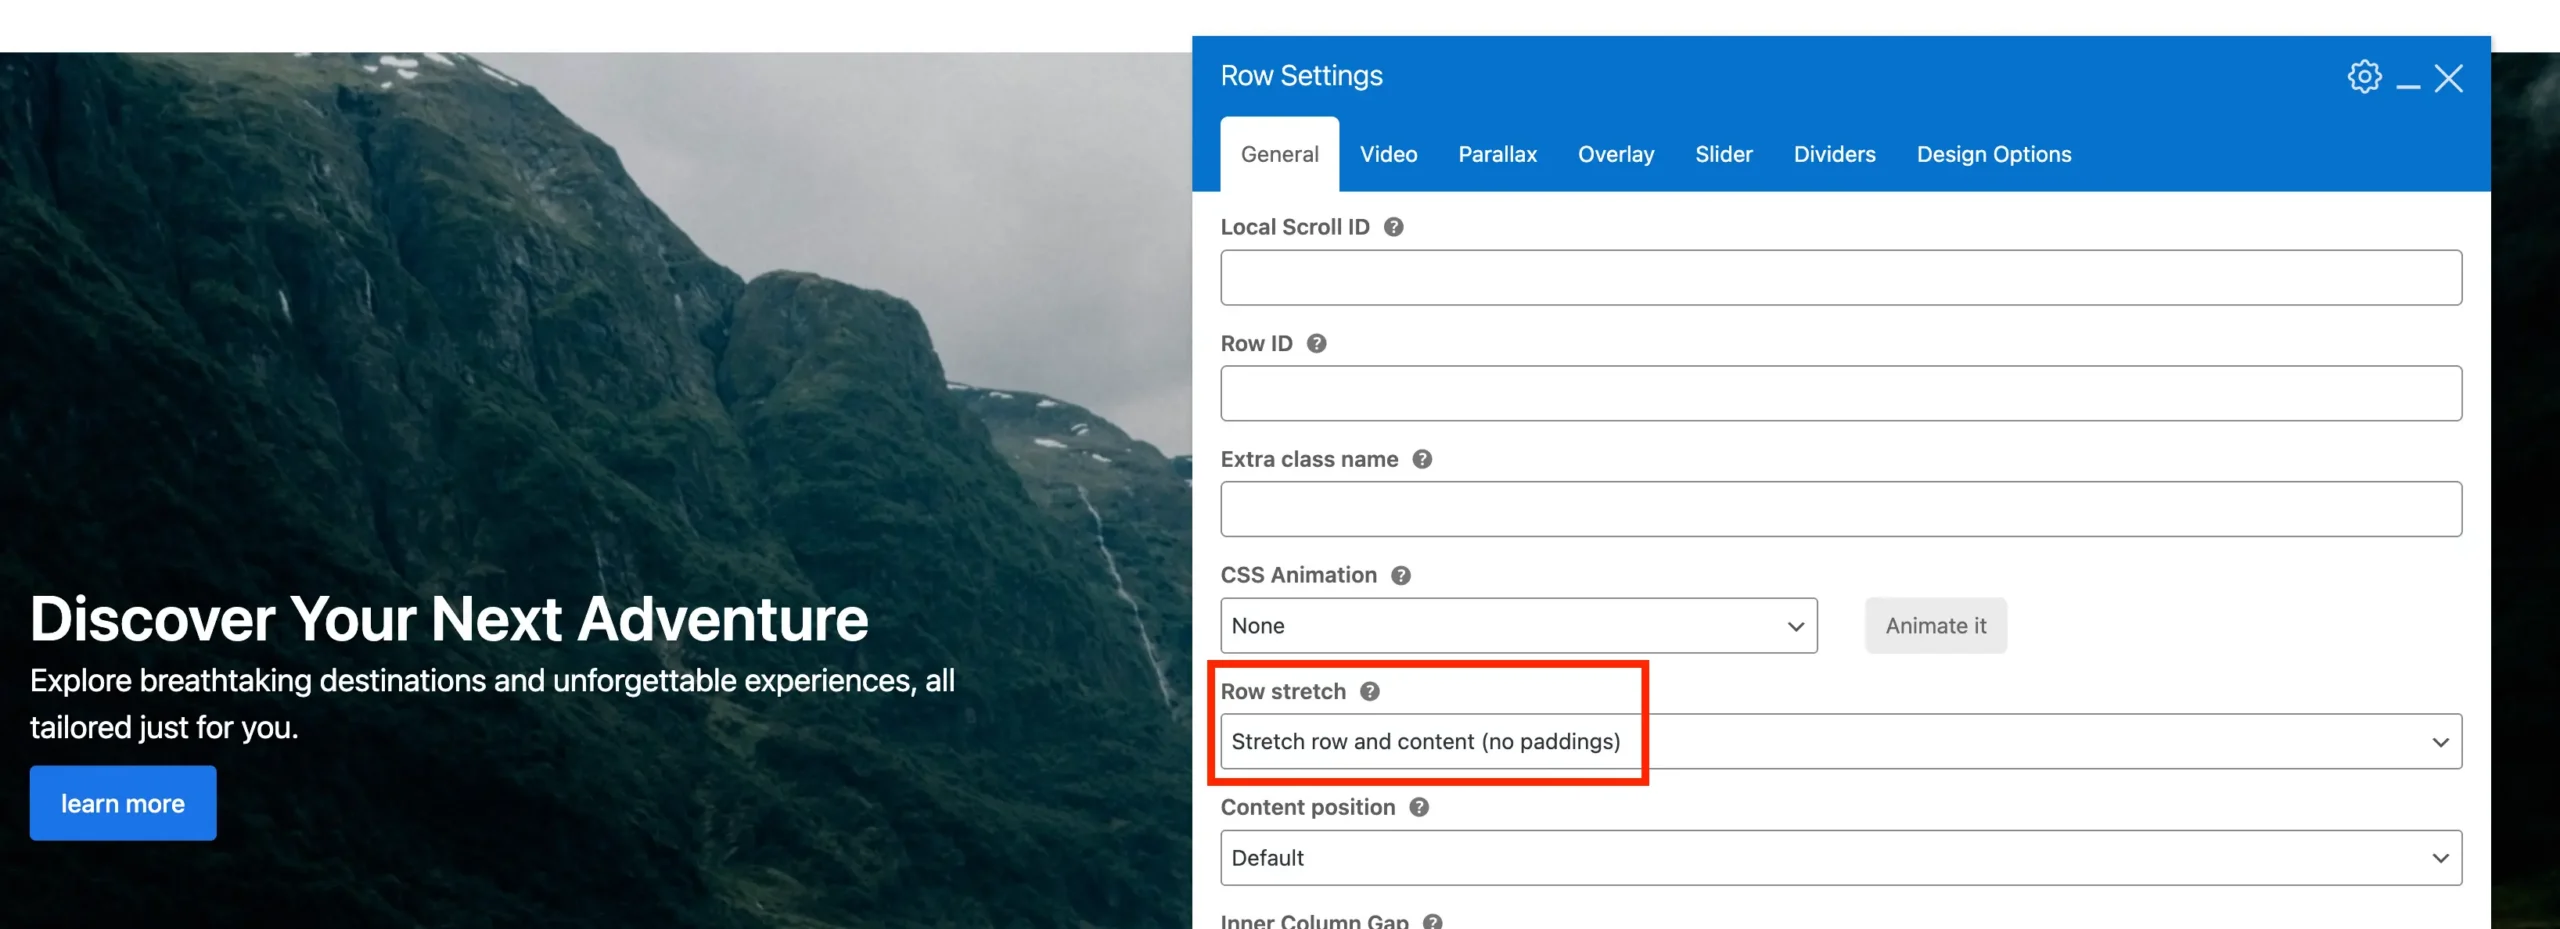
Hero sliders are typically full-screen. To make your slider full-screen, edit the row containing the Carousel Container and set Stretch Row to “Stretch row and content (no paddings)“. This ensures your carousel extends all the way to the edges of the screen.
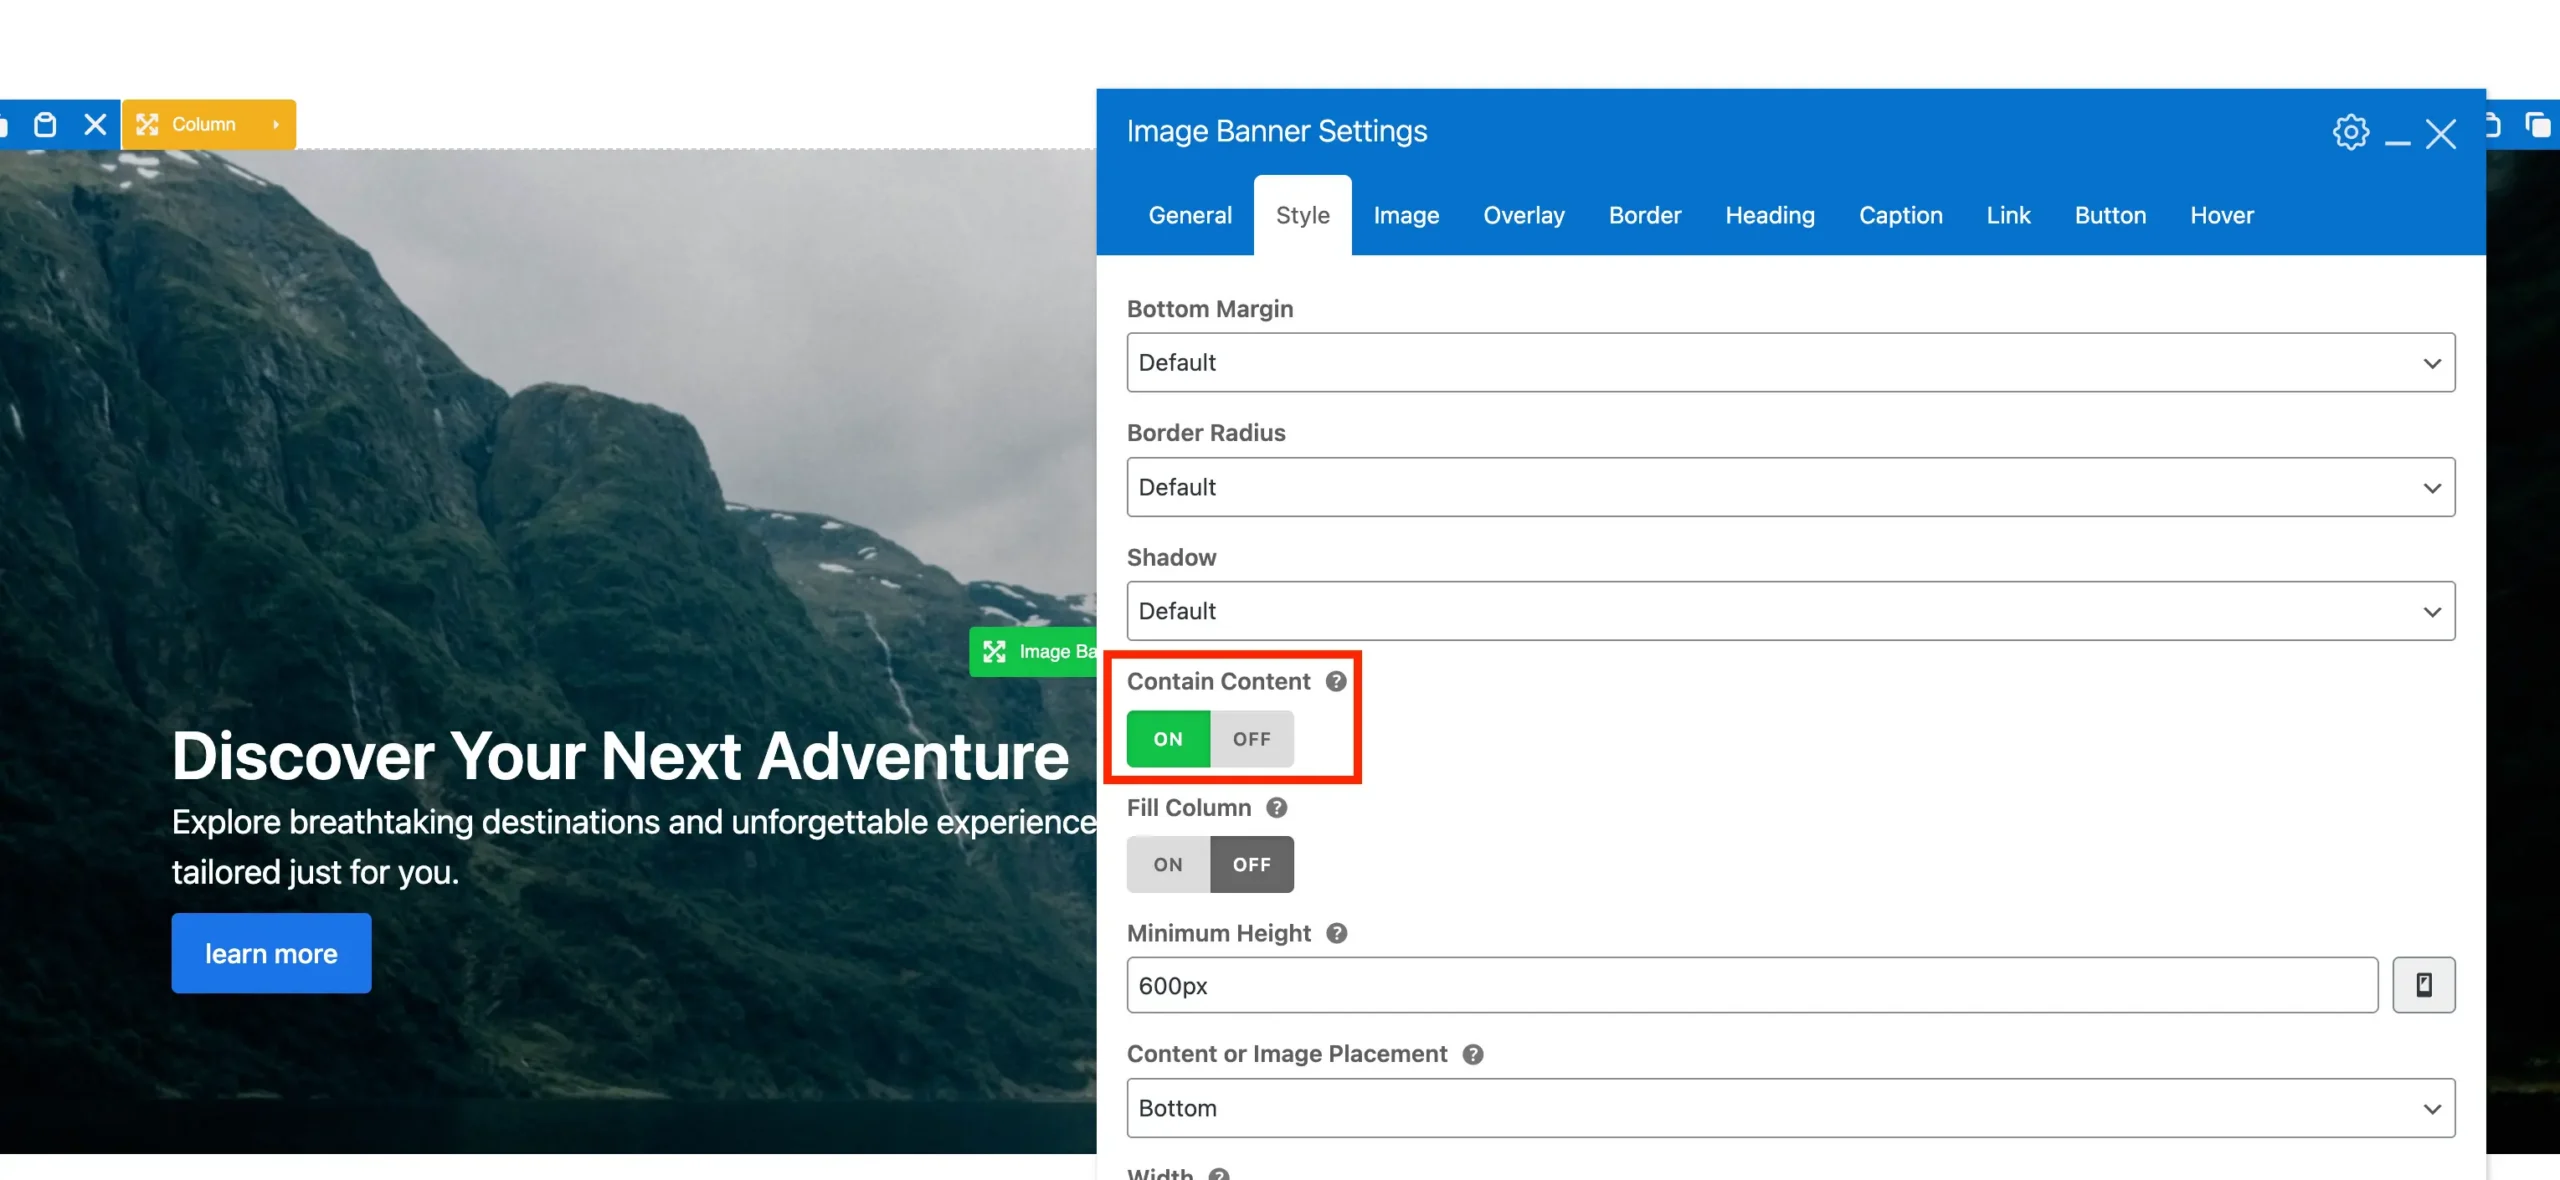
By default, the text and button within your Image Banner will also stretch. To keep them aligned with the rest of your site, edit the Image Banner element and enable “Contain Content” under the Style tab.
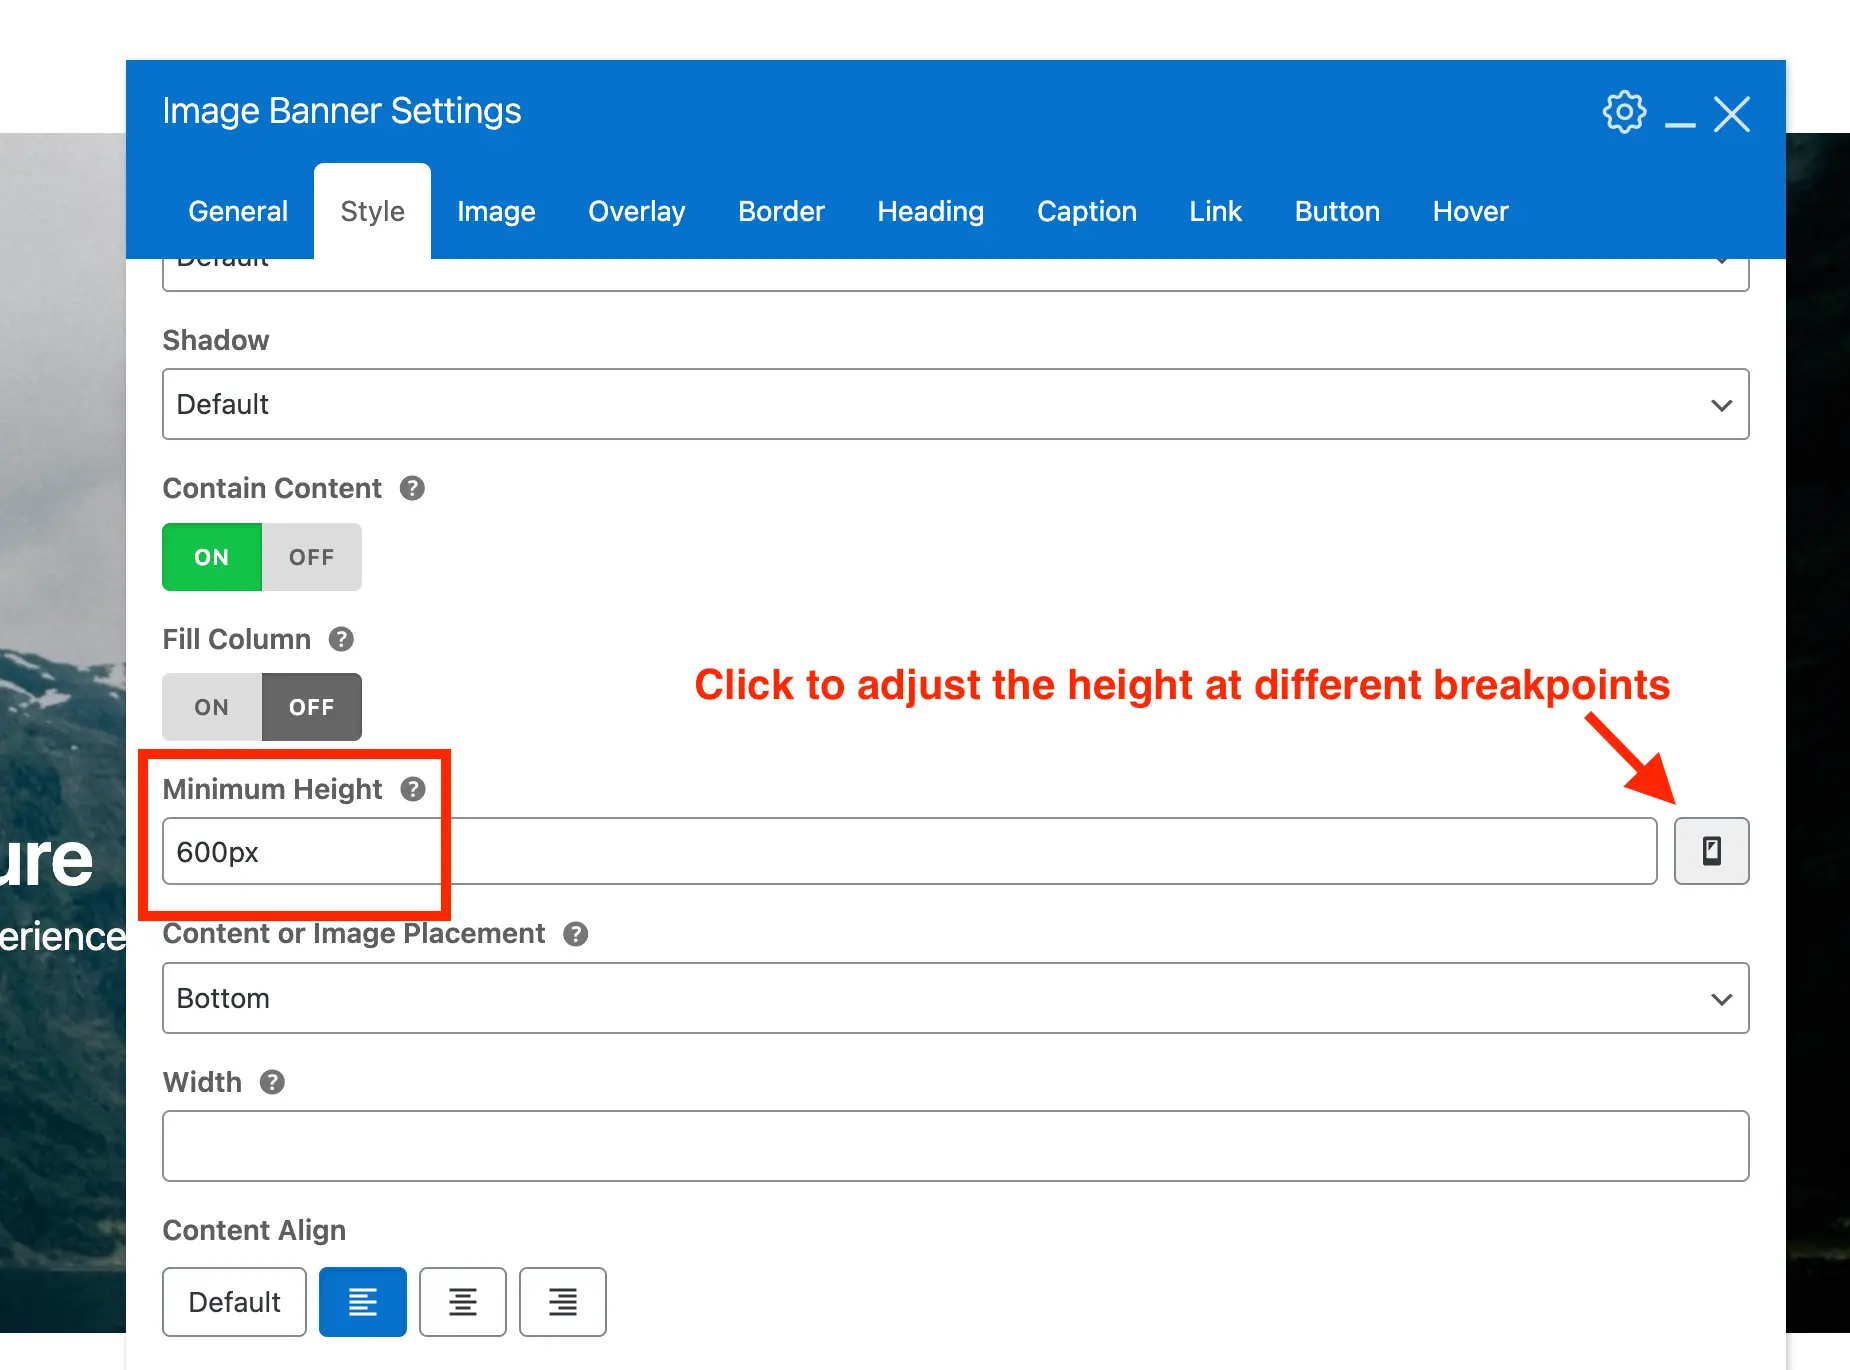
Set a Minimum Height for Your Image Banner
This step is optional, but it’s generally recommended to set a minimum height for your Image Banner in hero sliders. This ensures the slider is tall enough and that all content fits comfortably.
To do this, open the Style tab in the Image Banner and locate the Minimum Height field. You can enter a value in pixels, rem, vh, or use modern CSS functions like clamp(), min(), or max(). You can also click the mobile icon to set different heights for each responsive breakpoint.
Full-Height Slider
If you are using a flex header style, these headers have a fixed height which means you can easily create a full-height slider excluding the header by using the following value for the Minimum Height:
calc(100vh - var(--wpex-site-header-height, 100px))