The Color Palette functionality in Total allows you to define global colors for use on your site. To provide support with WPBakery Total overrides the default color picker under the Design Options tab for rows, columns, sections and the text block.

Unfortunately, because of how WPBakery is coded overriding the color picker in all WPBakery elements isn’t possible. We use a little trick to override it for the most crucial elements. Make sure you use Total elements whenever possible as they will all have access to your color palette colors.
Using Color Palette Classnames (Older Docs)
Previously you had to use the color palette classnames to use your color palette colors in WPBakery – this is no longer required. However, we’ve kept the docs in case you want to use this method for non theme elements or other parts of your site.
Locate Your Color Classname
Head over to Theme Panel > Color Palette to locate the classname you want to apply to your WPBakery element.
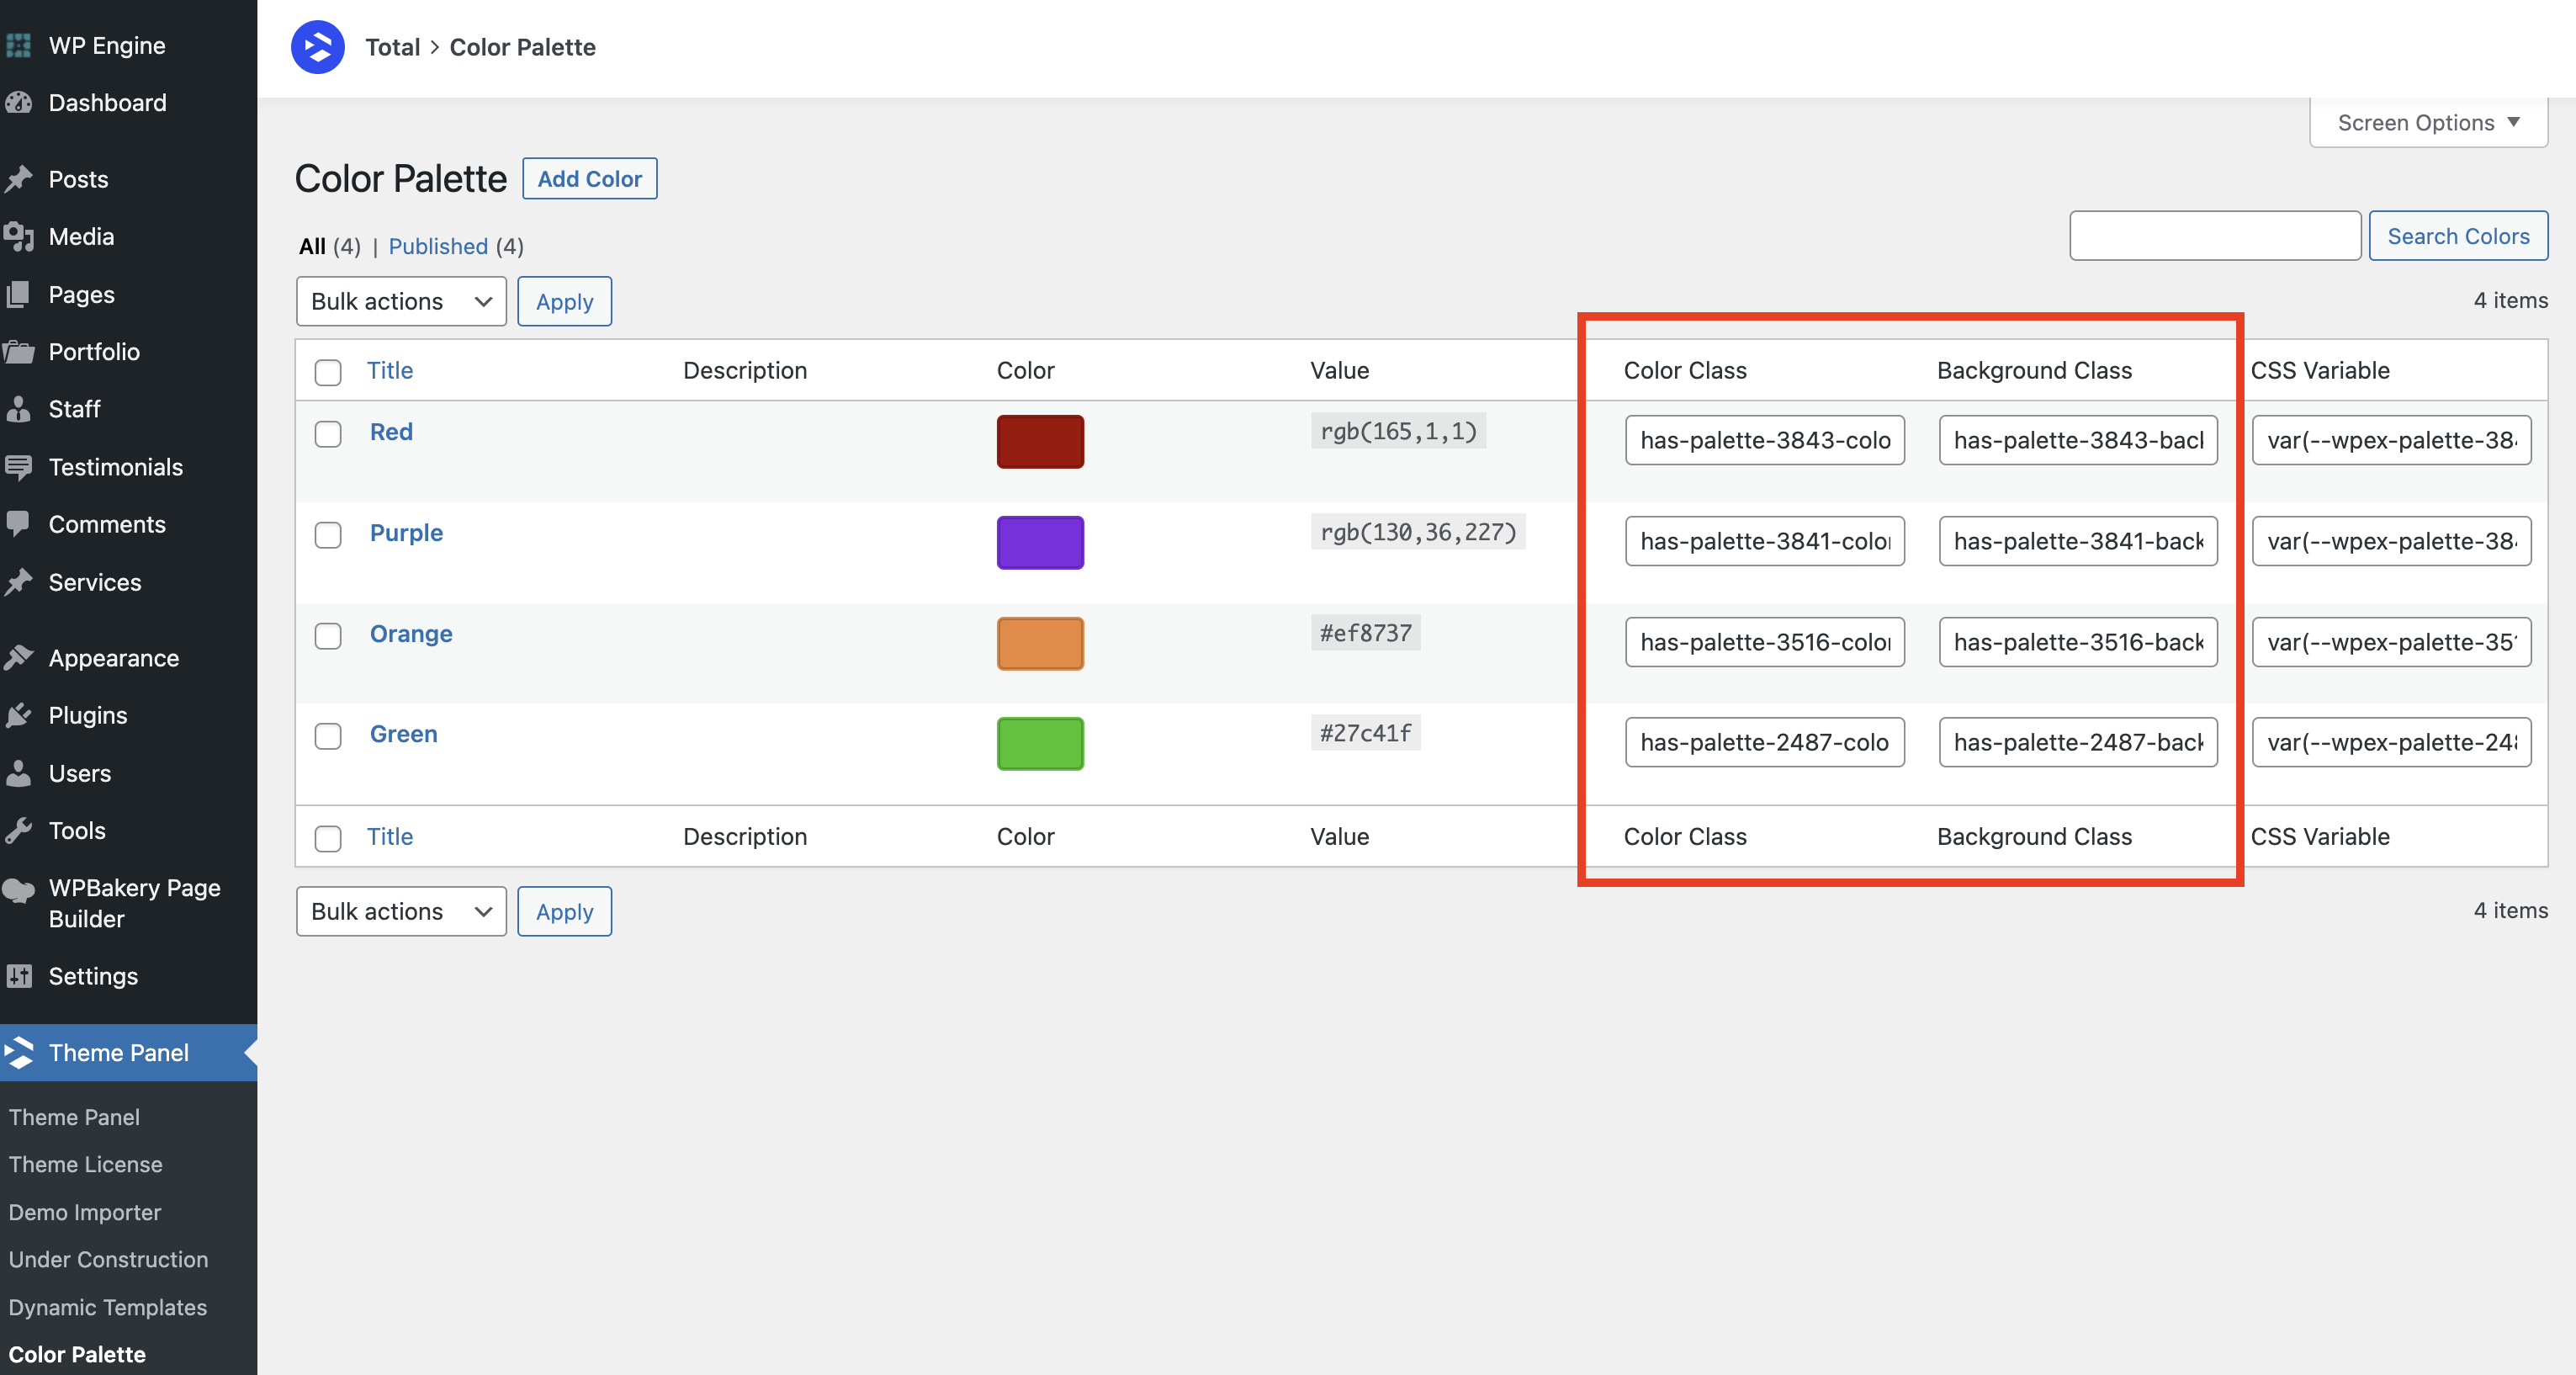
While in the Color Palette panel you will notice 2 columns with the classnames for applying a palette color to an element on your site. The Color Class is used to set the text of an element to your palette color and the Background Class is used to apply your color palette color as the background-color for your element.
Simply click on the input for the class you want to copy which will highlight the classname so you can copy it.
Paste Your Classname into Your WPBakery Element
Now that you have located and copied your color palette color classname you can edit any WPBakery element and insert the classname into the Extra class name field like the example below.
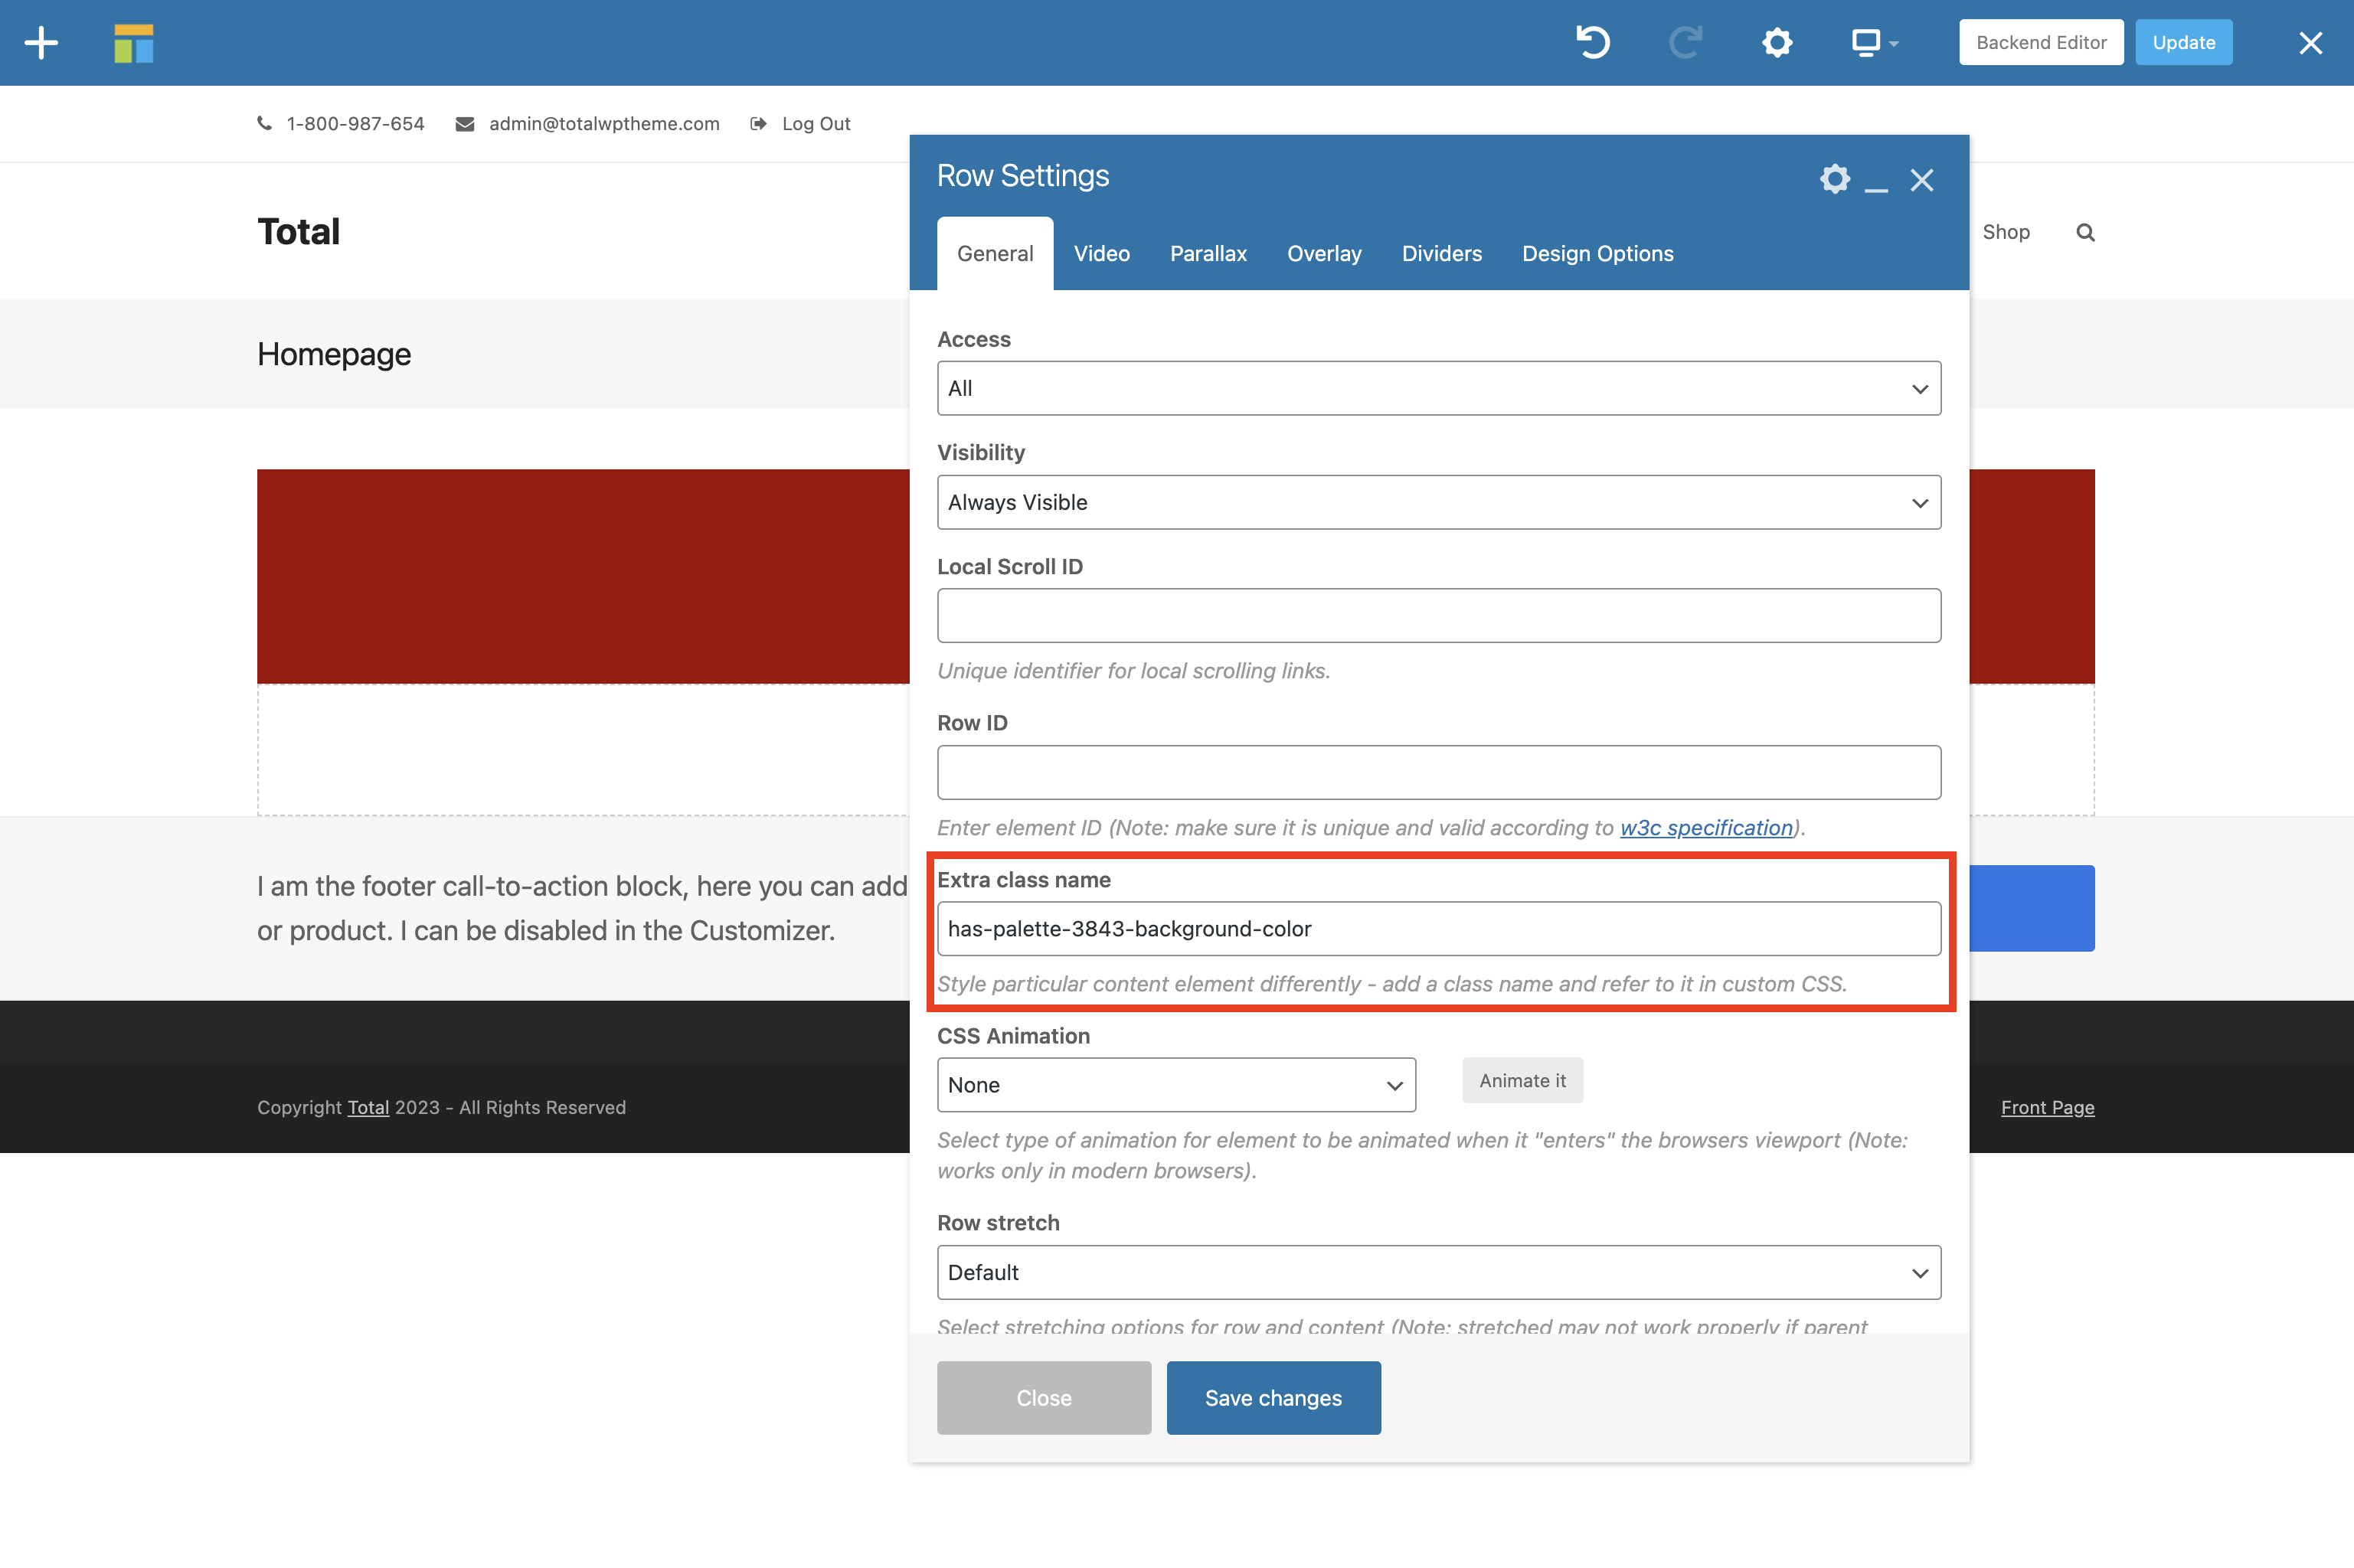
By default WPBakery works with negative margins on their Rows to offset inner column spacing. So if you just add a color palette classname to a row it will extent a bit to the left/right.
To fix this you can click on the “Design Options” tab and enter 0px for the left and right margins or if you don’t need multiple columns on the row you can instead set the “Inner Column Gap” setting in the General tab to 0px.