The Total theme includes a built-in functionality so that you can easily create custom templates for your WooCommerce product archives (aka categories, tags, etc). Creating a custom template is very simple and can be done with a few steps.
This guide covers how to edit all WooCommerce archive pages — including the main shop page, categories, tags, and more.
If you prefer to customize the main shop page separately from the other archives, you’ll first need to disable the default shop output. Once that’s done, you can freely edit the shop page like any other page on your site.
Step 1: Create a new Dynamic Template
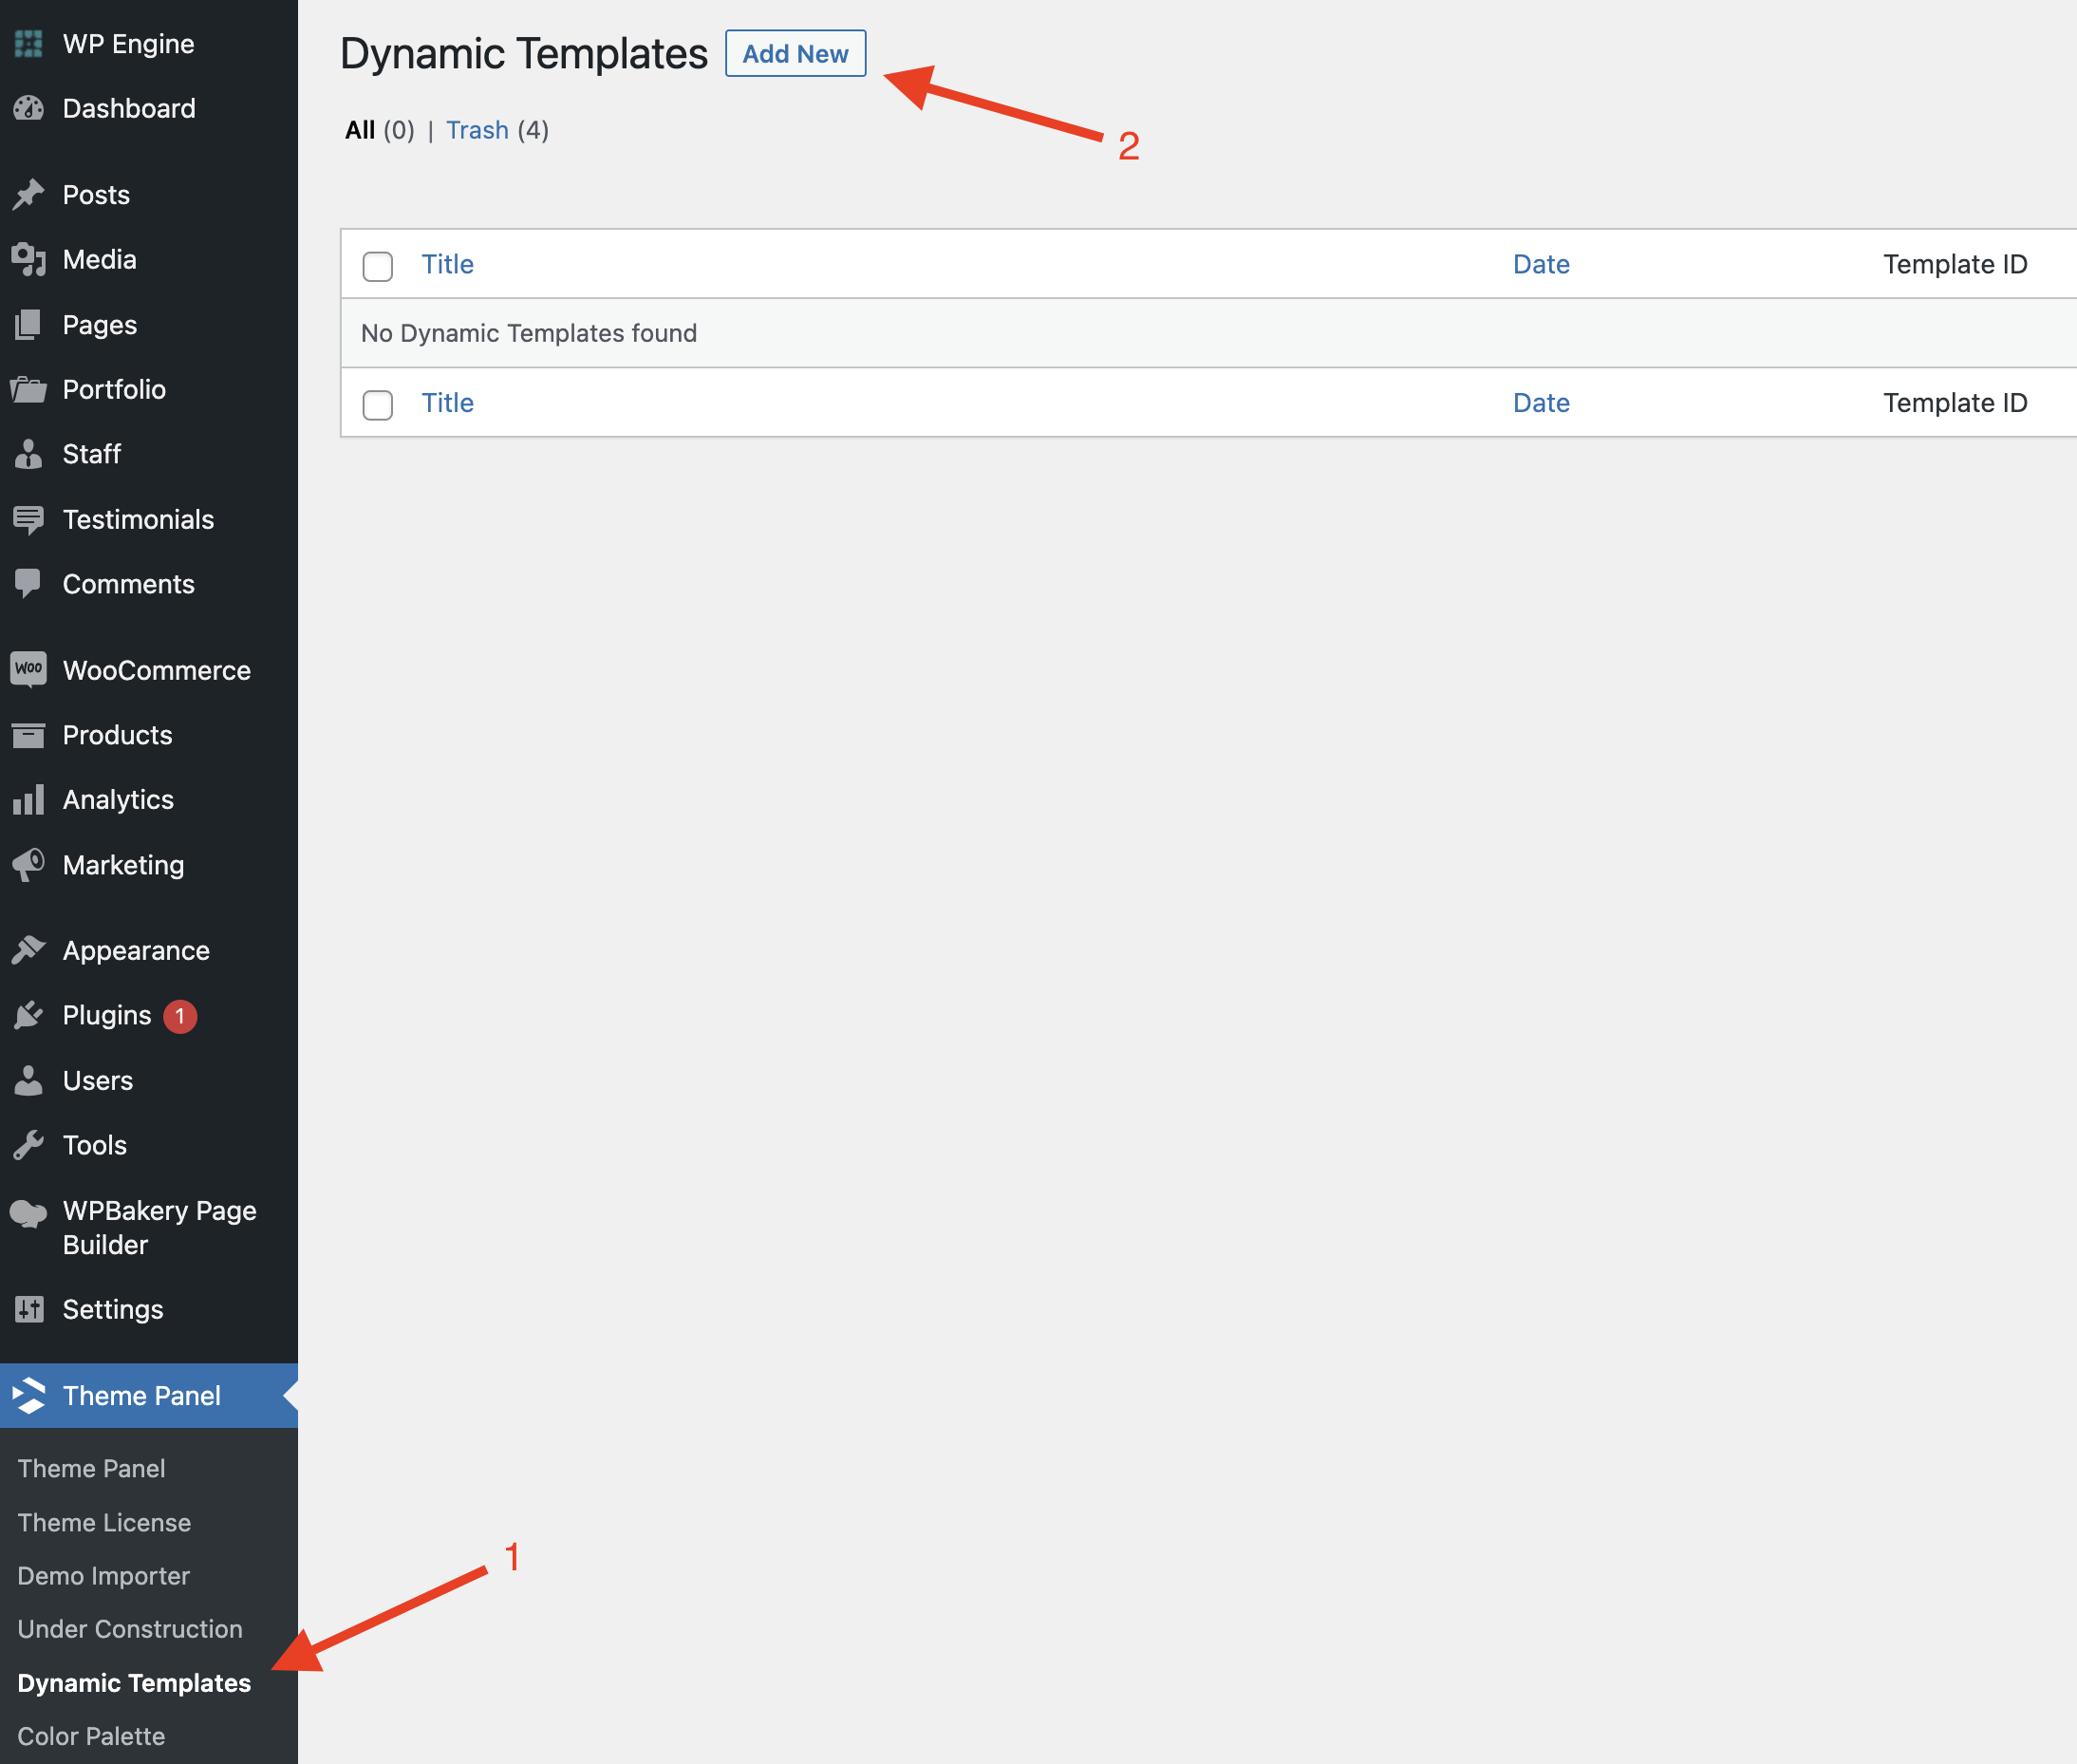
Start by creating a new template under Theme Panel > Dynamic Templates.
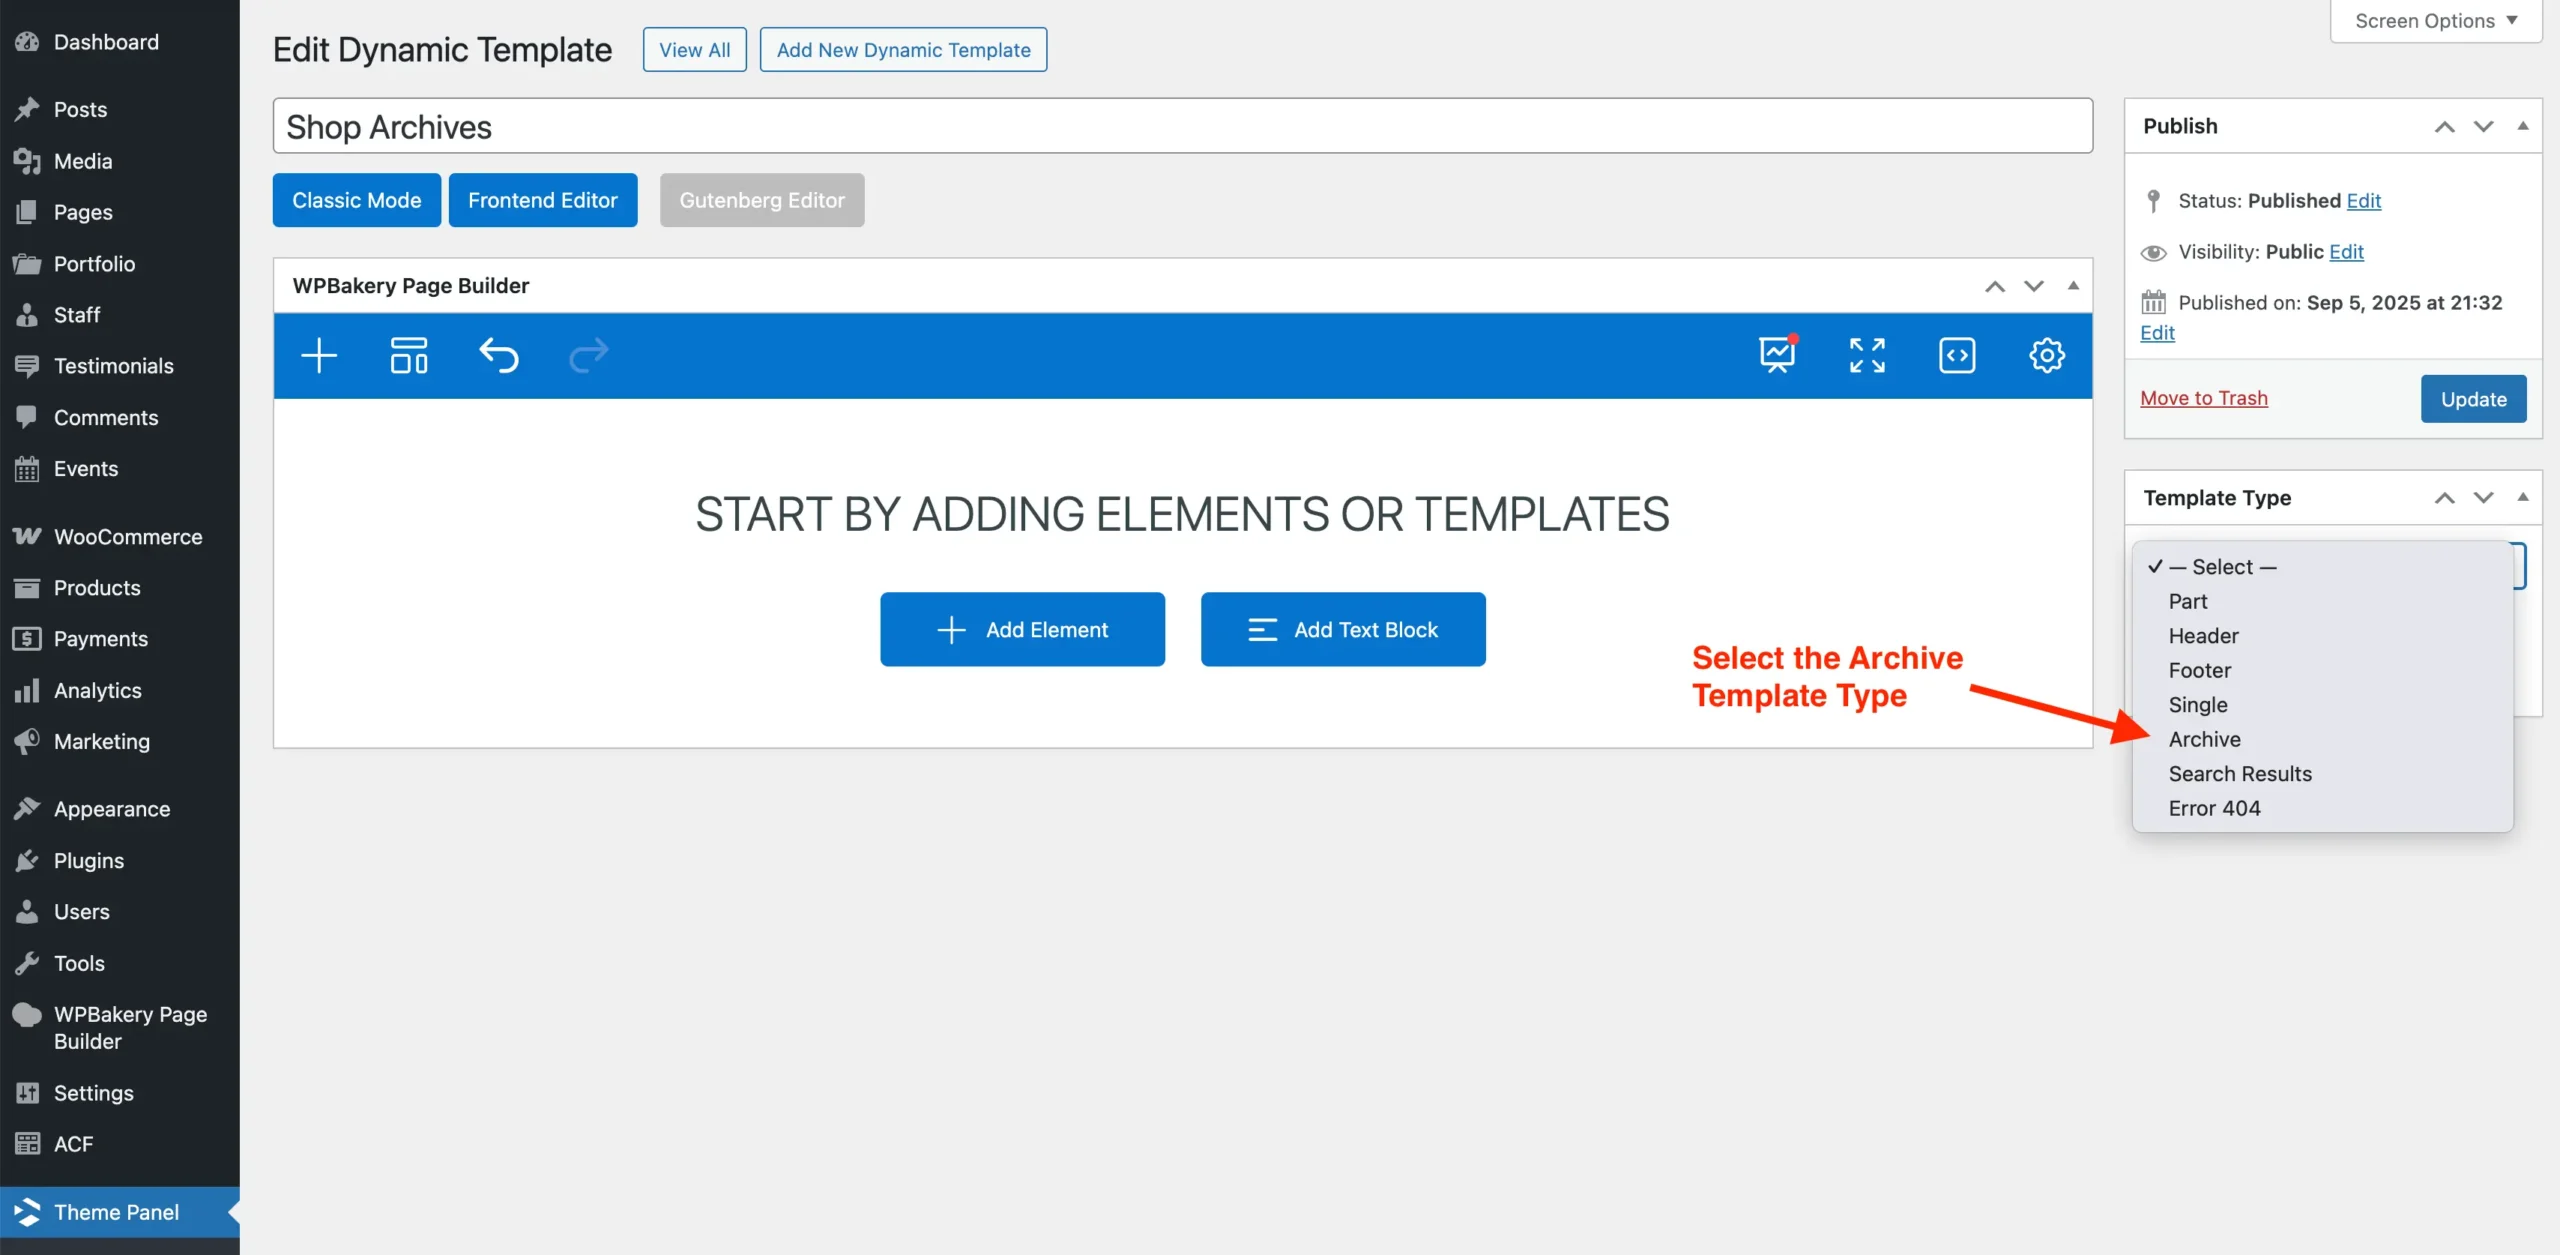
Once the new post window opens, make sure to select “Archive” as the type for your newly created dynamic template.
Step 2: Design Your Dynamic Template
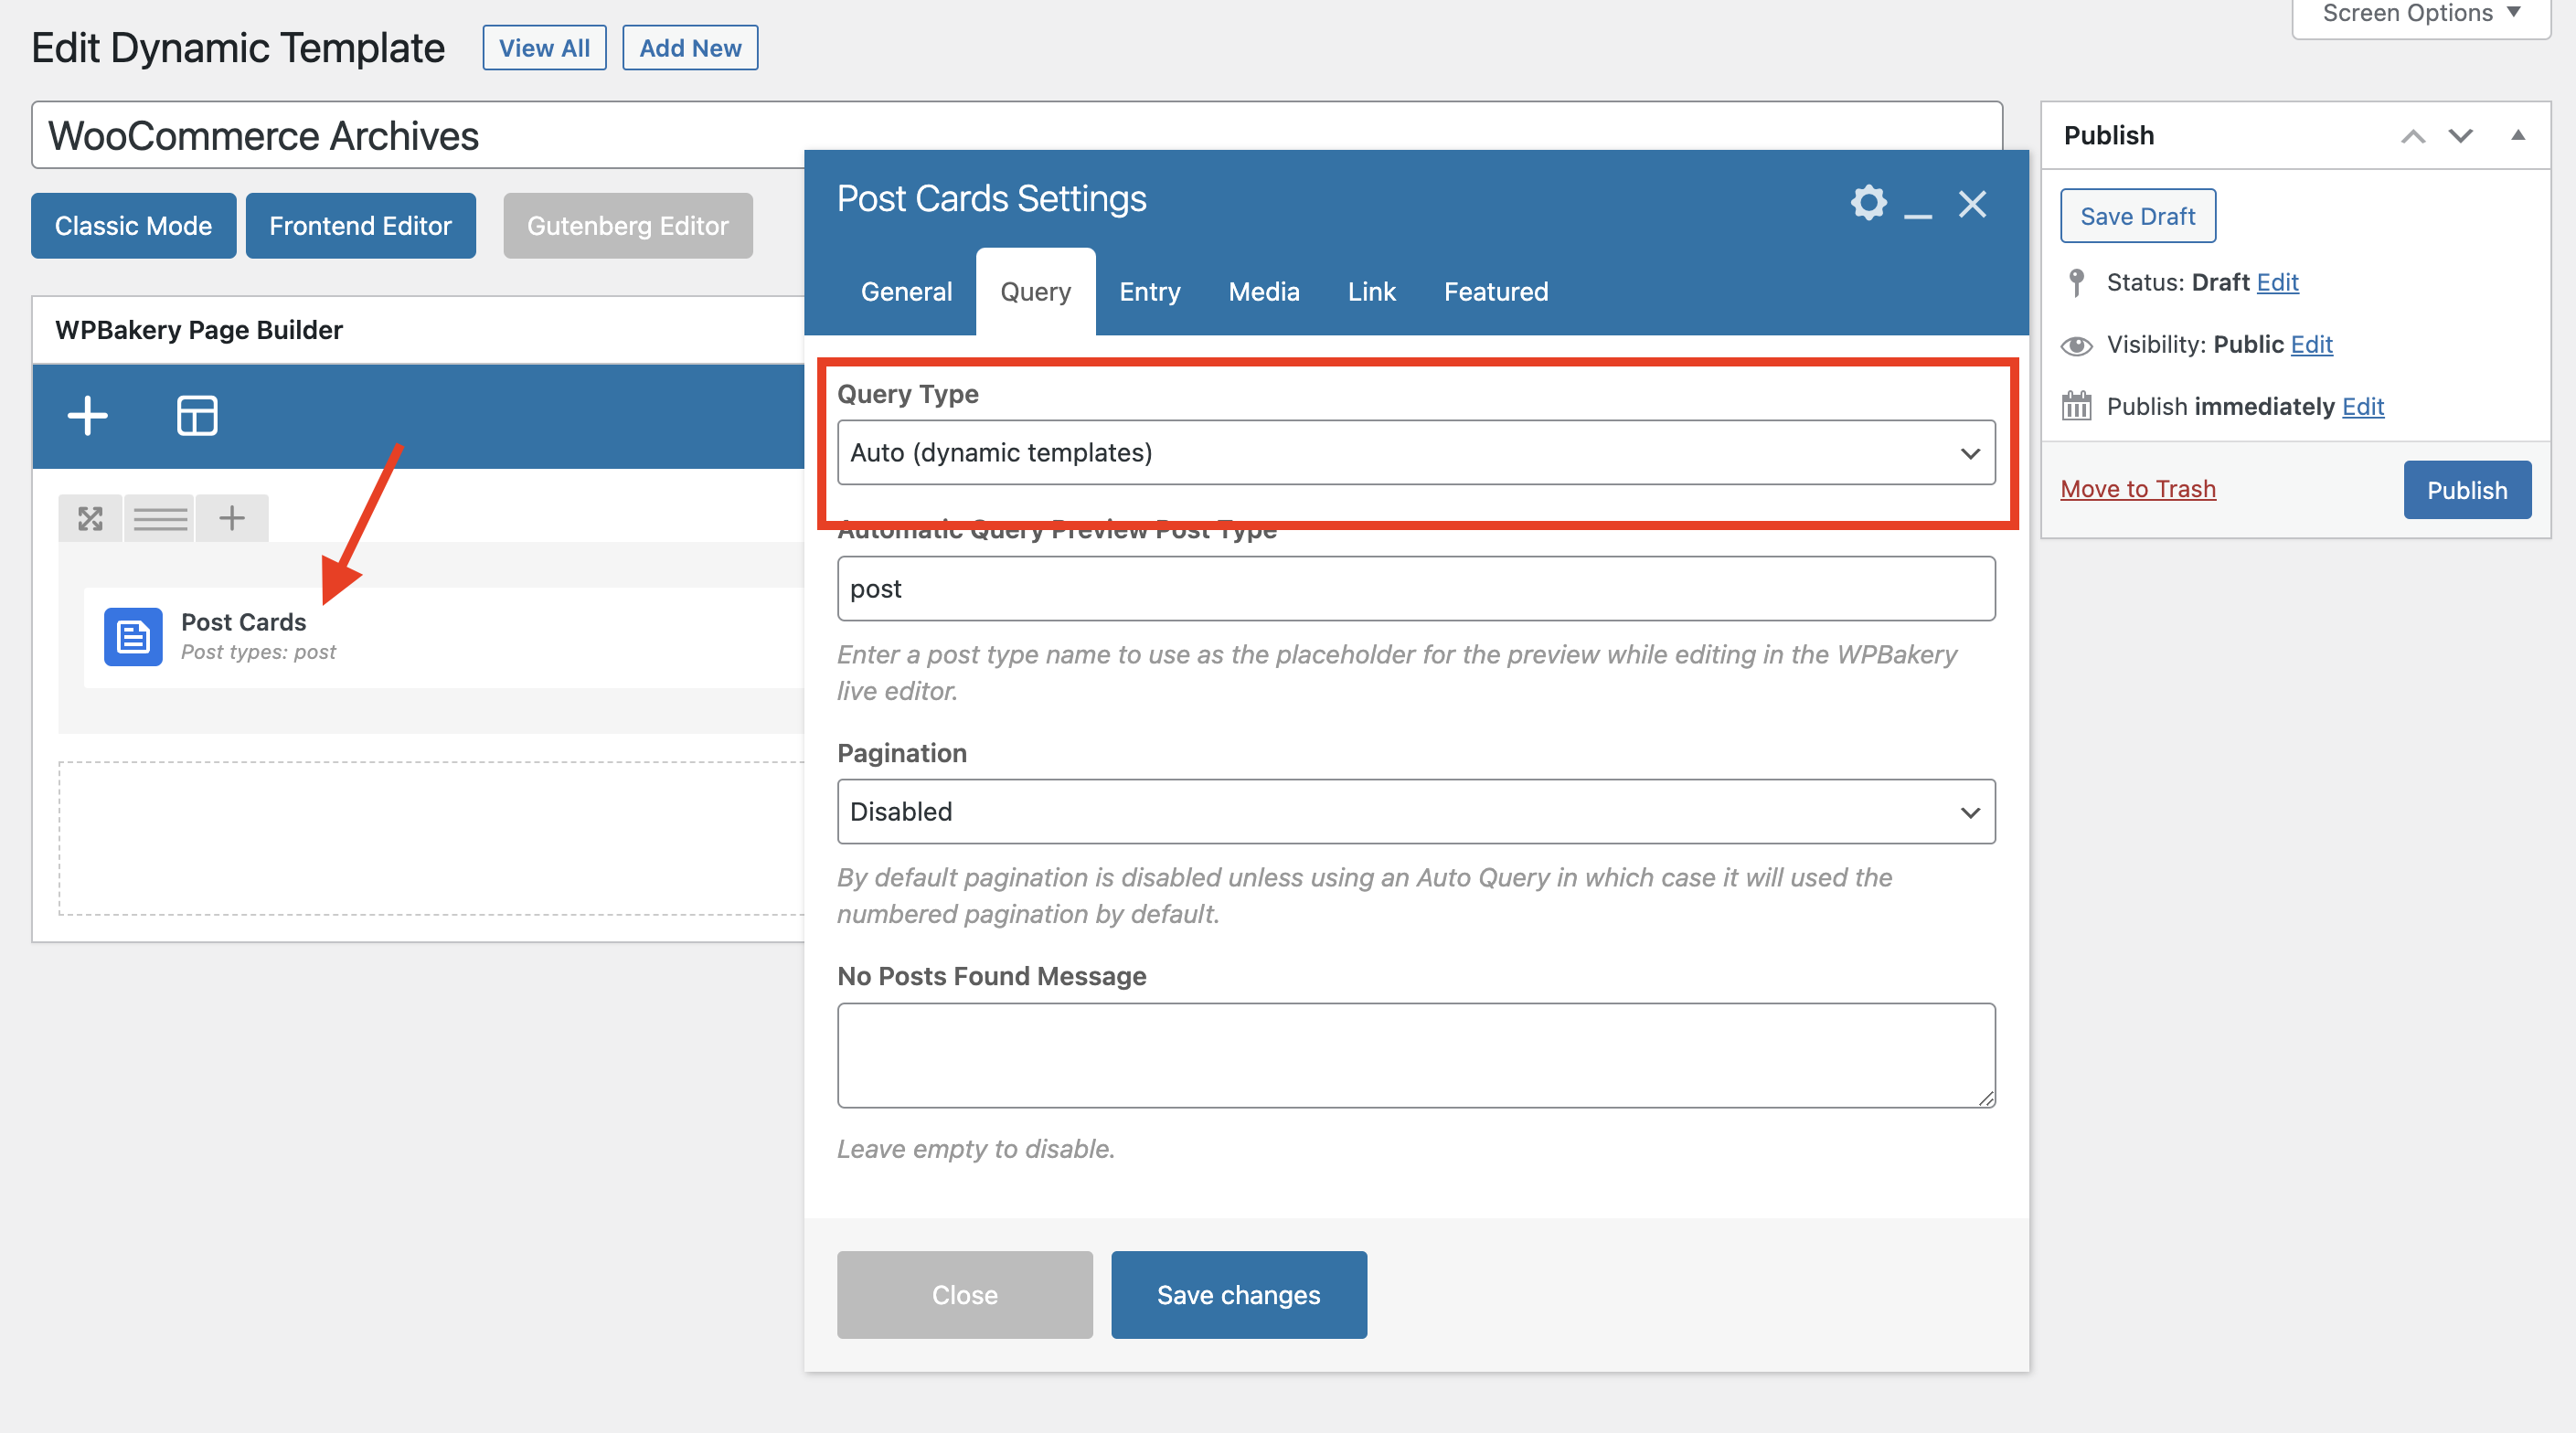
With your template created, design the layout using WPBakery, Elementor, or Gutenberg. Remember to insert the Post Cards element and set the Query Type to Auto to ensure archive products appear automatically.
Below is a list of useful elements for designing your Shop archive template. Of course, you’re not limited to these, feel free to use any elements that fit your design:
- Title or Heading: Displays the main title if you’ve disabled the default page header title.
- Post Cards: Displays your products.
- Woo Notices: Shows WooCommerce notices; it’s recommended to place this at the top of the page.
- Woo Template Part: Allows you to display WooCommerce core elements, such as the Catalog “Sort by” and “Results Count” features.
You can create a custom card to fully control the design of each product entry, giving you complete flexibility over its layout and style.
Step 3: Assign the Template via the Customizer
With your template created you can now assign it via Appearance > Customize > WooCommerce (Total) > Shop & Archives.
