The Total Theme Font Manager makes it easy to register custom font families from Adobe Fonts for use across your site. With just a few steps, you can seamlessly integrate your favorite Adobe Fonts into your theme.
Step 1: Locate Your Adobe Fonts Project ID
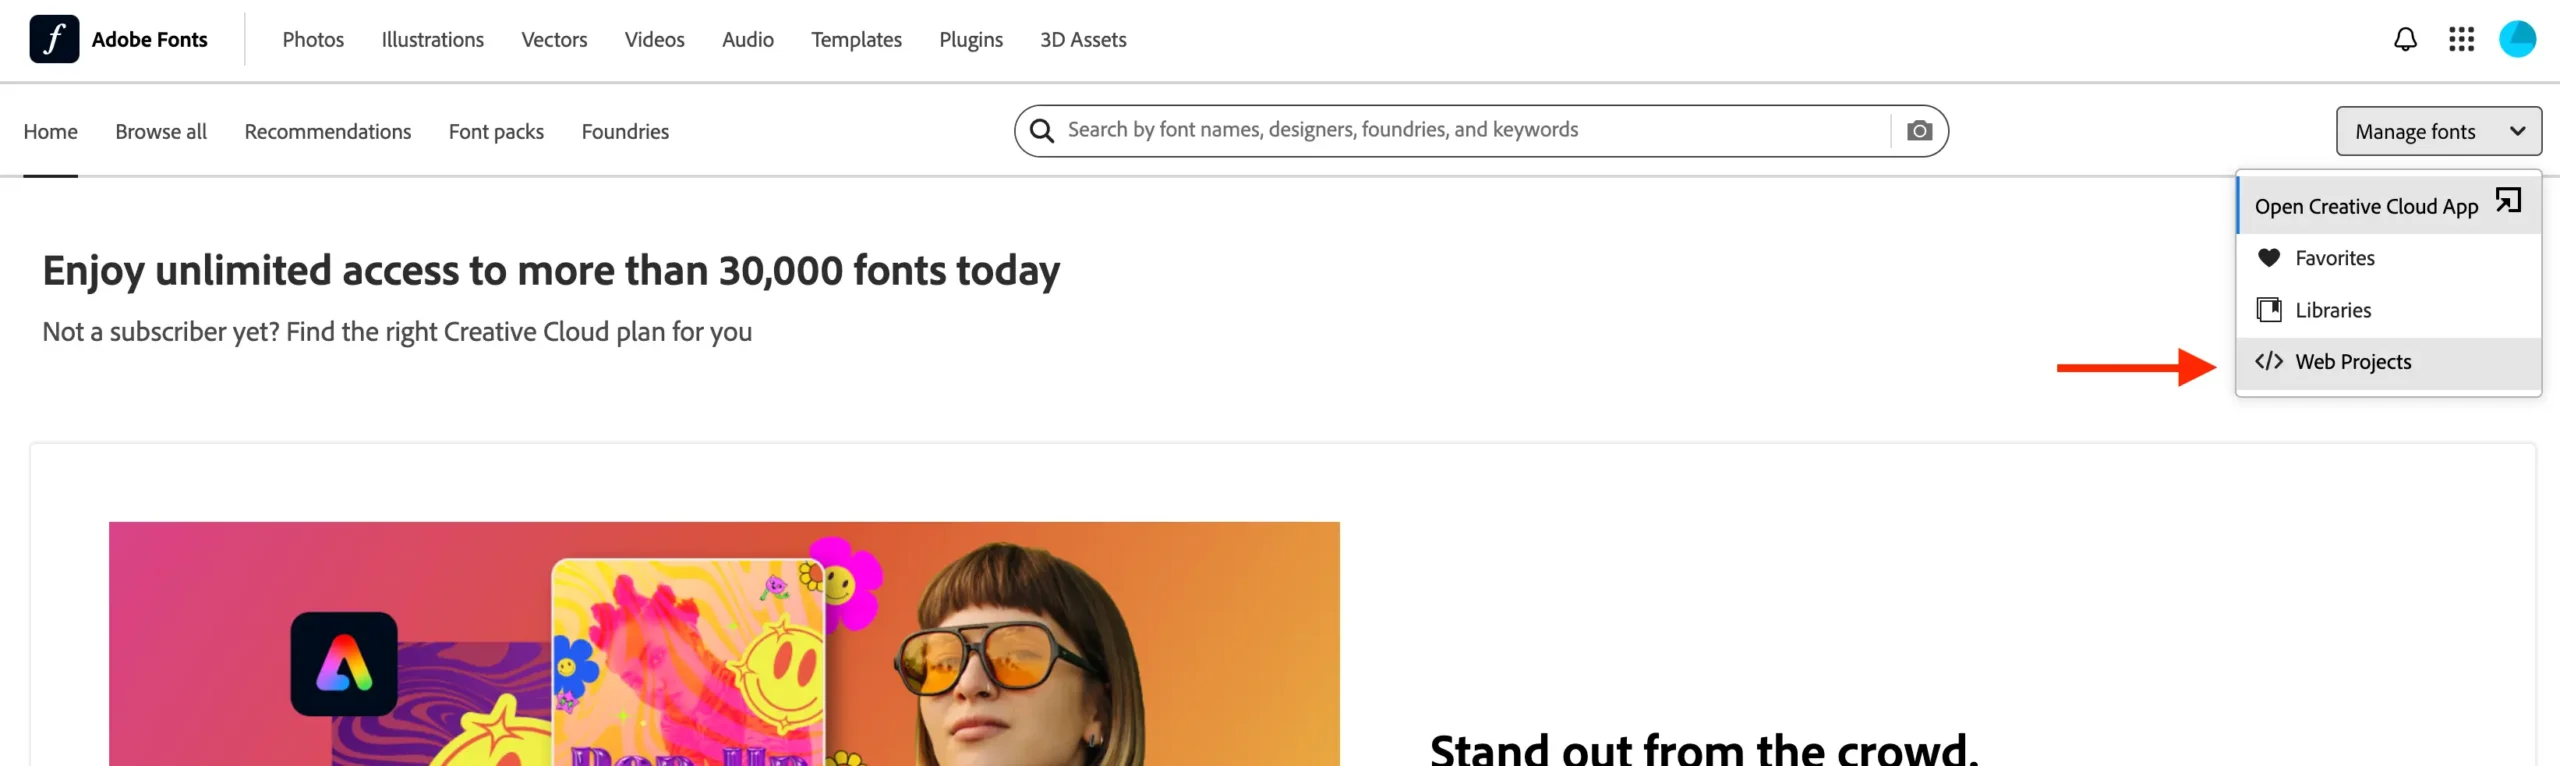
Before you can register fonts, you’ll need your Project ID from Adobe Fonts. Here’s how to find it:
- Go to Adobe Fonts.
- Sign in to your Adobe account.
- Navigate to the Web Projects section under Manage Fonts.
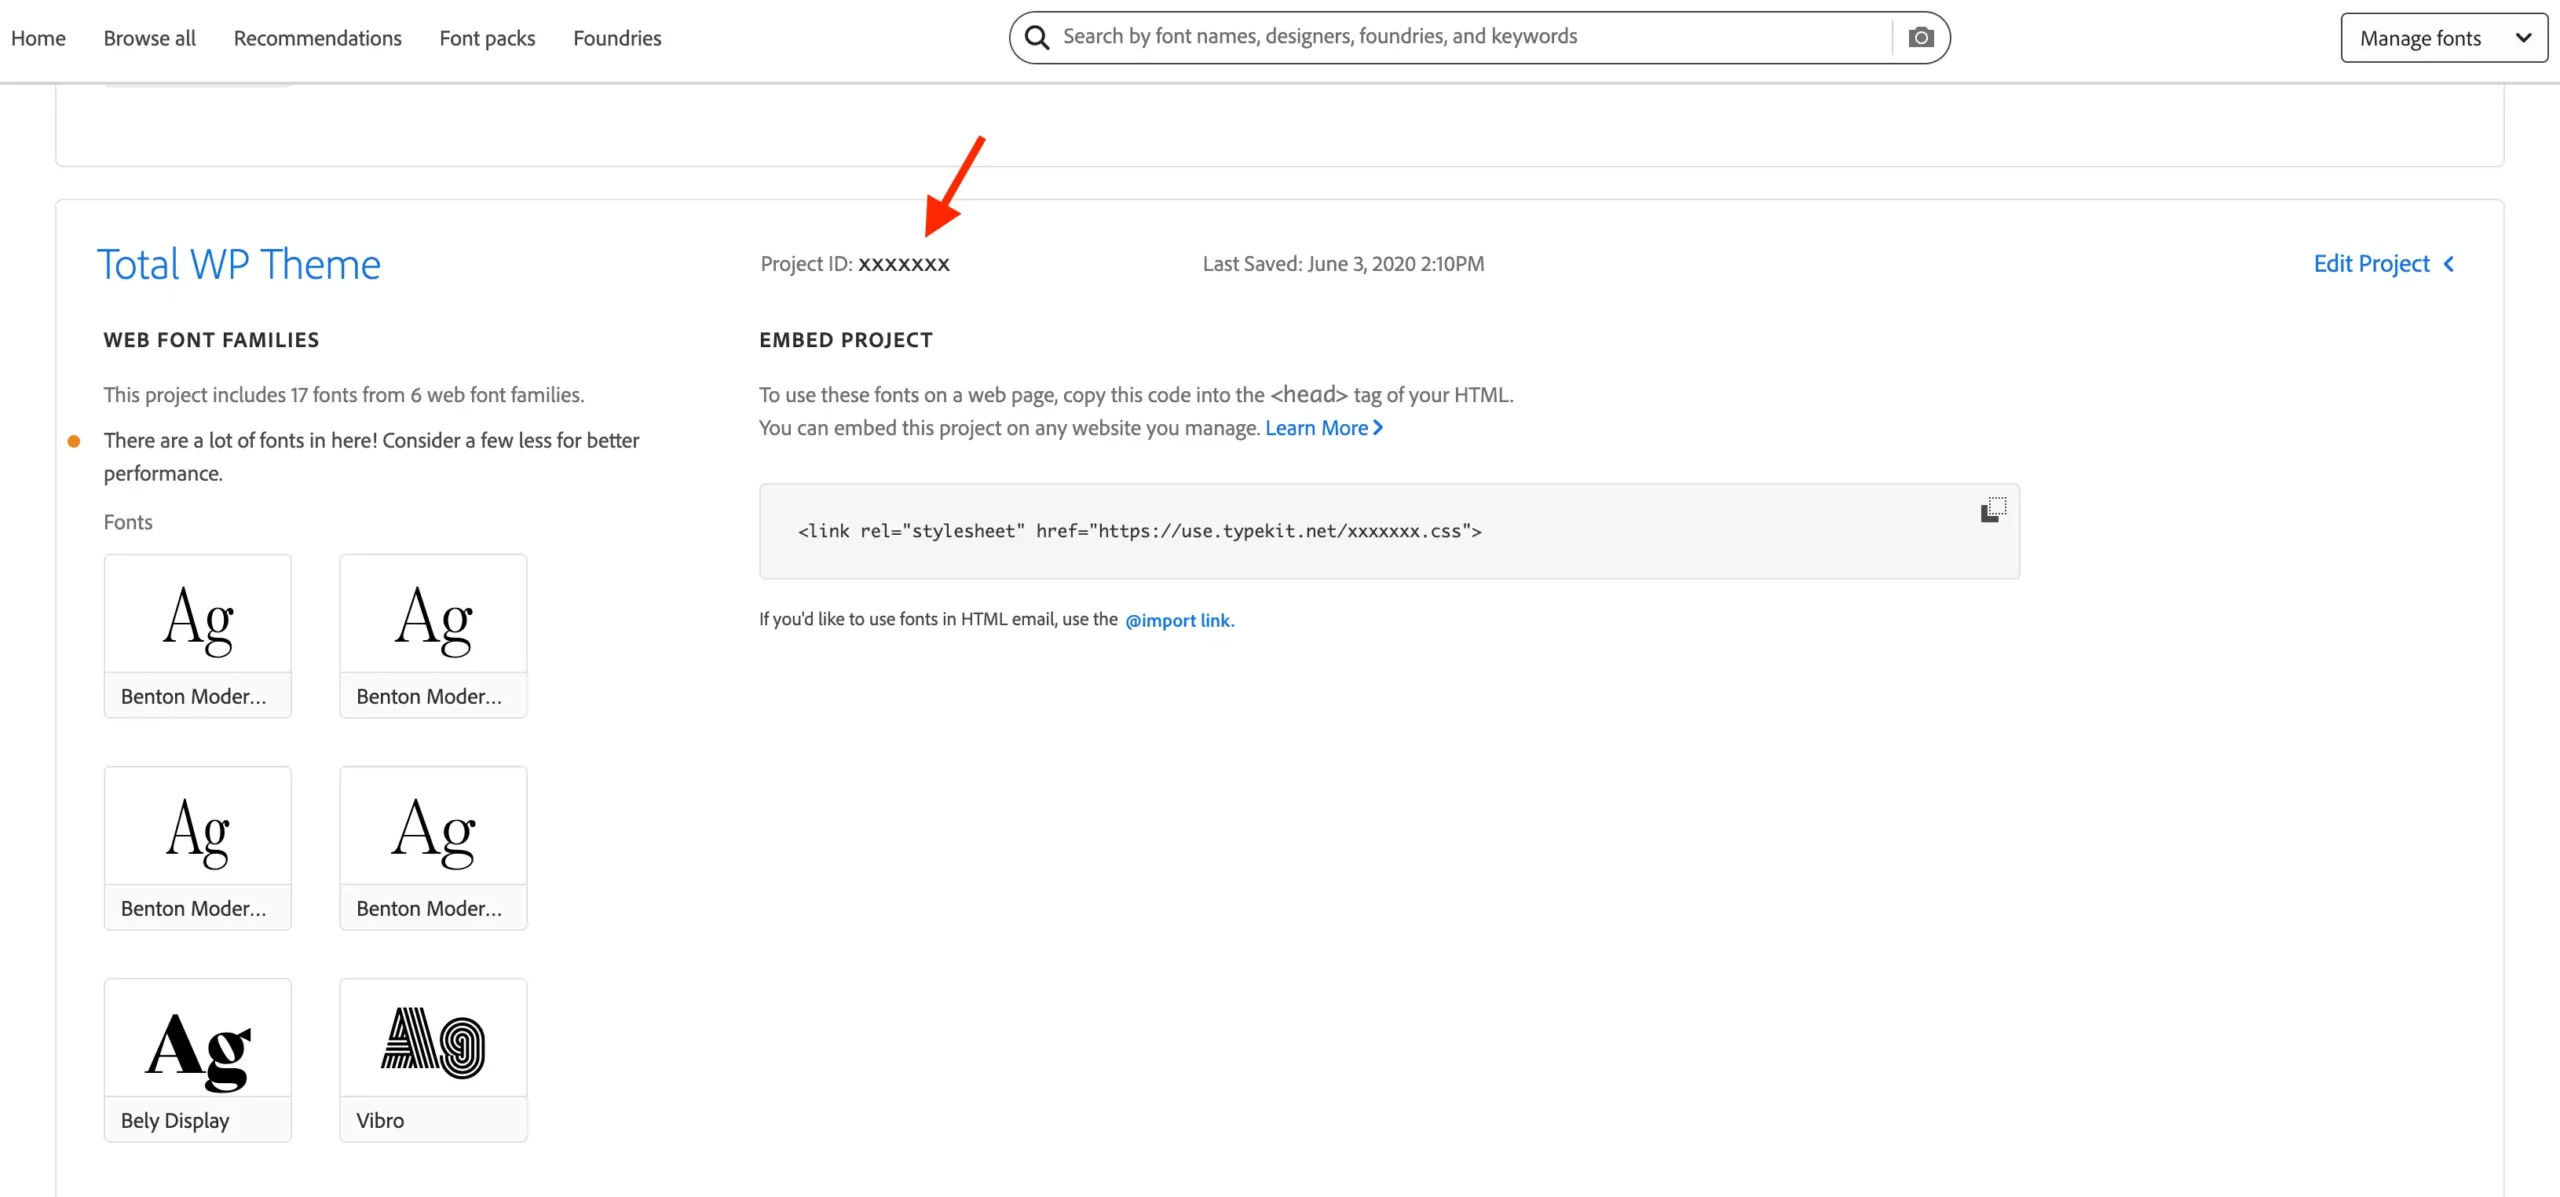
- Next to each project you will be able to locate the Project ID.
Step 2: Register Fonts in the Total Theme Font Manager
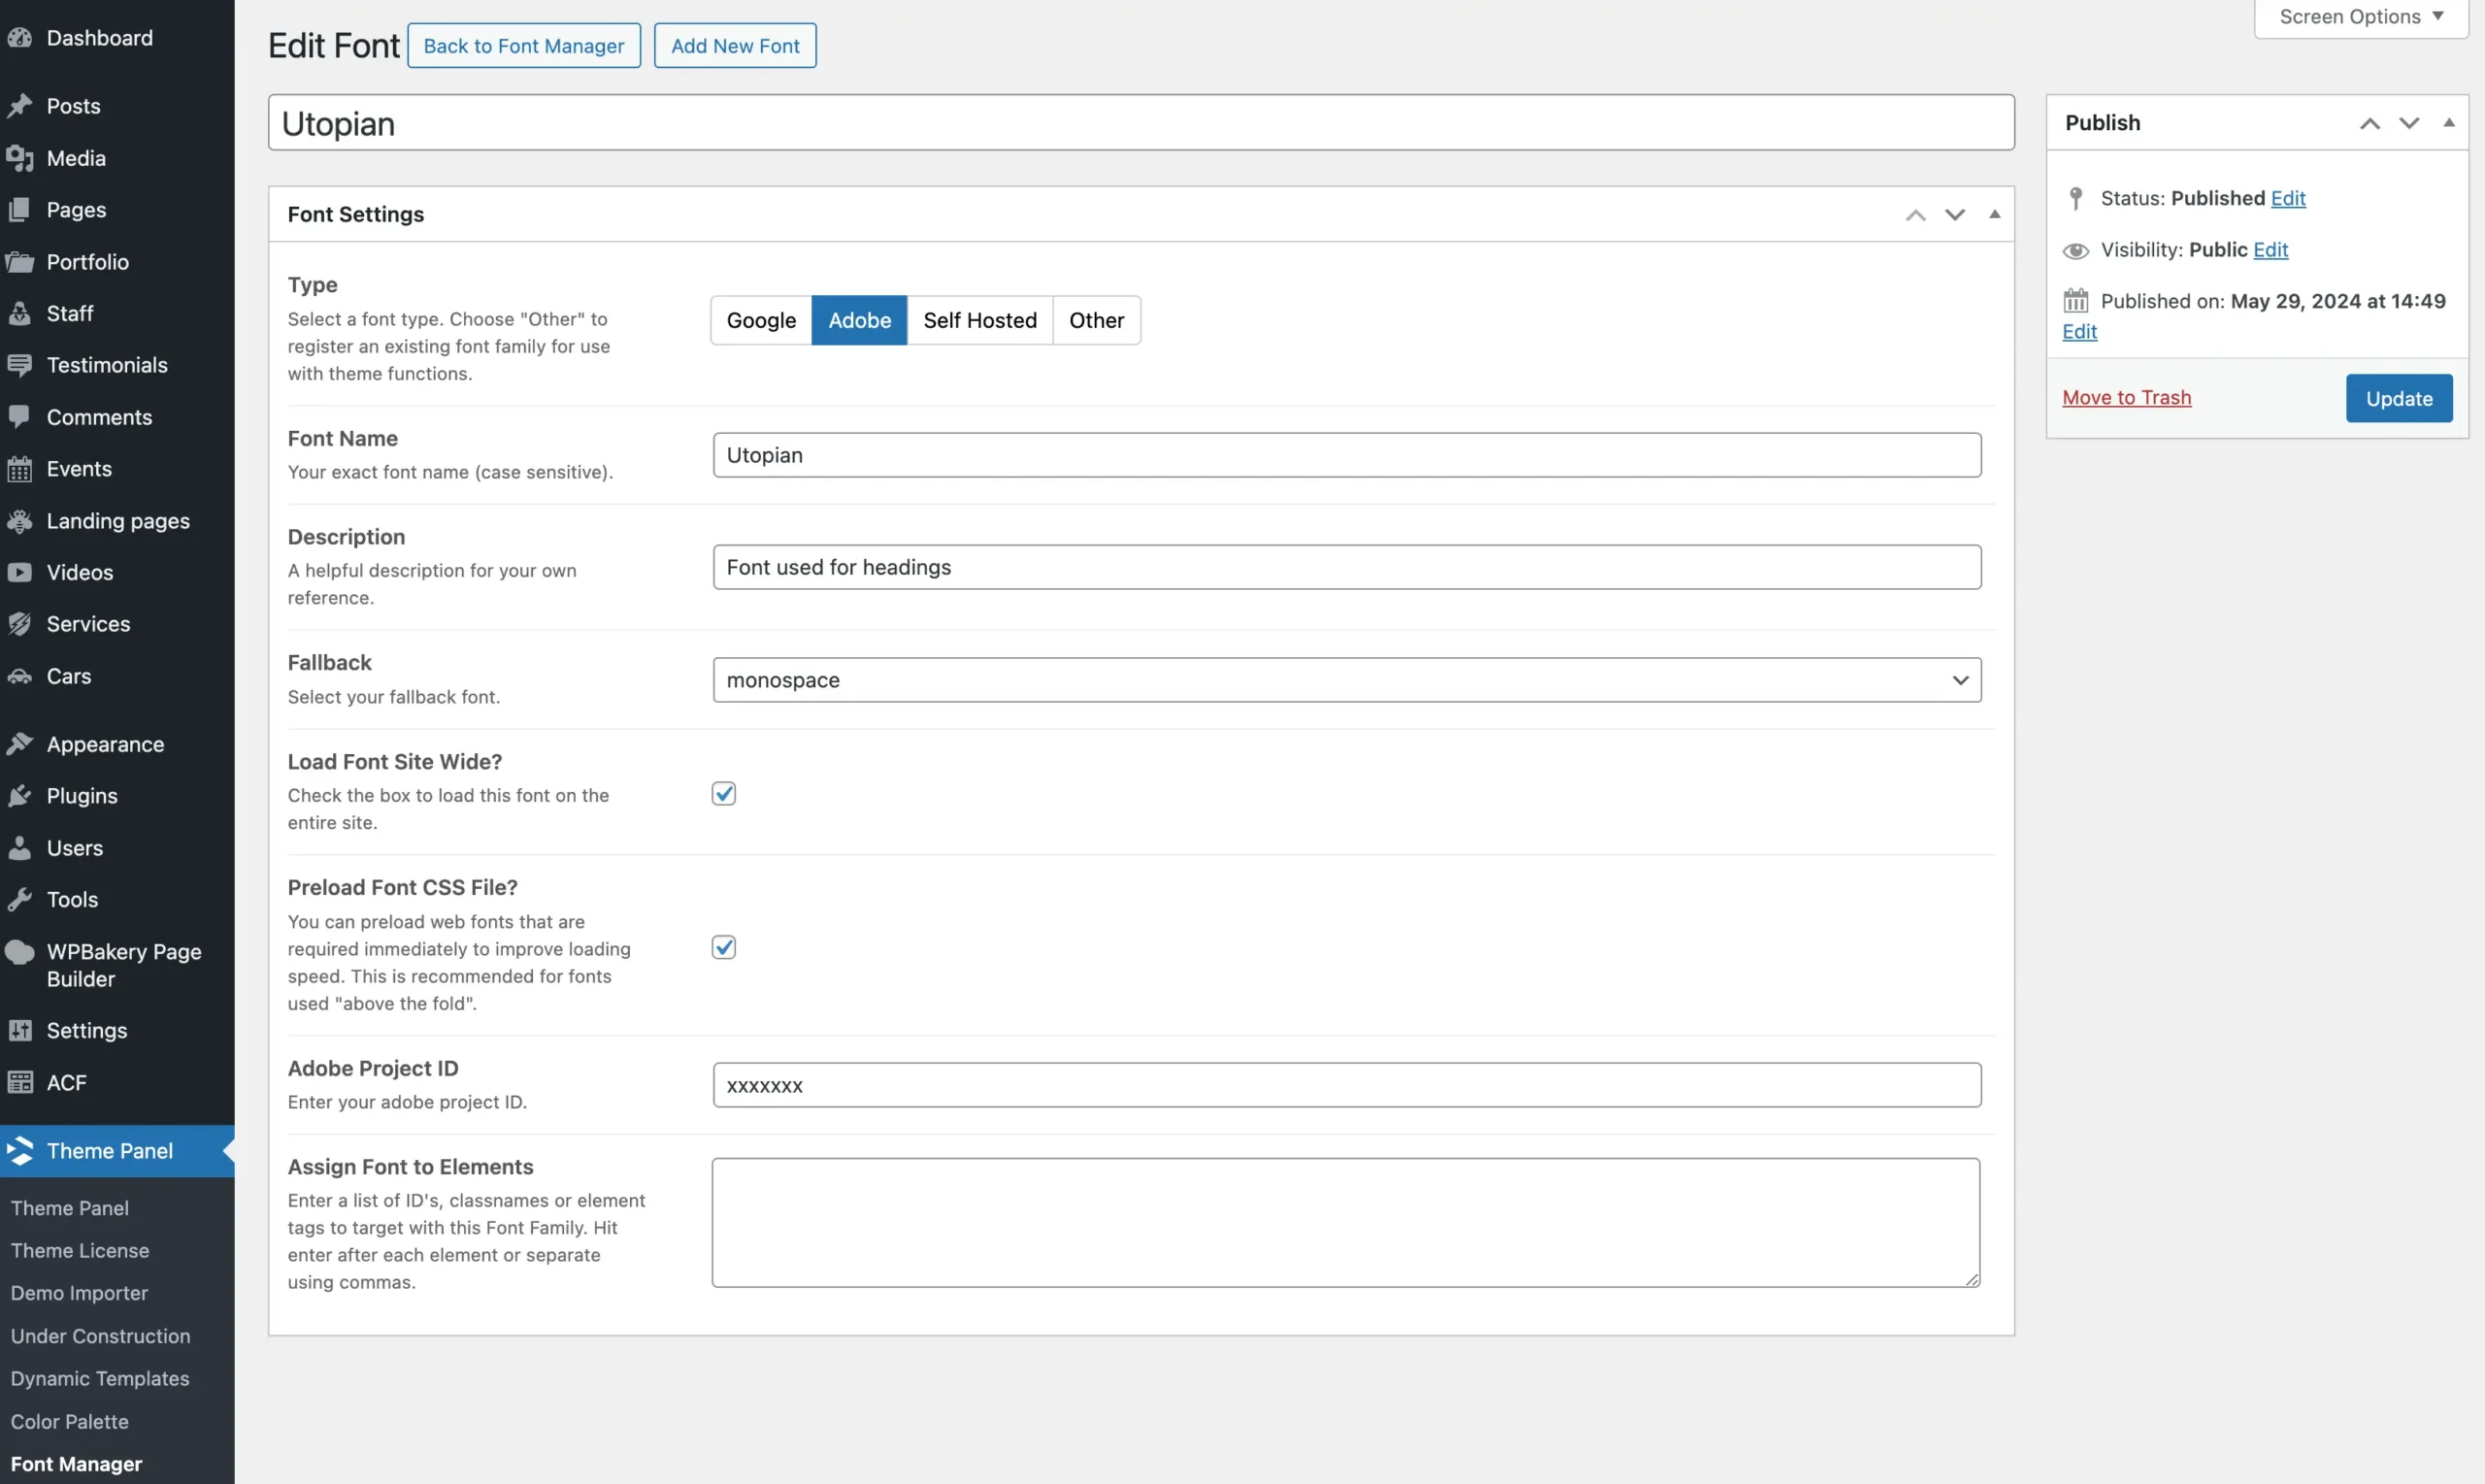
- In your WordPress dashboard, go to Theme Panel > Font Manager.
- Click Add New Font.
- Select Adobe for the font type.
- Enter the Font Family Name exactly as it appears in Adobe Fonts.
- Paste your Project ID into the corresponding field.
- Save your changes.
Once registered, your Adobe Fonts will be available for use in the theme’s typography settings, page builder elements, and customizer options.
Troubleshooting Adobe Font Issues
If you encounter any issues while registering or using your Adobe Fonts with the Total Theme Font Manager, don’t worry. Most problems can be resolved with a few simple checks. When you save a font, the theme automatically verifies the information and will display a notice at the top of the screen if there are any errors. If you don’t see this notice but the font still isn’t working correctly, proceed with the following troubleshooting tips to help resolve common issues:
- Double-check the font family names for typos or incorrect formatting.
- Ensure that the font family is included in the selected Adobe Fonts project.
- Clear your site and browser cache, then refresh the page.
- Confirm that your Project ID is entered correctly without extra spaces or characters.