This guide will walk you through creating stylish dropdown menu items with icons, headings and descriptions like the example below:

Adding Icons to Menu Items
If you aren’t sure how, start by reading the article on adding icons to your menu items. Essentially there are 2 options:
- Icon Select Option: Total includes a custom icon select right in the menu editor (non-customizer) so you can easily select your menu item icon.
- Shortcode: Alternatively you can use the icon shortcode in the text field (old way of doing things).
Showing Menu Item Descriptions
By default, the theme doesn’t show menu item descriptions in the standard site header to avoid potential conflicts. To enable, simply add the classname show-desc to any menu item to display its description.
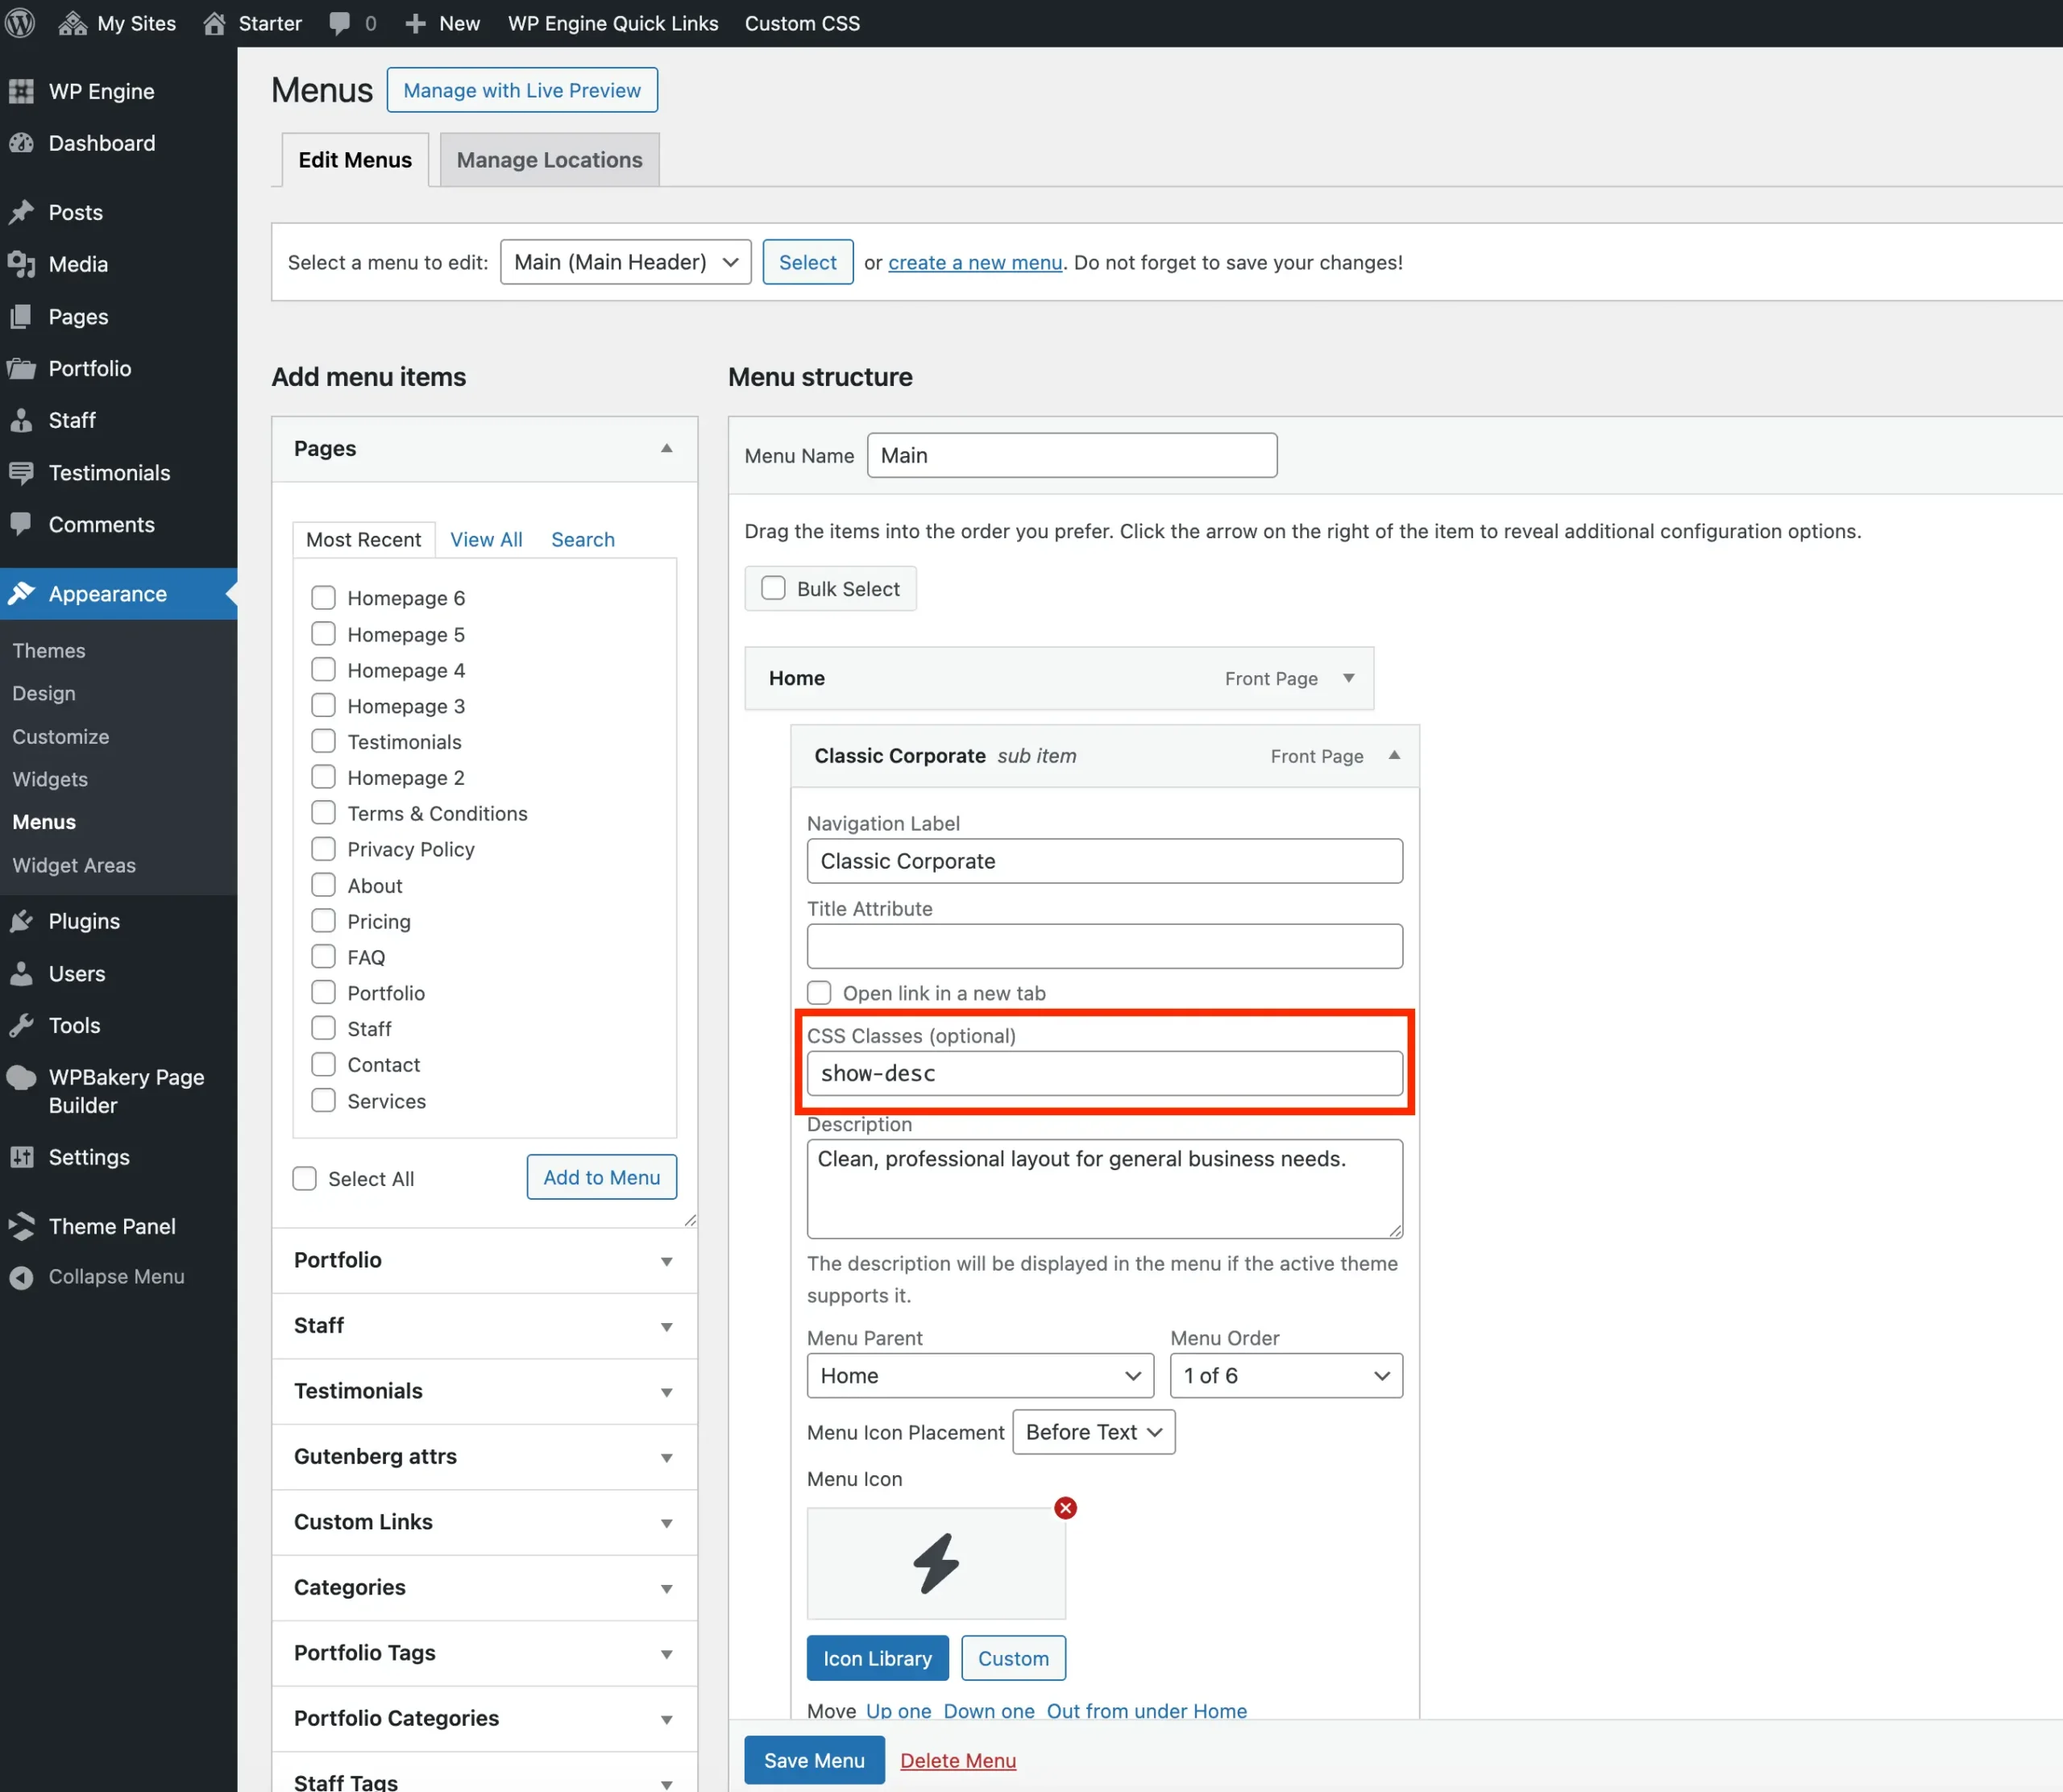
If you wish to hide it in the mobile menu you can also add the hide-desc-mobile classname. With this extra class added a simple icon + text will display in the mobile menu keeping things slimmer.
By default, the CSS Classes field in WordPress is disabled. To enable it, click Screen Options in the top-right corner of the screen and check the box next to CSS Classes.
Custom Styles for Headings and Descriptions
By default, menu headings and descriptions inherit the same colors as other menu items for consistency. Headings are displayed in bold, while descriptions use the wpex-text-sm class.
If you want to style them differently, you can do so with a bit of custom CSS. Below is a sample snippet with the correct selectors that you can copy:
#site-navigation .sub-menu .menu-item-icon { color: purple; }
#site-navigation .sub-menu .menu-item-heading { color: red; }
#site-navigation .sub-menu .menu-item-desc { color: green; }