The Font Manager, included with the Total WordPress Theme Core plugin, makes it easy to add custom fonts to your website. Once added, these fonts can be used throughout the theme’s Customizer settings and builder elements.
You can register font families from a child theme, integrate Adobe Fonts (formerly Typekit), add Google Fonts, or upload your own custom font files directly.
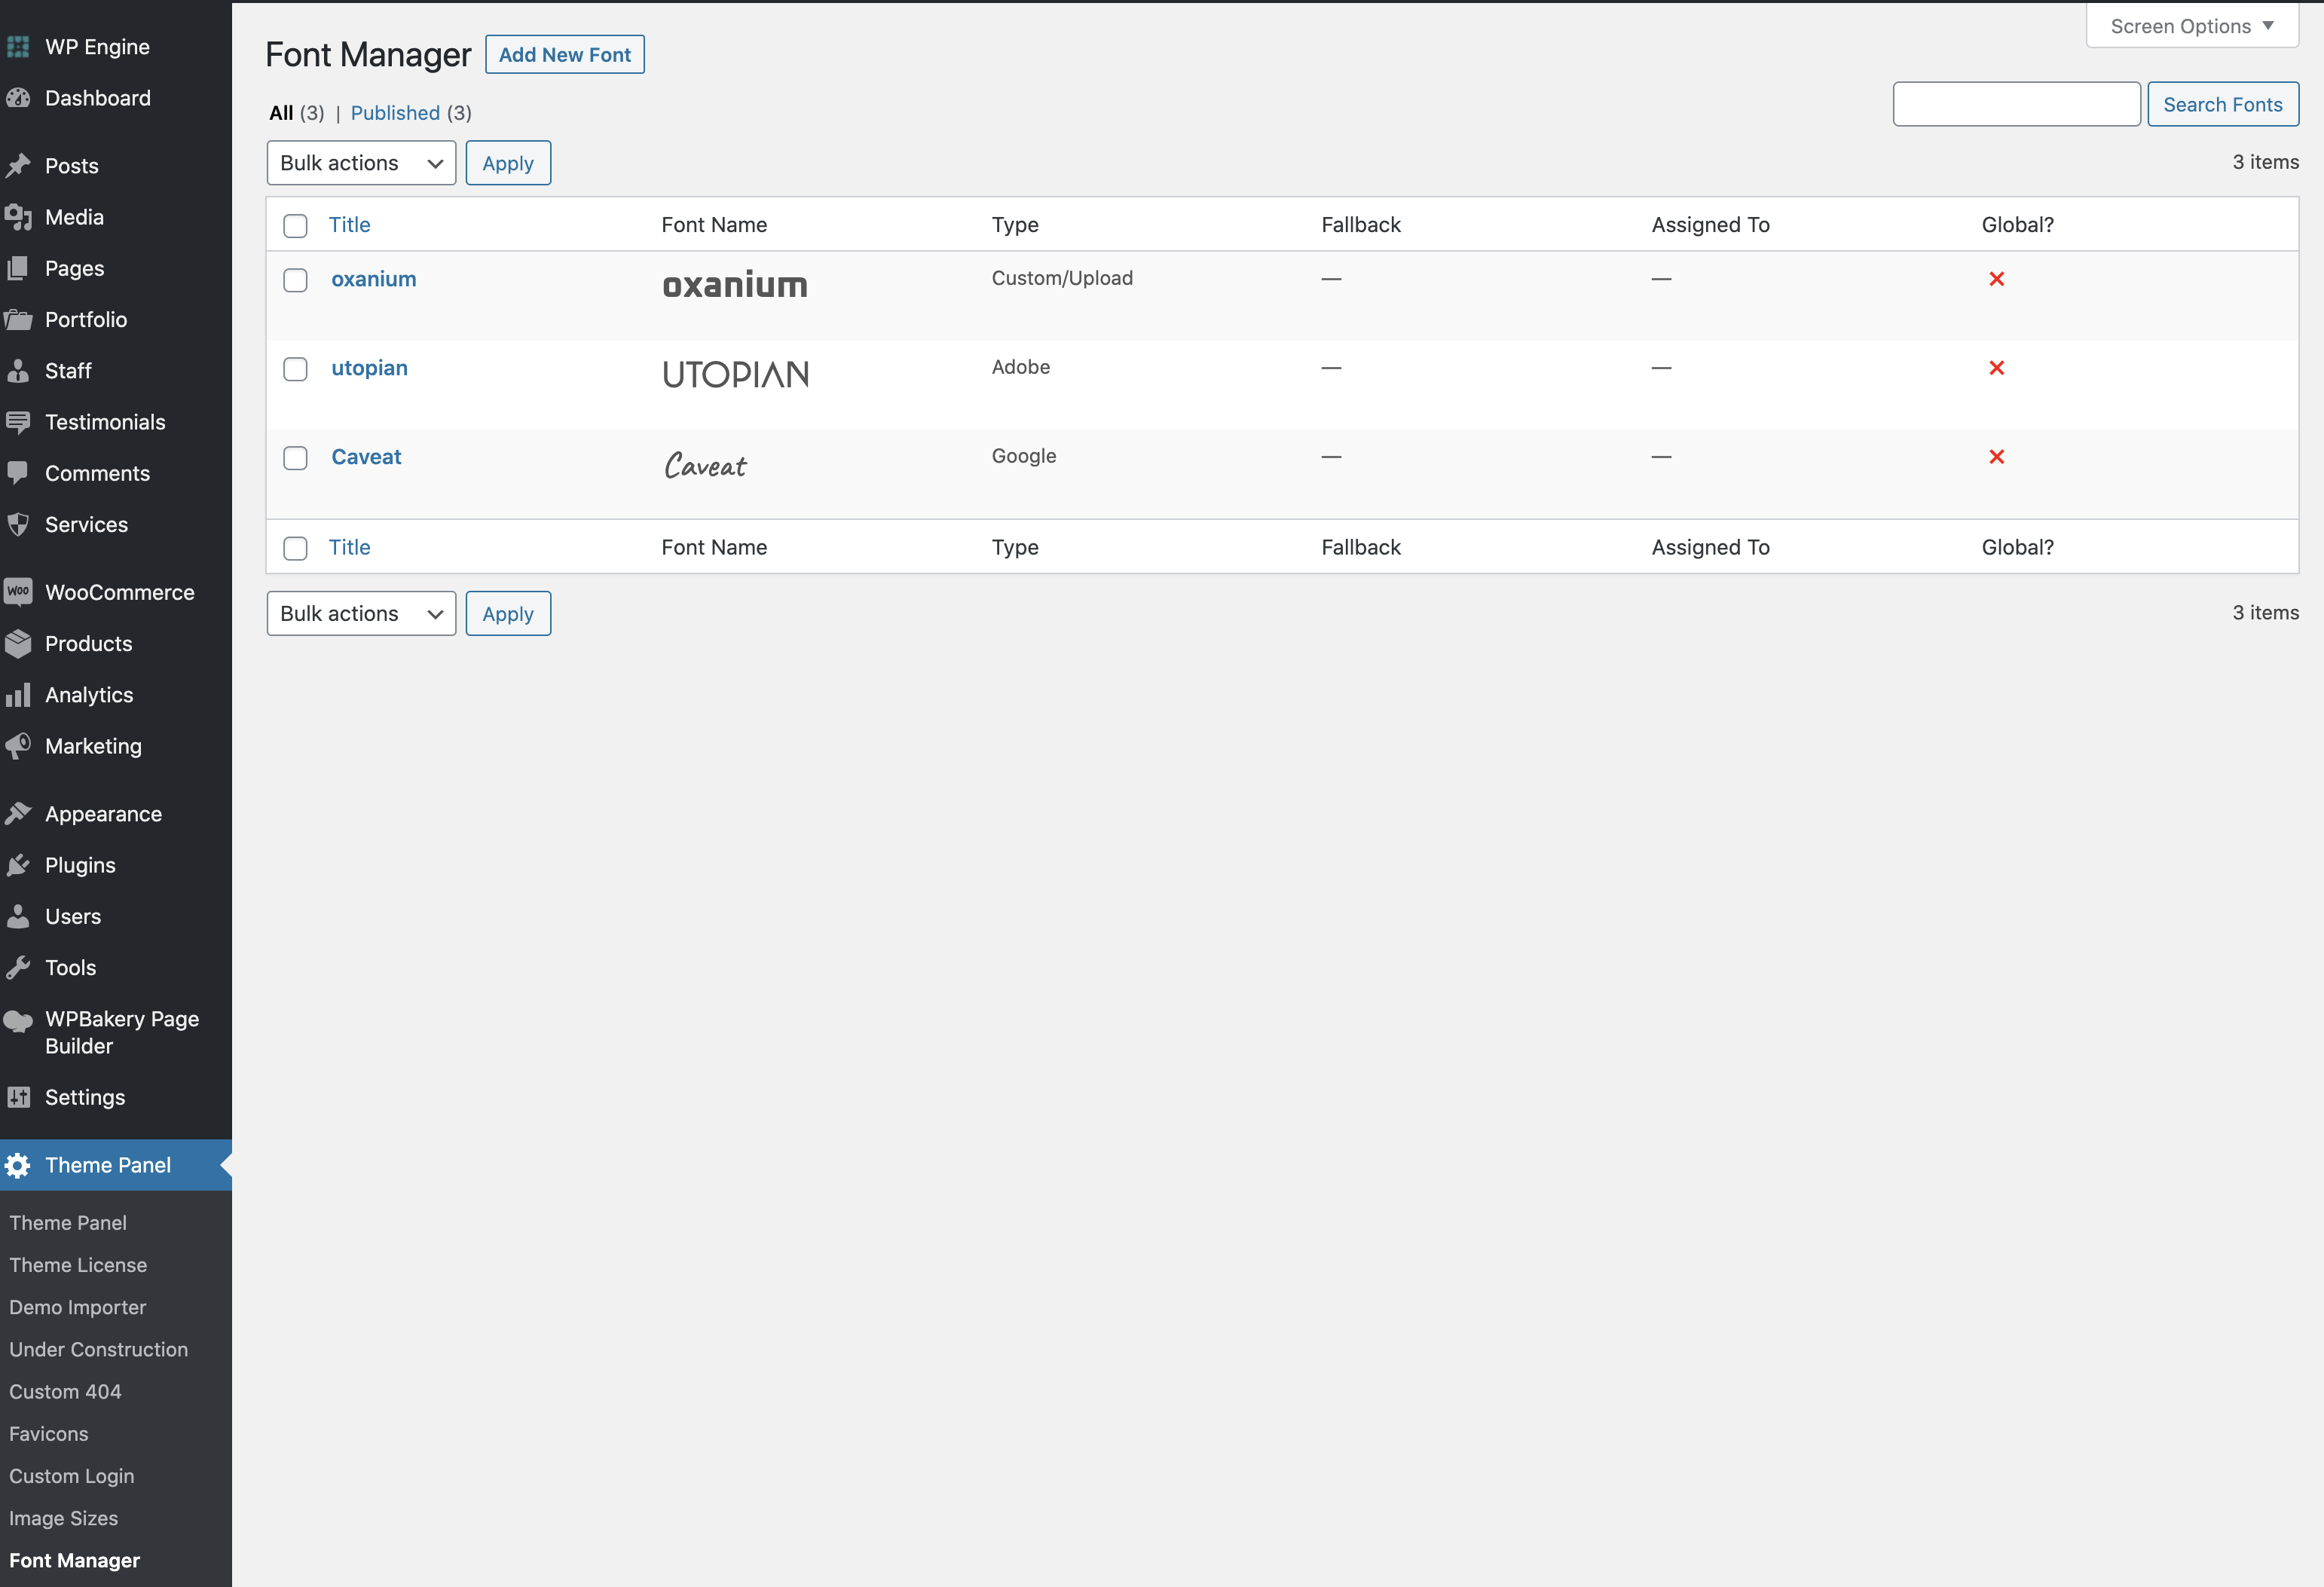
How to Register Fonts in the Font Manager
To make your custom fonts available throughout the Total Theme, you’ll need to add them using the built-in Font Manager. This tool allows you to register fonts from various sources, including Google Fonts, Adobe Fonts, custom uploads, or fonts already loaded through a child theme. Follow the steps below to add a new font:
- Go to Theme Panel > Font Manager in your WordPress dashboard.
- Click on Add New Font.
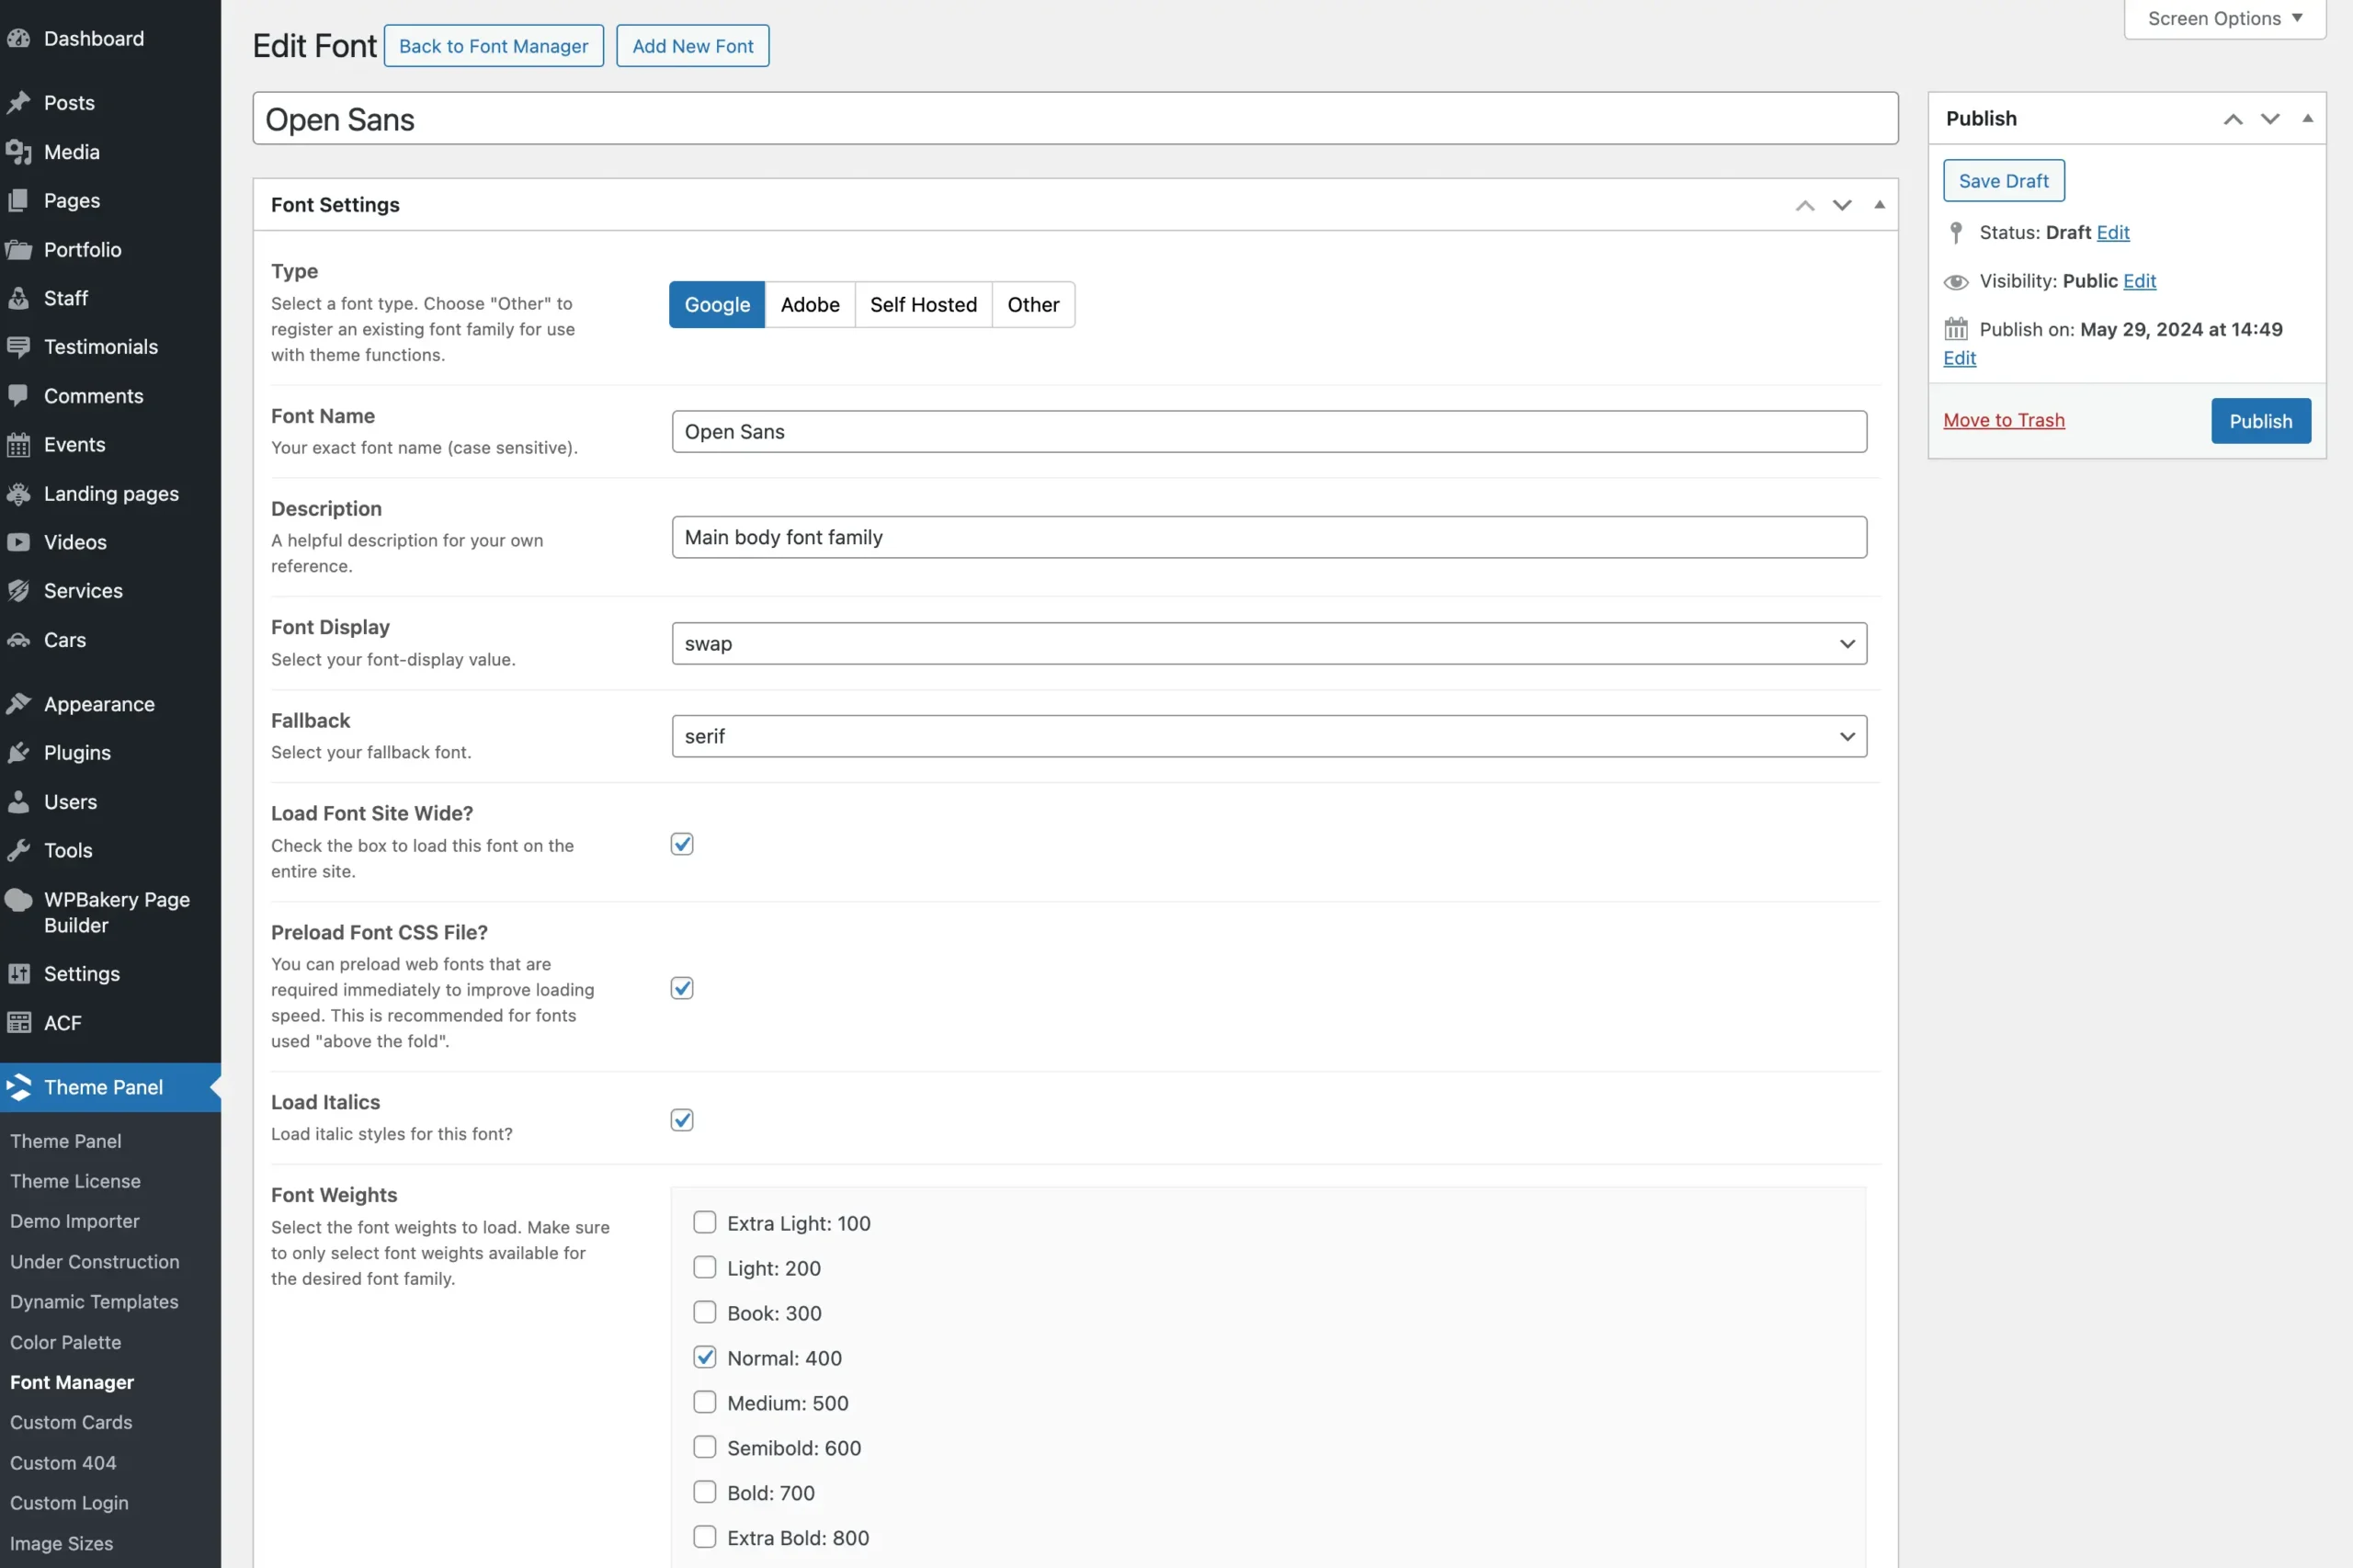
- Choose a Type (Google, Adobe, Self Hosted, or Other).
- Fill in the required details based on the selected type.
- Click Save to register the font.
Once saved, your font will be available in the theme’s Customizer typography settings and builder elements.
When you add fonts using the Font Manager, the theme will remove the default Google Fonts from the Customizer and builder elements. This helps streamline your font choices and improve site performance by only displaying the fonts you have registered.
If you want to continue using a Google Font that was previously selected, simply add that font to the Font Manager as well. This will ensure it remains available for your site’s typography settings.
Font Types
You can choose from various font types when adding a new font:
| Type | Description |
|---|---|
Google | Register a custom font from the Google Fonts API. |
Adobe | Register a font from an Adobe Fonts Project. |
Self Hosted | Register a web font that has been uploaded to the WordPress media library. |
Other | Register a font already loaded on the site via a child theme, plugin, or other method. This option simply makes the font available for selection. |
Tips for Registering and Using Fonts
To maintain good performance and a consistent design, it’s best to register only a few core fonts. In most cases, one sans-serif font and one serif font are enough to create a clean and professional look across your site. To help keep things optimized, the theme does not load registered fonts until they are actually used on a page.
When applying fonts, try to define them in only a few key places. While the theme gives you full control to assign custom font families in various Customizer settings and individual elements, overusing this flexibility can make future design updates more difficult.
We recommend starting with the basics: set your primary body and heading font families under Customizer > Typography. This approach provides a solid foundation for your site’s typography. If you need to use a different font for specific standout headings or sections, you can override it within the individual Heading element settings.

Recommendations
- Register only the fonts you actually plan to use to keep your site lean and fast.
- Most sites work well with just two fonts: one sans-serif and one serif (headings and body font)
- Set your global font families (body and headings) under Customizer > Typography.
- Avoid setting fonts in too many individual elements, as it can make future updates harder.
- Preload fonts to improve loading speed and rendering (see next section).
Preload Fonts to Improve Speed
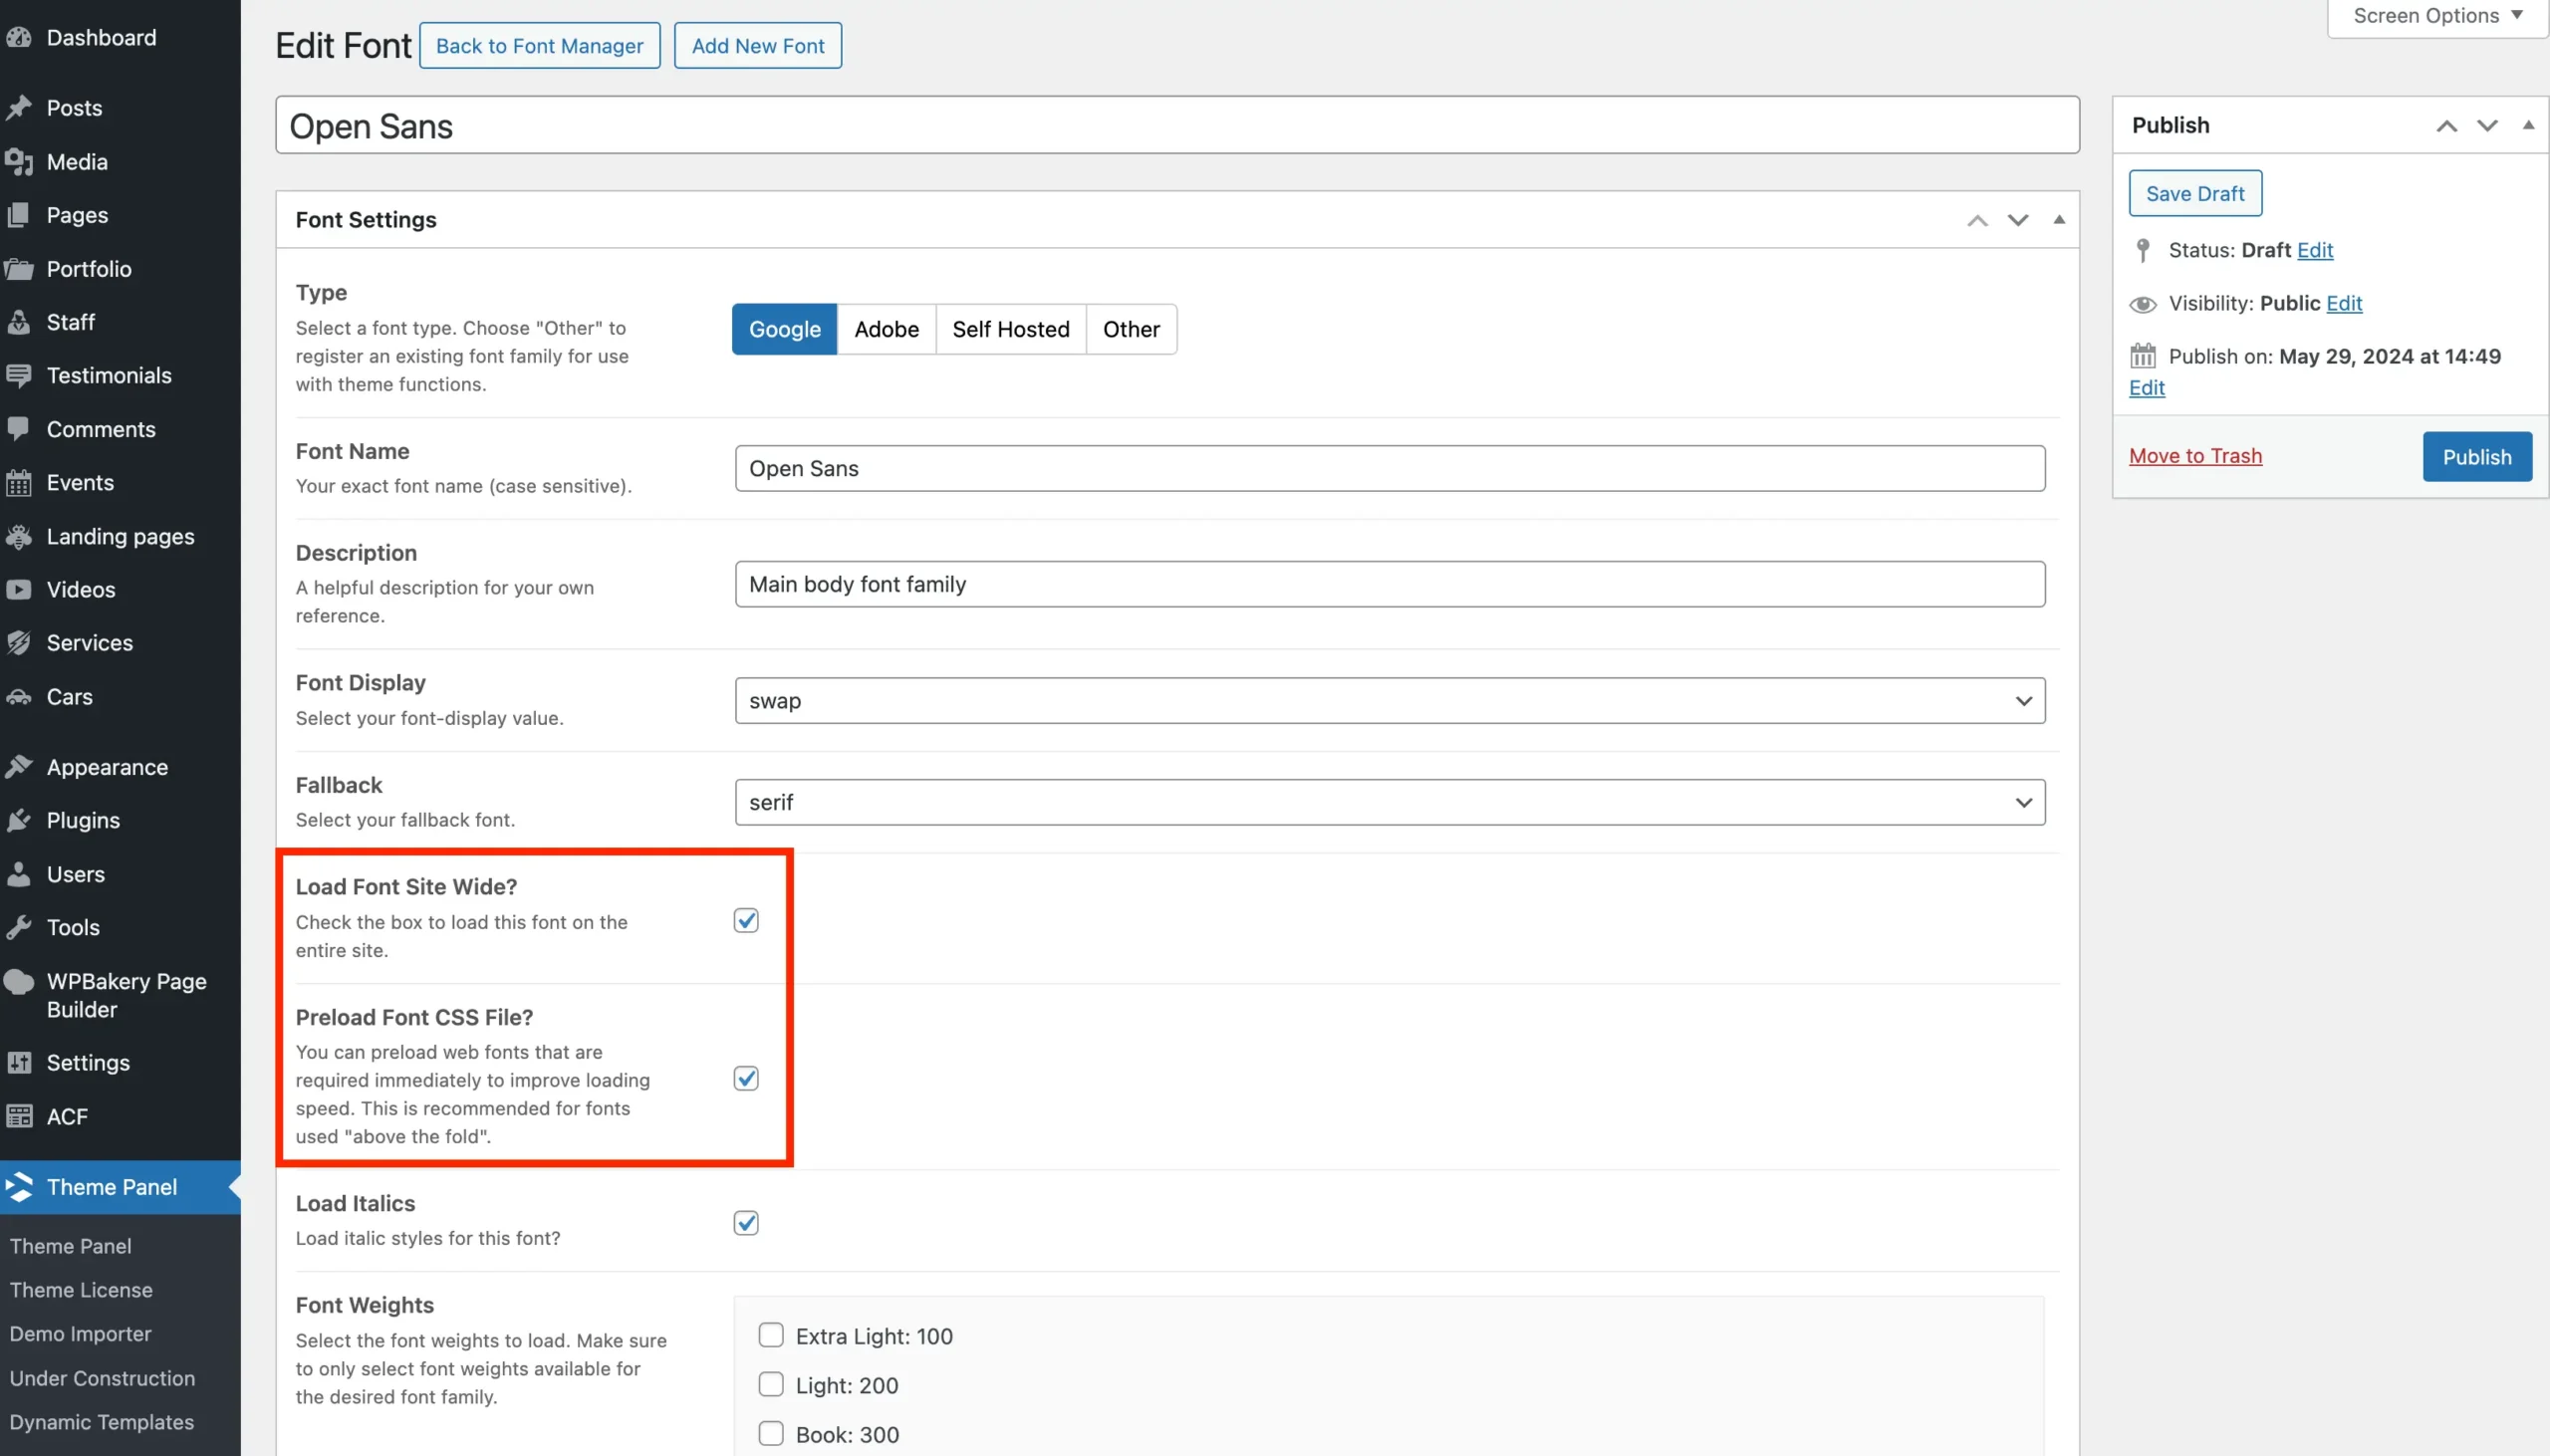
Preloading fonts is a modern technique to improve loading speed and font rendering. If you are using a custom font, you can enable this for Google, Adobe and Select Hosted Fonts.
If you are using a Google or Adobe Font, you will need to enable it globally first by checking the Load Font Site Wide field. This will make the preload checkbox available.
For self-hosted fonts, you need to enable the preload option individually for each font file. This lets you selectively preload only the font weights or styles you actually use, helping to optimize your site’s performance.
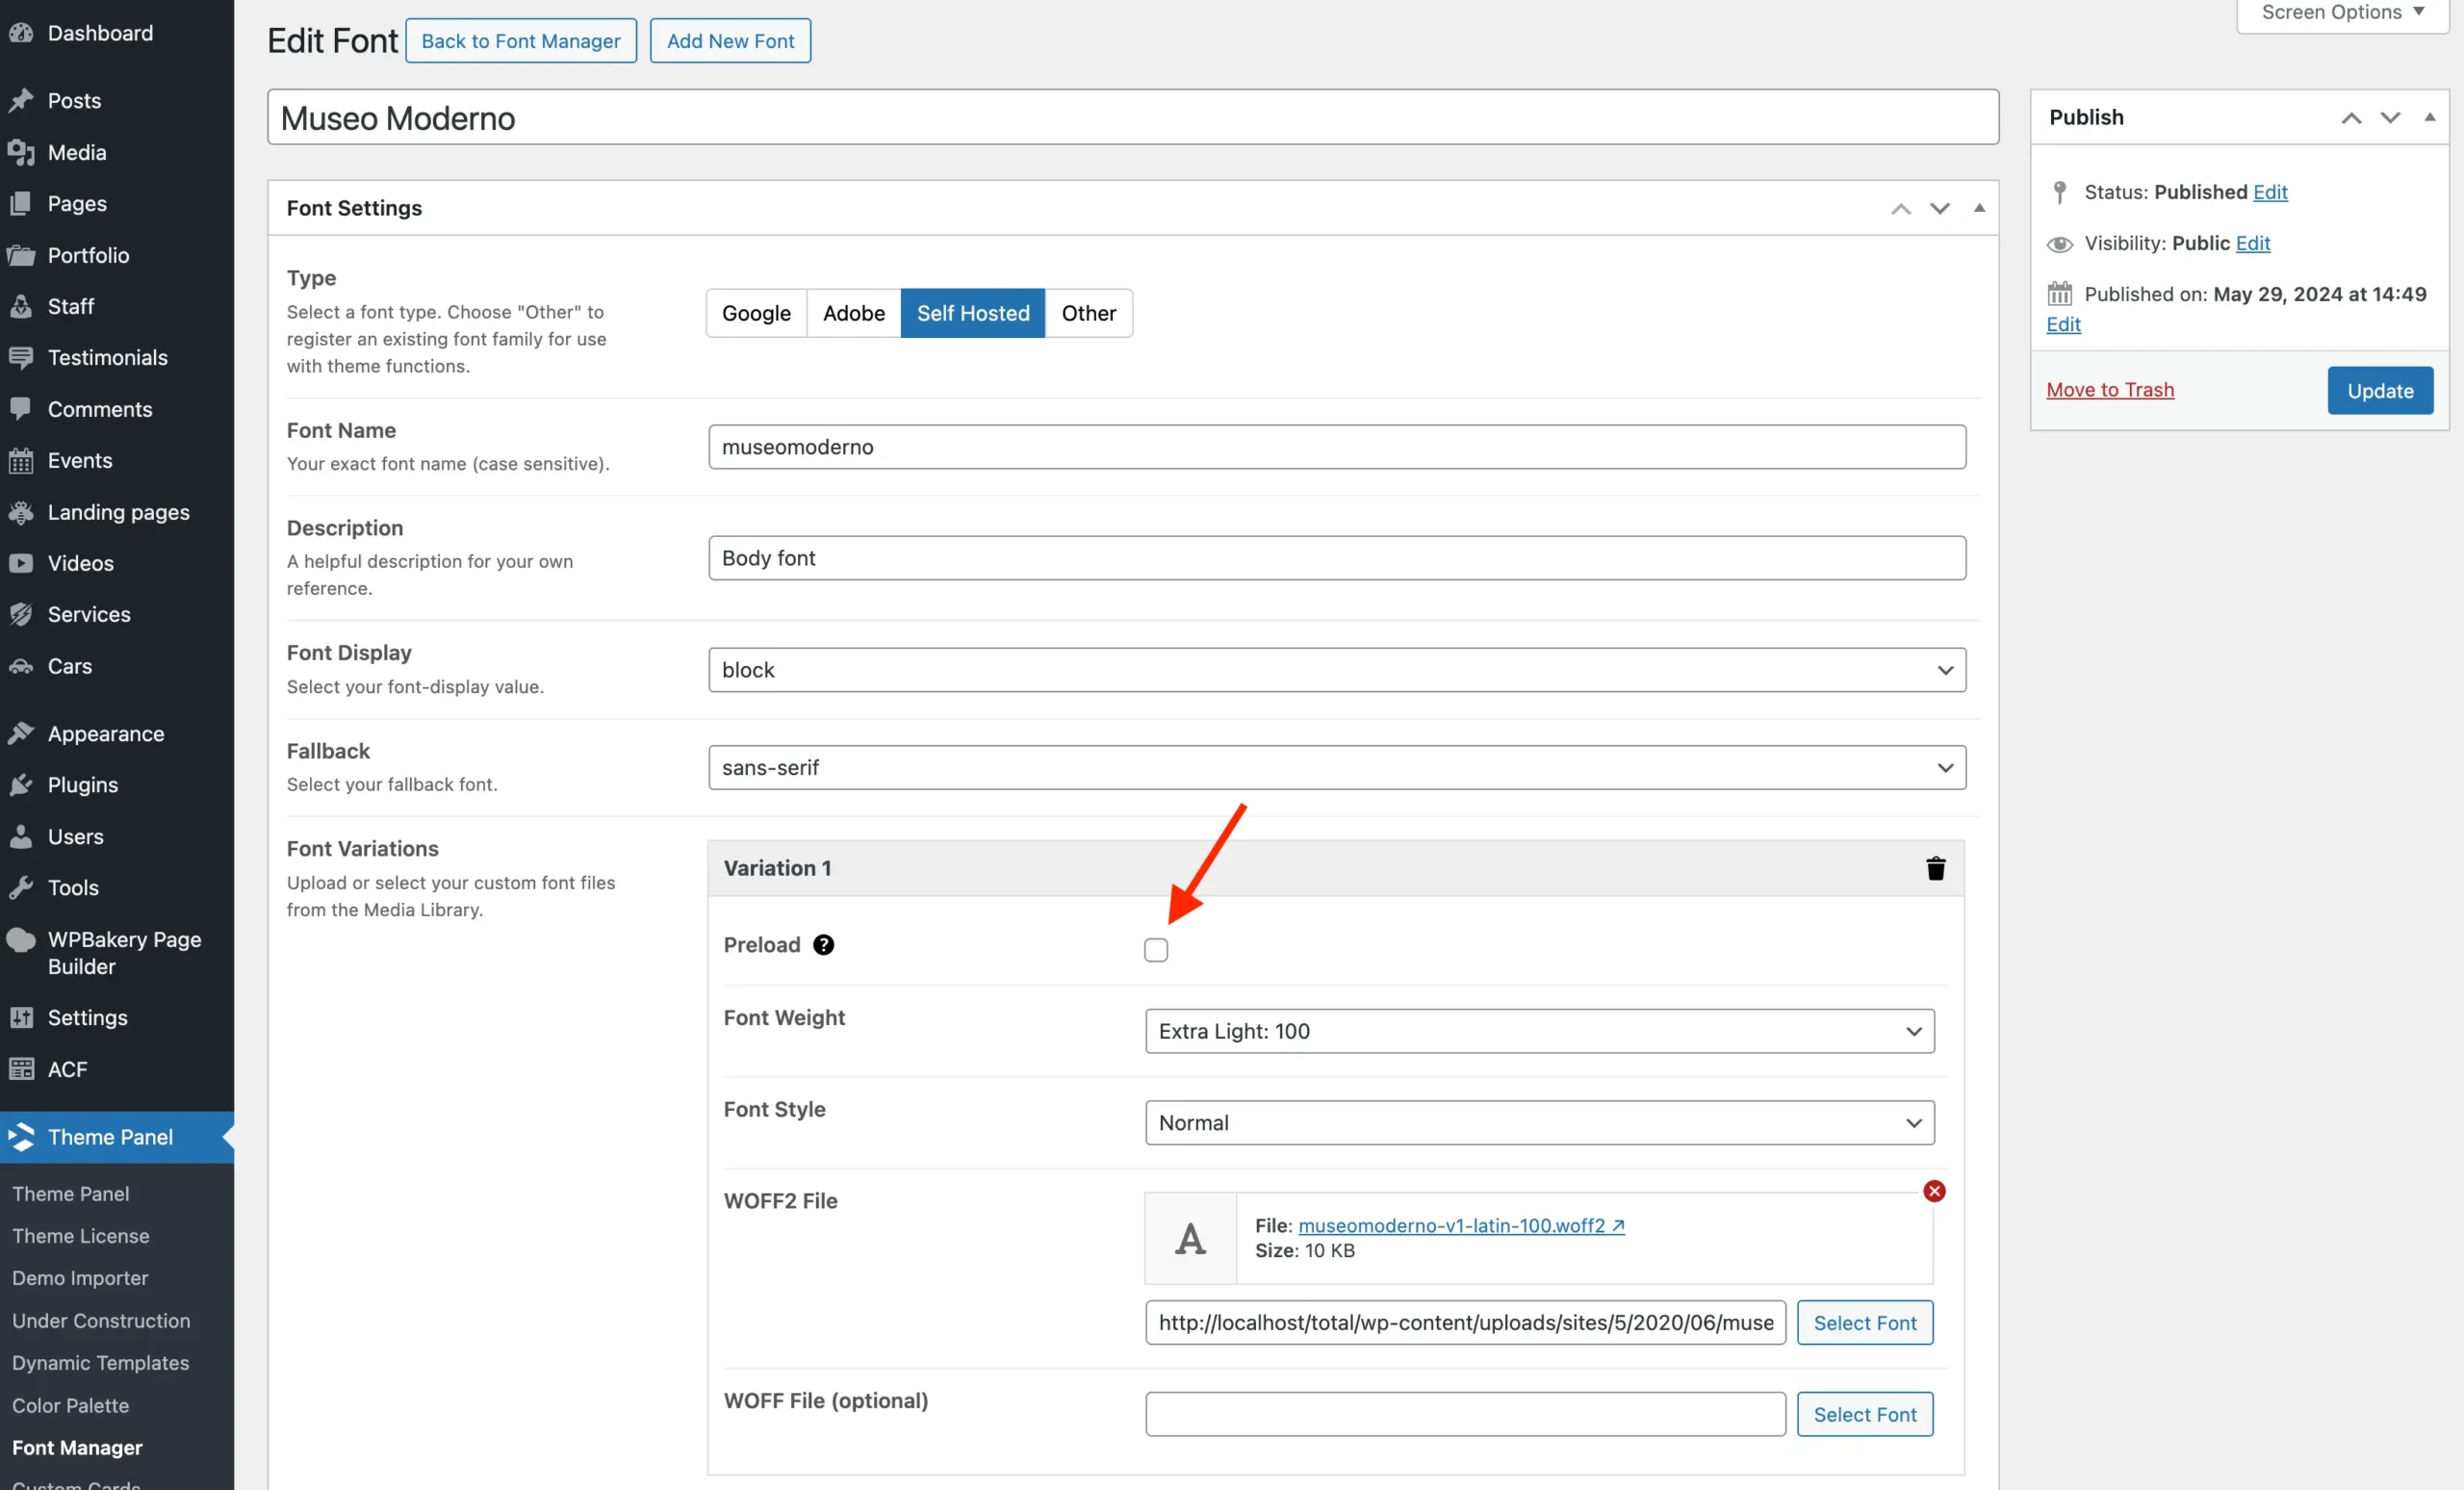
Self-Hosted Google Fonts
If you want to self-host your Google Fonts, you can do so by adding a new font in the Font Manager and selecting the Self Hosted option to upload the font files manually.
While Google Fonts allows you to download font files (typically in TTF format), it does not provide web-ready formats like WOFF2 directly. To properly self-host these fonts on your site, you will need to convert the downloaded files from the official Google Fonts site into web-friendly formats. Alternatively you can use a helpful third-party tool called Google Webfonts Helper to download web-ready Google Fonts files for self-hosting.
Because of potential security and licensing concerns, the theme does not include automatic Google Fonts downloads or conversions.
Variable Fonts – Coming Soon!
We are working on a method for defining variable fonts in the Font Manager! For the meantime you could always add these to your child theme and then use a simple snippet to make your fonts available for selection in the customizer or in theme elements – view docs.