The Grid Container element allows you to easily create grids using various builder elements without needing to manually set up rows and columns.
It is especially useful when adding a grid of items inside a column, as it removes the need for inner rows and columns. The Grid Container uses modern CSS grid styles, and any elements placed inside will have equal height by default.
The screenshots below display the Front End WPBakery page builder. Because of certain WPBakery limitations, the editor view may look different, so always save your work and check the live site to see the final result.
How to Add a Grid Container
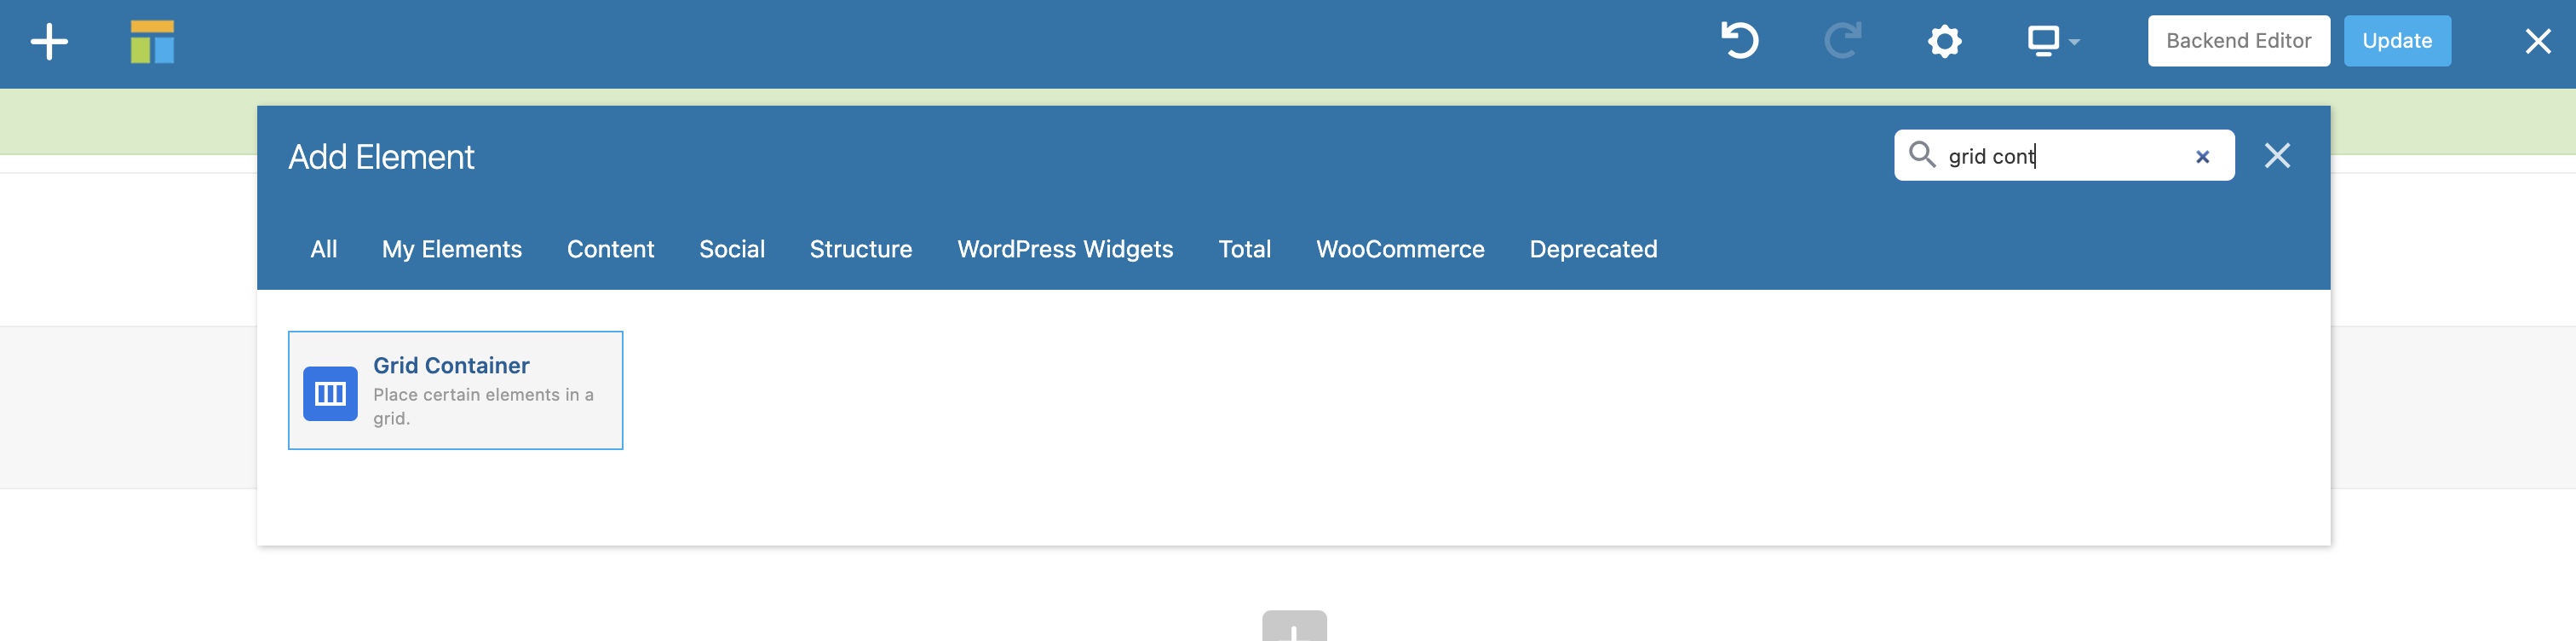
To get started, open the WPBakery Page Builder, click the Add Element button, then search for and insert the Grid Container element anywhere on the page.
Add Elements to the Grid Container
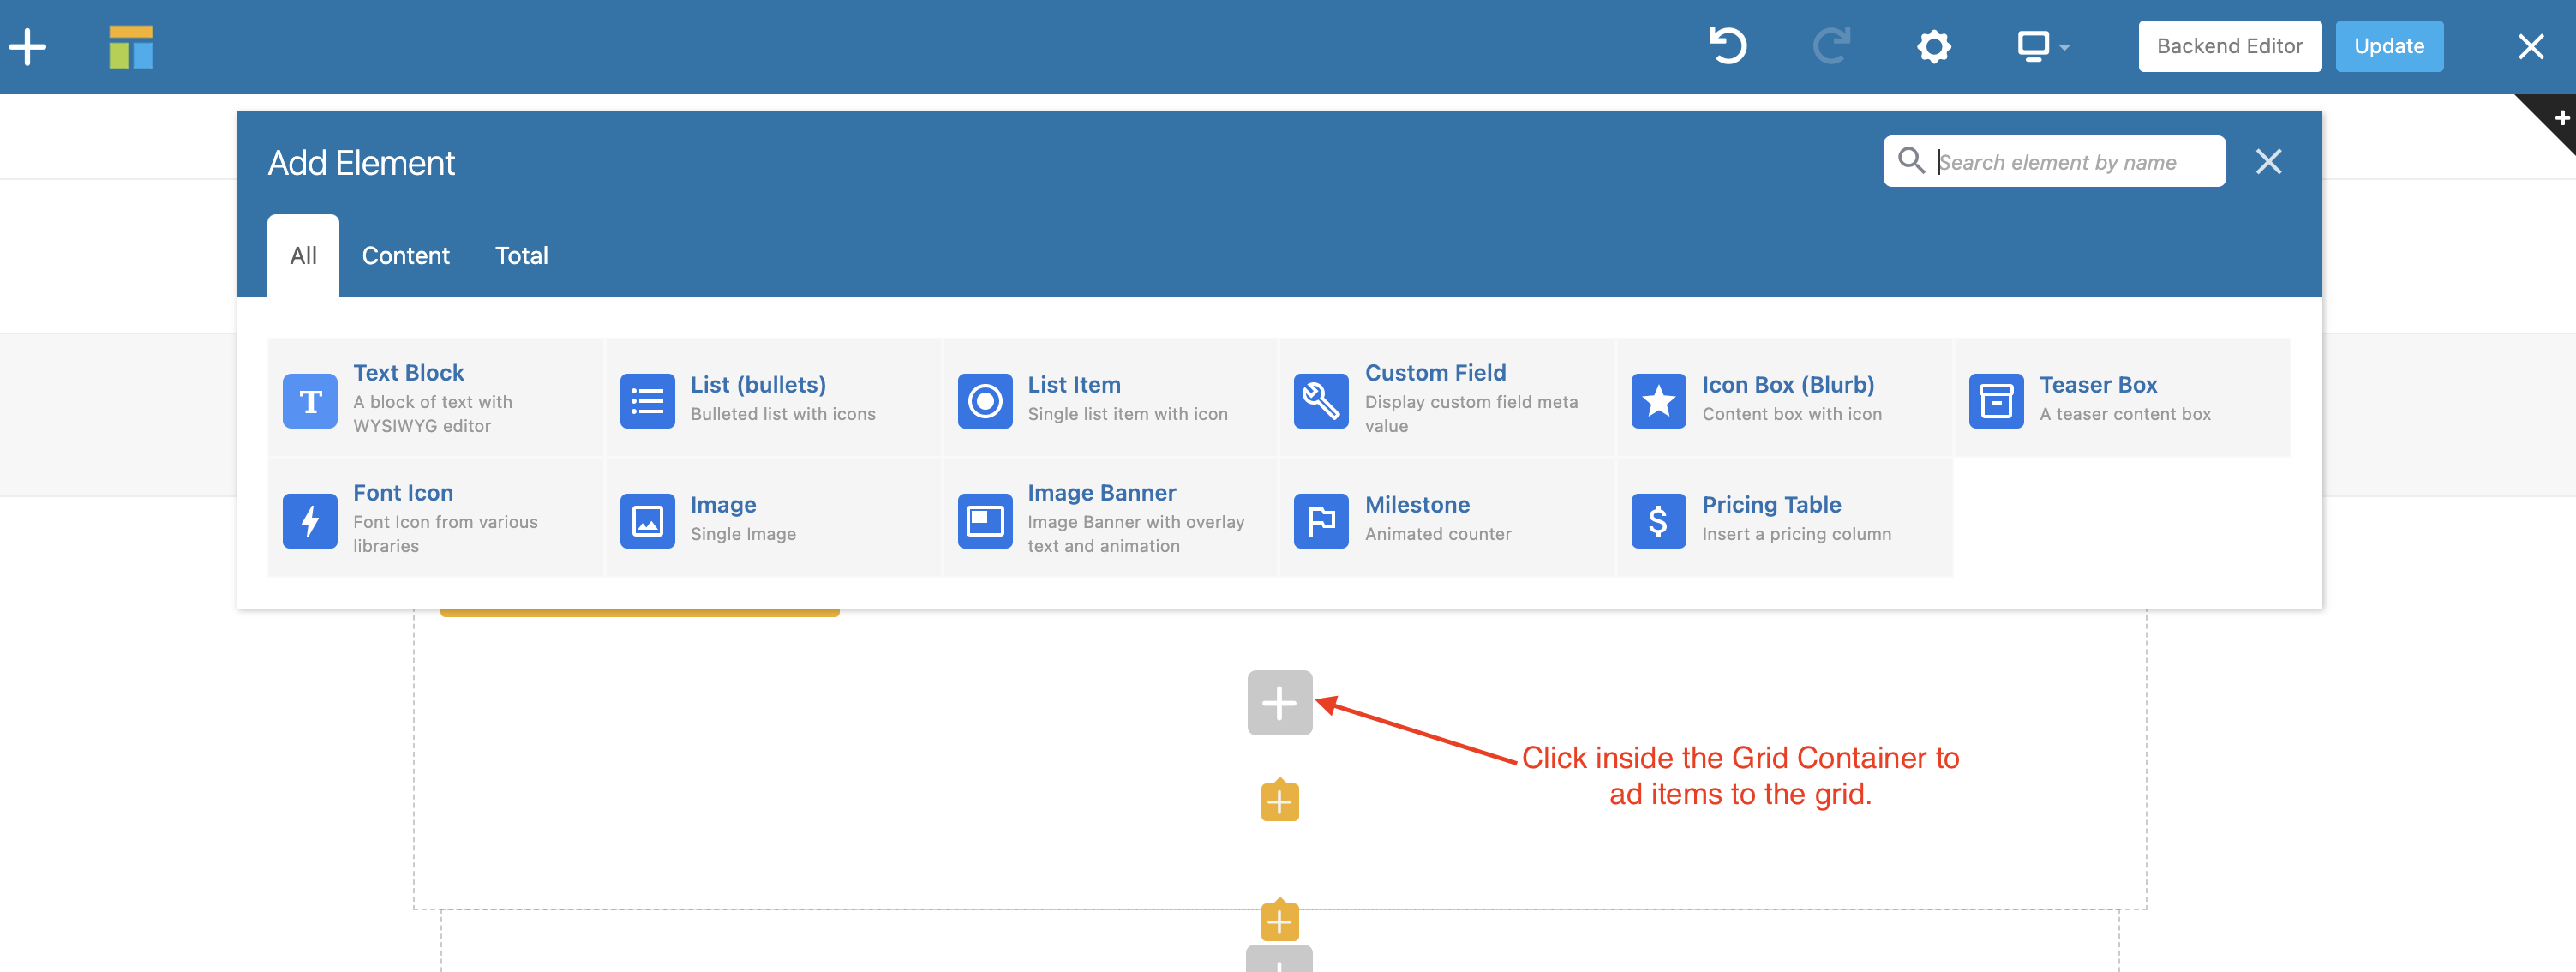
After adding the Grid Container to the page, you will see a gray plus icon that you can click to add elements inside the container.
The Grid Container Only Allows Certain Elements
To keep things streamlined and prevent bugs, only specific elements can be added inside the Grid Container. For example, adding a grid within a grid is not supported.
If you want to enable additional elements that aren’t allowed by default, you can use the vcex_grid_container_allowed_elements filter. Here is a sample snippet you can use:
// Add new elements to the Grid Container allowed list
add_filter( 'vcex_grid_container_allowed_elements', function( $allowed_elements ) {
    // Parse the comma-separated string into an array
    $elements = wp_parse_list( $allowed_elements );

    // Add a new element to the list
    $elements[] = 'vcex_star_rating';

    // Convert the array back to a comma-separated string
    return implode( ',', $elements );
} );
Note: WPBakery uses a comma-separated list to define which elements can be added inside container-type elements. In the sample snippet, we convert this list into an array using wp_parse_list, add our custom element, and then convert it back to a string. This makes the list easier to work with and modify programmatically.
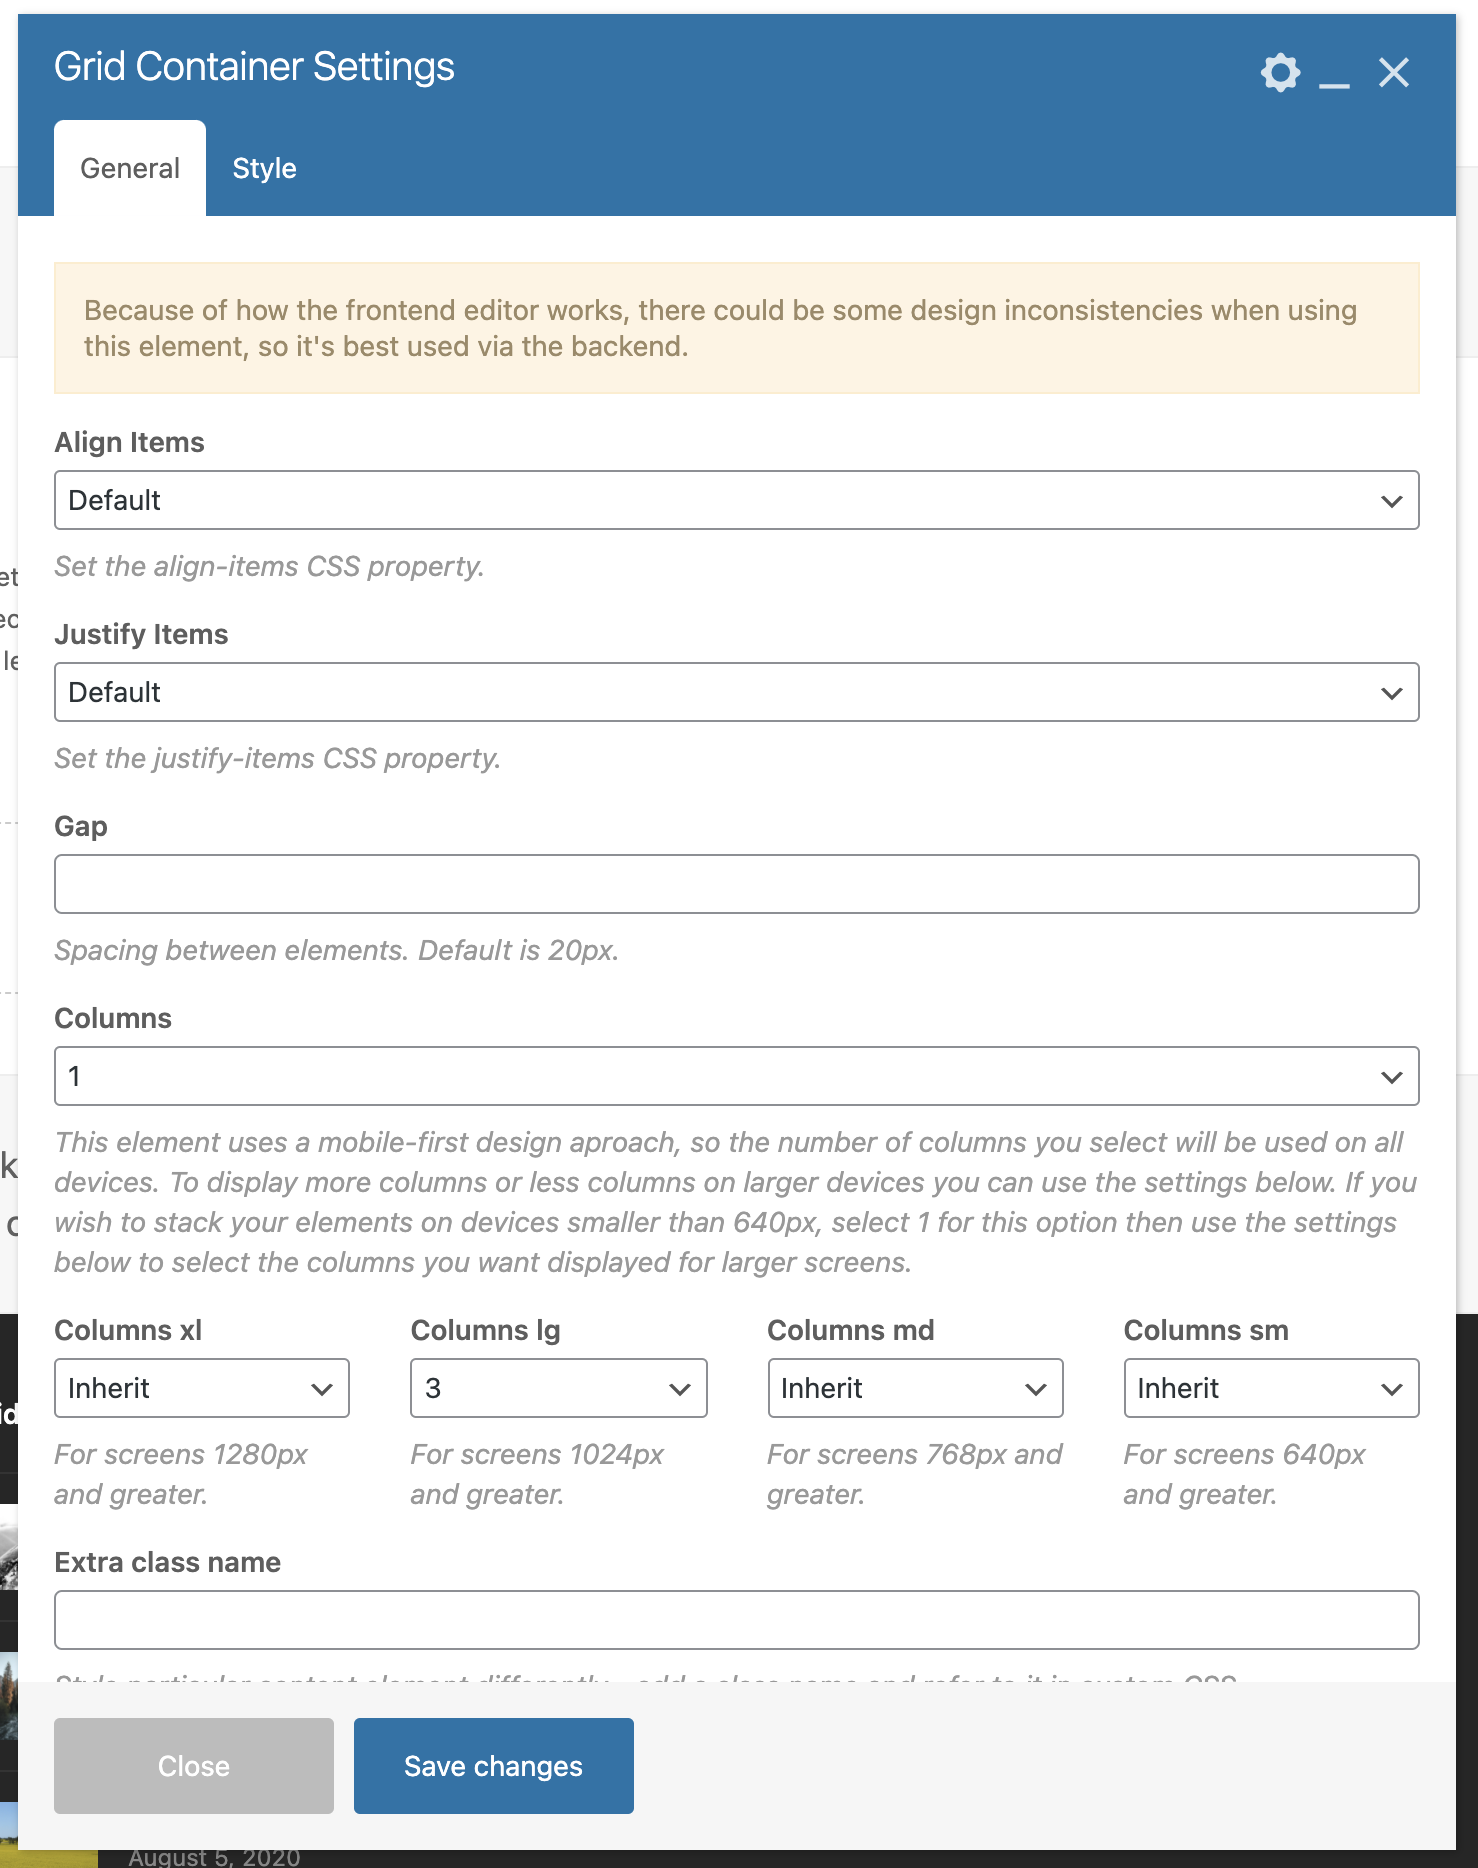
Grid Container settings
Once you’ve added the Grid Container and inserted your items, you can adjust its settings to control the layout. This includes selecting the number of columns, setting alignment, adjusting the gap between items, and more to achieve your desired design.
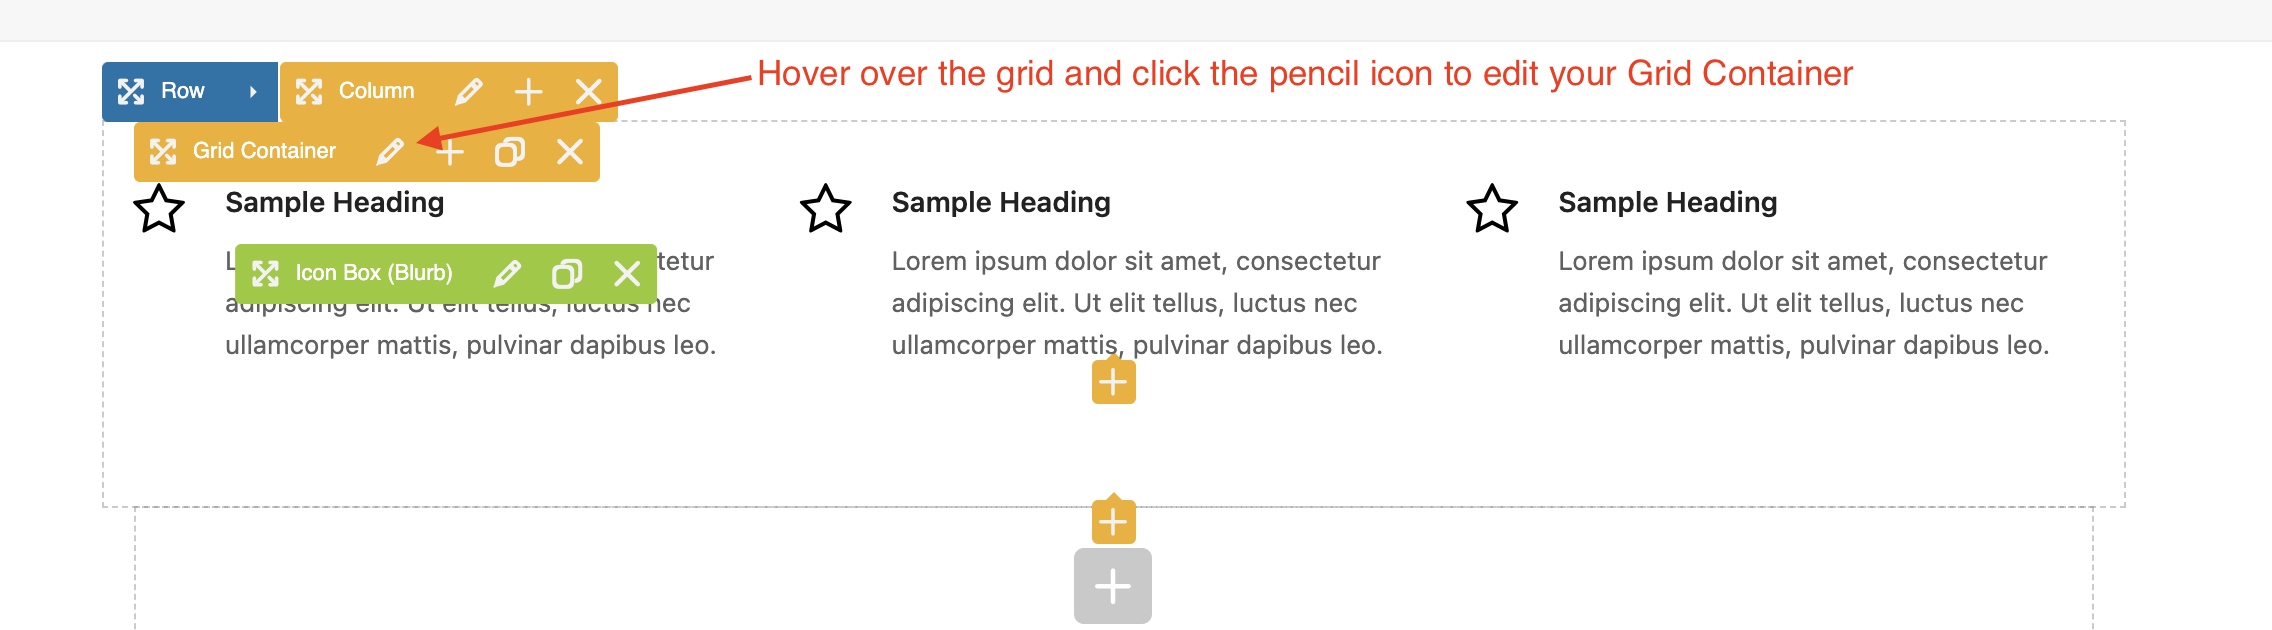
Hover over your Grid Container and click the pencil icon to open the element settings panel. From there, you can adjust settings such as alignment, justification, number of columns, gap between items, and more to customize the layout to your needs.