WP_Debug is a constant that when enabled will display any PHP errors on the front-end of your site, this is the most useful tool when troubleshooting your site for errors. If disabled and your site has an error you may see a blank screen or a message that simply reads “There was a critical error on your website” neither of which are useful in troubleshooting the issue.
Important: This is an advanced procedure so please proceed with caution, if you don’t know what you are doing, please contact your webhost for assistance. Additionally, you should only enable WP_Debug temporarily for debugging. Keeping it enabled always could pose a security risk.
How To Enable WP_Debug in WordPress
Below are the steps required to enable WP_Debug for your WordPress installation.
- Access your website’s root folder via FTP or SFTP
- Locate the wp-config.php file
- Open this file in a text editor (I prefer sublime text)
- Search for “WP_Debug” and if you find it set the value to true if currently set to false
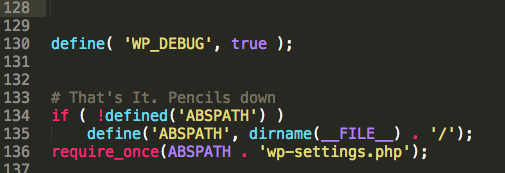
- If you didn’t locate “WP_Debug” scroll down near the bottom of the file and add the following code right before the line that says “# That’s It. Pencils down”
define( 'WP_DEBUG', true );
When it’s done and saved it should look like this: