As you know the Total theme includes a full-featured demo importer so that you can easily import any of our live demos to your site with a few clicks. What makes Total even better is that you can actually “filter” the demos that are available allowing you to easily create a custom plugin that replaces the demos in the importer with your own custom demos for import. This may be something you would want to do if you purchase many copies of the theme for clients and you have pre-set designs you want to use for your client sites.
Creating Your Custom Demos…
Of course before you even start you will want to create your custom demos. These demos should be hosted live so that the importer can properly import the images. Just like our live demos we would recommend creating a multi-site network and hosting your demos on them. You’ll only need 1 valid license of the Total theme to host your demos since you’ll be using these simply to speed up client work by having pre-made demos you can use for your client work (make sure you purchase a license of the theme for each client though).
Download Starter Plugin From Github
First you’ll want to head over and download the starter plugin from the Github repository here.
Plugin Structure
The structure of the plugin is very straight forward:
- total-custom-demos.php – this file will replace the demos with your custom demos, no need to modify it
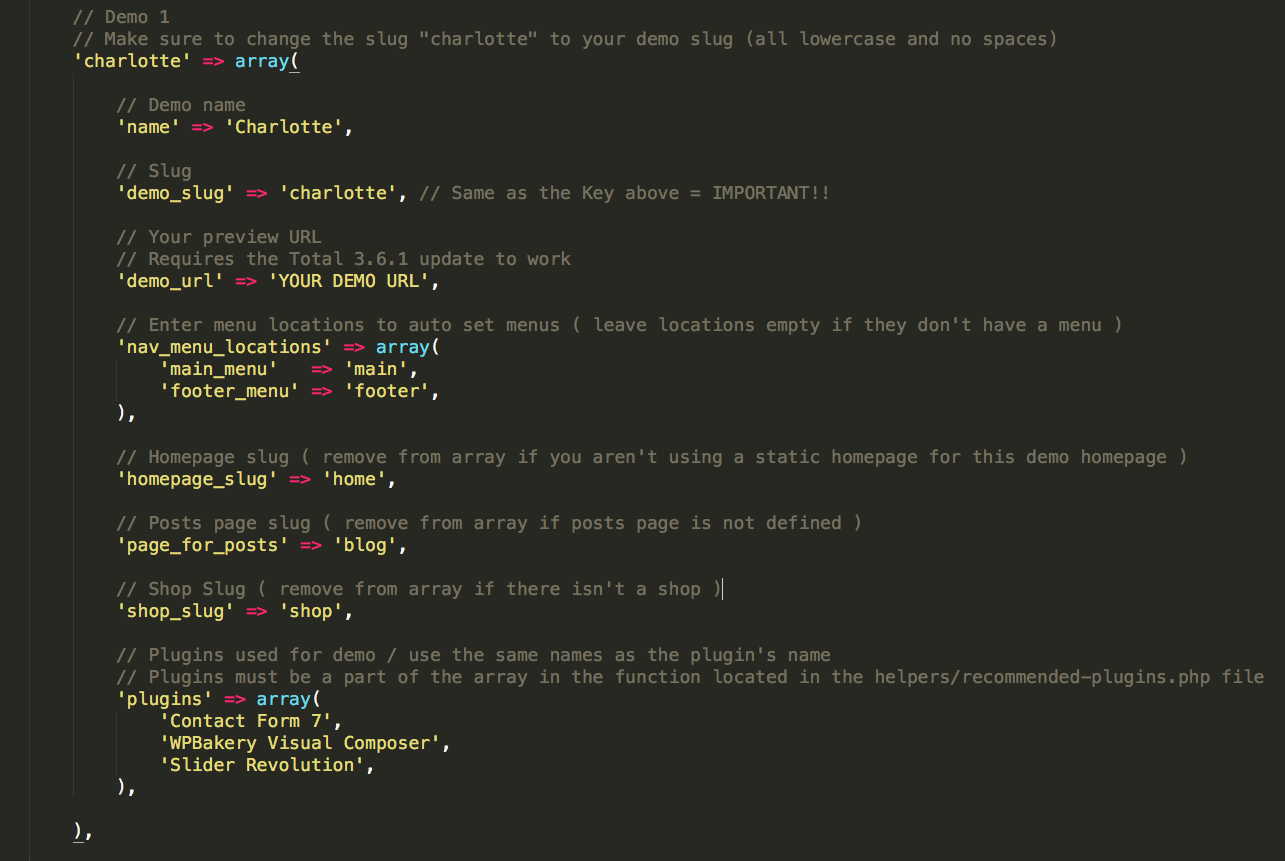
- helpers/demos-array.php – this is the main file you will edit to add your array of “demos” – follow the examples provided
- helpers/recommended-plugins.php – this file contains an array of all the possible plugins you may want to “recommend” prior to importing a specific demo. So if you are using any 3rd party plugin for a demo you should add it to this array so that the theme knows it’s a possible recommended plugin.
- demos – this folder will contain the assets for all of your demos, simply follow the example structure to add your own demos.
Export Your Demos
First thing you need to do is export your demos. Have a look at the structure the plugin uses. Every demo should have a screenshot.jpg file which is a screenshot of the demo, a theme-options.txt file which is the exported theme options taken from Theme Panel > Import/Export, a widgets.txt file created using the widget importer/exporter plugin, a sample-data.xml file created using the core WordPress exporter at Tools > Export and if the demo has custom sliders created with the revolution slider these should be exported and added inside a revolution-sliders folder.
So export your demos and then add them inside the plugin in the demos folder and you can delete the sample demo files.
Edit total_custom_demos_array
Now that you’ve exported your demos you will need to edit the file at helpers/demos-array.php. Simply follow the same format to create an array for each demo. Everything is well commented so it should be easy to follow.

Edit total_custom_demos_recommended_plugins_list
The last step is to edit edit the file at helpers/recommended-plugins.php to make sure any plugins that your demos require are a part of this list. This array registers “allowed” plugins to be processed by the demo importer. So lets say you want the “WordPress SEO” by Yoast plugin to activate before importing a demo you will need to add this plugin to the list as we’ll as in the plugins array defined in the last step for your specific demo. This array doesn’t install or activate any plugins it’s just an extra security step used by the demo importer so that it knows what plugins are allowed to be installed/activated by any particular demo. In most cases you can probably leave this alone.

Import Extra Things or Run Extra Processes
In Total 4.0 we introduce a new action hook named “wpex_demo_importer_ajax_post_import_complete” which you can use to run any other functions after the demo importer runs – so if you need to import data from other 3rd party plugins, insert users, change menus…etc, you can use this action hook to do so.