The Total theme has 2 primary methods for adding a button to your site header. This article will explain both methods.
Since Total version 6.4.1 this functionality works both in the default theme header menu as well as the theme’s Horizontal Menu and Off-Canvas Menu elements.
Method 1: Inserting a Button Directly into the Menu
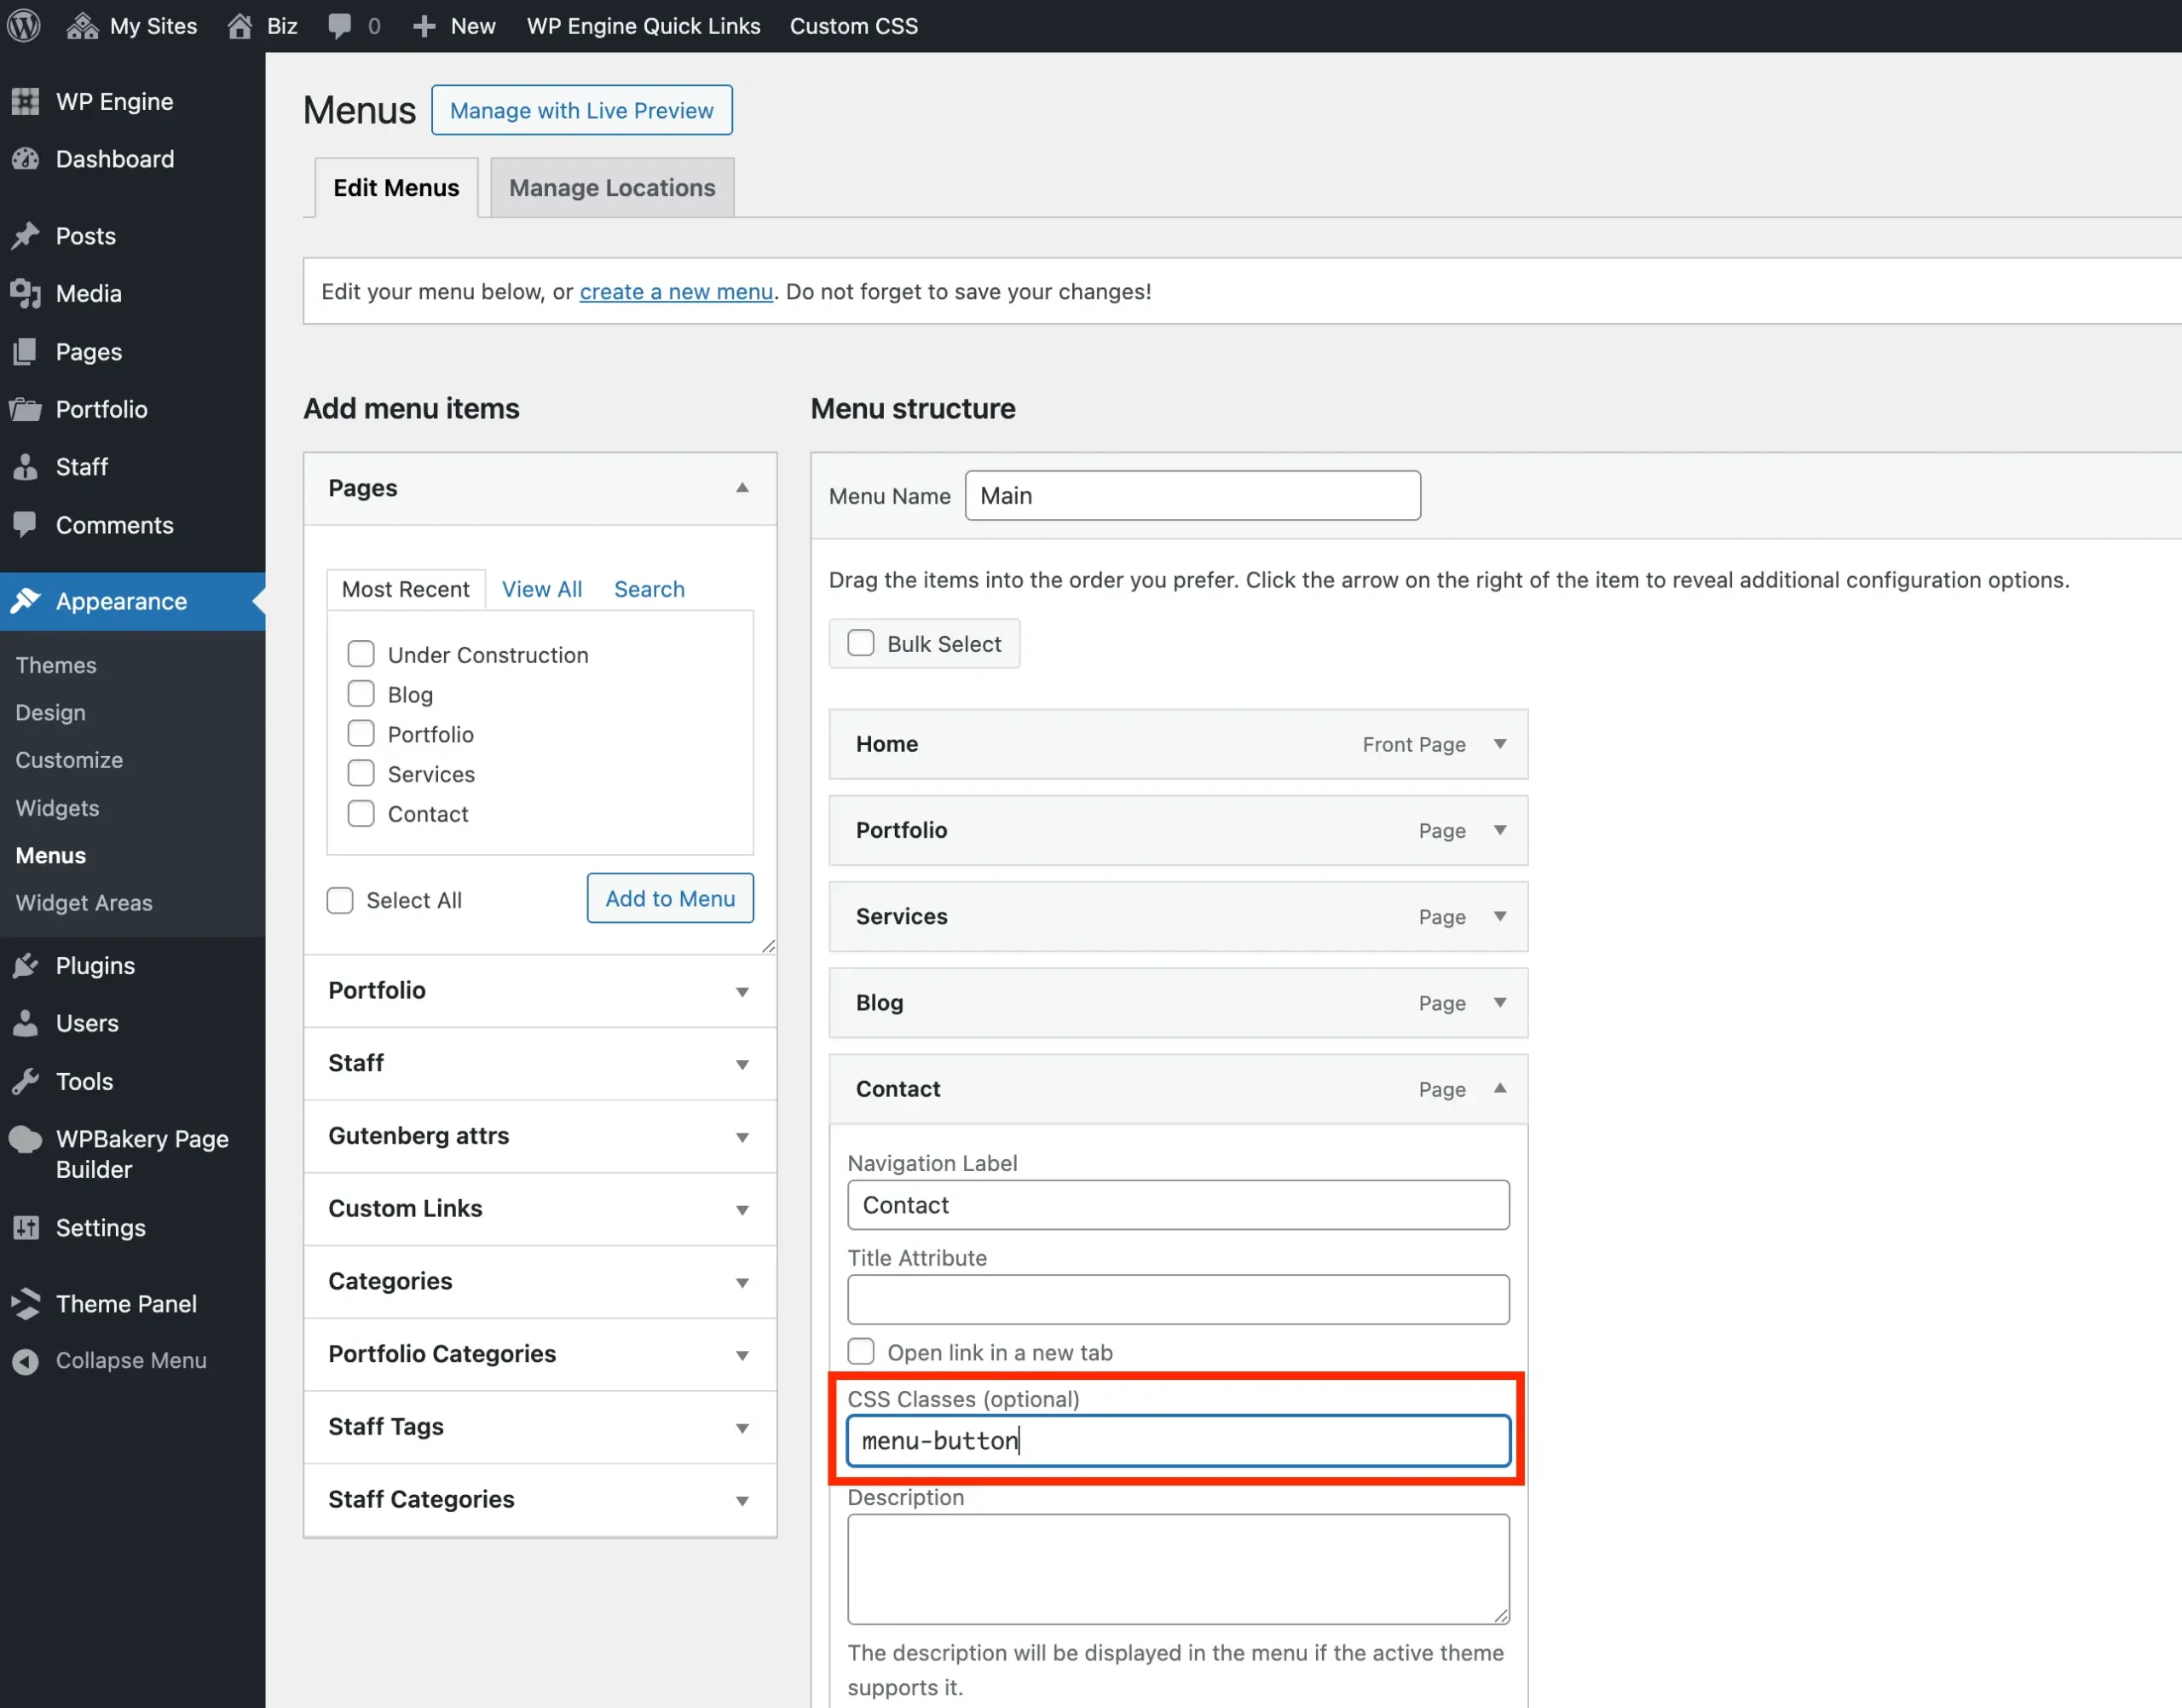
To insert a button directly into the menu all you need to do is add a new menu item and then give it the classname menu-button.
Want a Pill-Shaped Button?
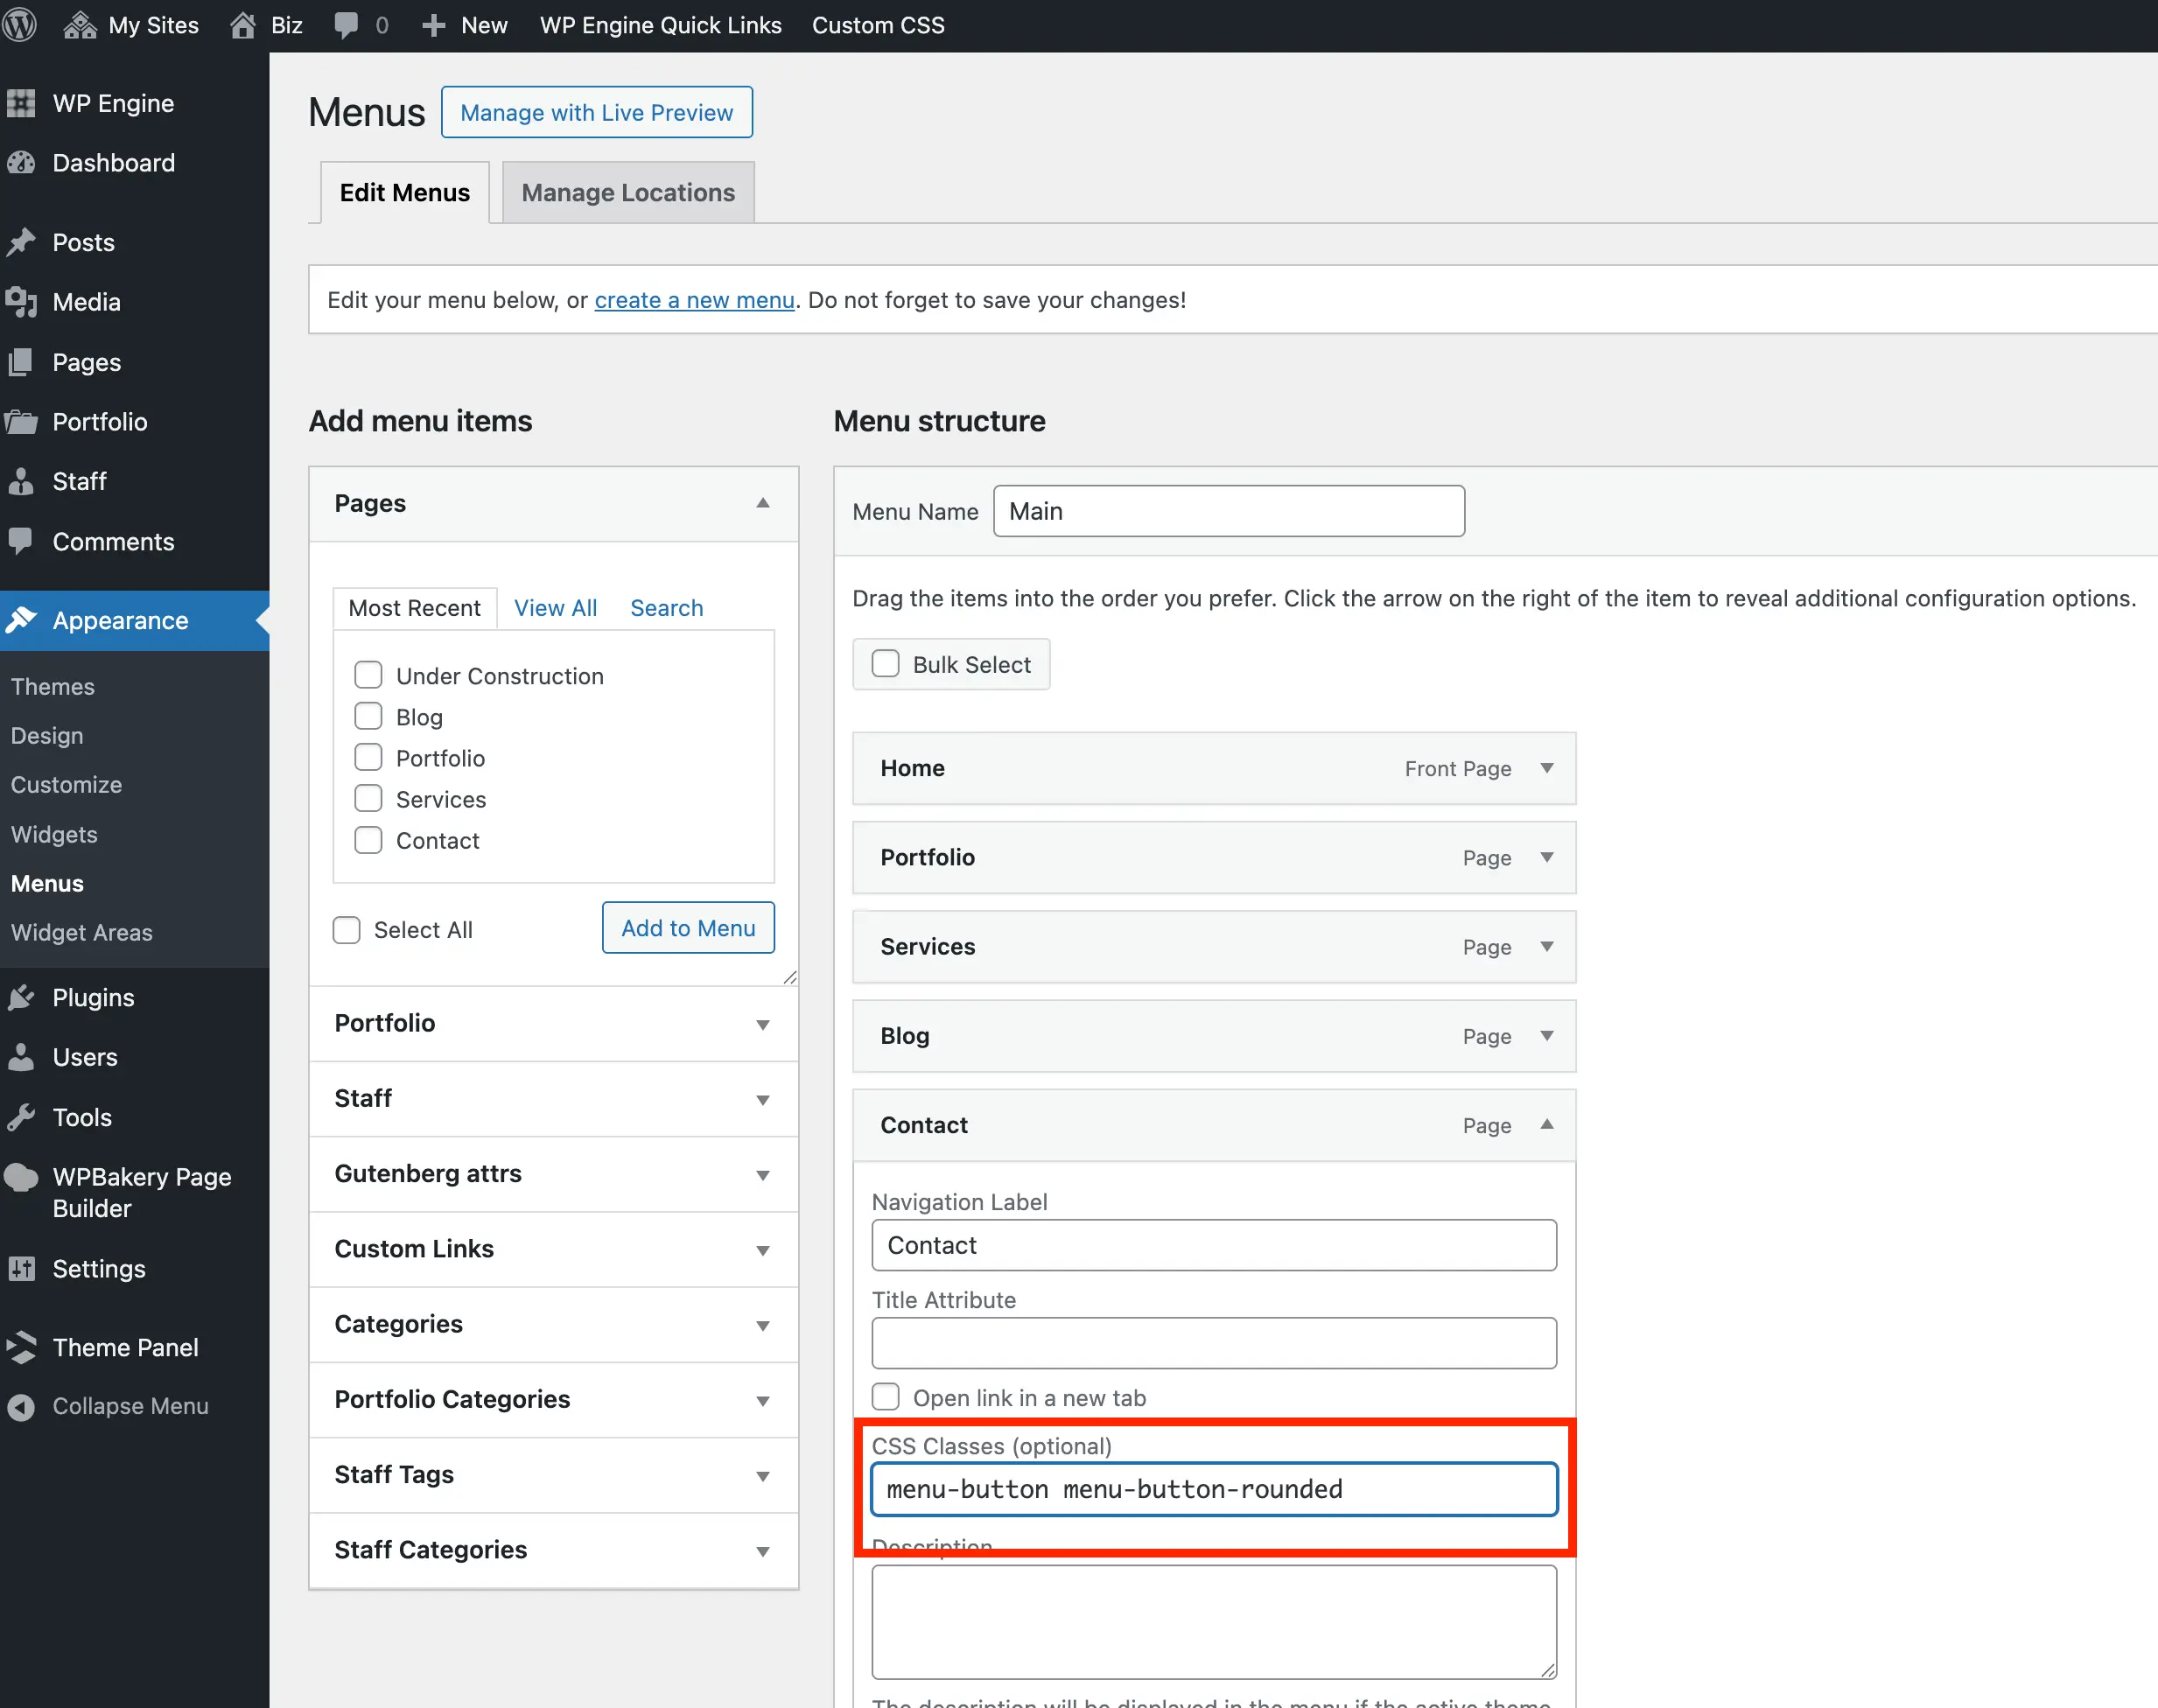
Add the menu-button-rounded class to create a pill-shaped button – make sure to keep the original menu-button class!
If you want to make all buttons on your site pill-shaped you should modify your buttons globally and change the default button border radius to 9999px or 100%.
If you don’t see the field to enter your custom CSS class simply click on “Screen Options” on the top right of your menu dashboard to enable it. You can also view this video guide
Result
Once you’ve added the class to your menu item, it should display as a button on the front end like such:

Menu Button Styling
The menu button will take on the default theme accent/button colors which can be adjusted under Appearance > Customize > Global Styles but if you want to customize the button colors it’s very easy using a little custom CSS. Example:
.menu-button,
.vcex-horizontal-menu-nav__button,
.vcex-off-canvas-menu-nav__button {
    --wpex-btn-bg: #800080;
    --wpex-hover-btn-bg: #5a005a;
    --wpex-btn-color: #fff;
    --wpex-hover-btn-color: #fff;
}
Method 2: Inserting a Button using Flex Header Styles
If you are using one of the new Flex Header styles you can easily add a header button like the Biz demo via the “Side Content” content box in the customizer at Appearance > Customize > Header > General. Please see the example below:
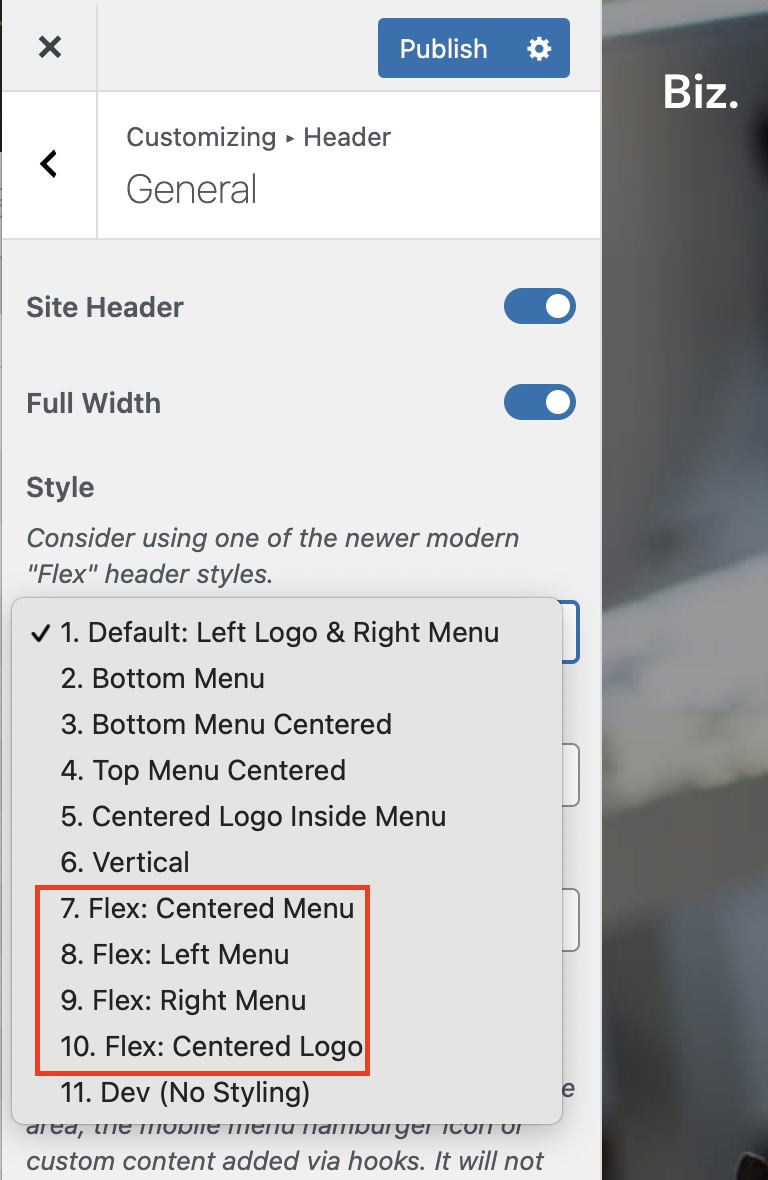
Once you select a Flex header style you can scroll down to view the Side Content field.

When using the Side Content box the contents will display on small screens as well (unlike using the menu button option). If you wish to hide the button on mobile you can do so by using the “Visibility” setting above the Side Content field.